Blog Widget by LinkWithin
Showing posts with label Toadstools/Mushrooms. Show all posts

Dream

>> Thursday, July 6, 2023

Good morning!
Today I have a fun card featuring our cute little gnomes.


I used a Sizzix star die in the sky. The background is dabbed alcohol inks.  I stamped the treeline with green alcohol ink.  The mushroom scene is done with Copic Markers.

Thanks for visiting today!
Robin


Read more...

Navy Proud

>> Tuesday, May 23, 2023

 Hi Everyone,


Since we're coming up on Memorial Day weekend, I thought I would share a military themed card.  DRS Designs has recently released a group of military emblems and my card today showcases Navy Proud.


I took inspiration from some of the emblems I saw online, which contained the colors of yellow and blue.  I heat embossed the emblem and also the background made using the Starry Background stamp.


To complete the card, I added a die cut banner along with a few die cut stars.


This card is one I made for a friend's birthday, and I took inspiration from this card:


Karin


Read more...

Happy Birthday!

>> Thursday, February 9, 2023

 Good morning crafty friends!

Today I have a Gnome card to share. 


I also used an embossing folder by Tim Holtz-Sizzix, Distress Ink-Walnut Stain, 3D foam
Silk flowers, Spanish Moss, and Prills (at the bottom for flowers).

In this close up you can see different thicknesses of foam used to pop up the images 
after fussy cutting them.
The stitched rectangle dies are from MFTs.
I hope you like this idea.  You get crafty!
Thanks for visiting!

Robin


Read more...

Gnomie Halloween

>> Thursday, September 9, 2021

Good morning! 

I created my little Halloween scene using DRS stamps:
After coloring I used the star die (Sizzix-Tim Holtz) on the sky.
I set aside my sky and used a background I previously made with ink sprays
and stenciled it with spreadable Stickles-Black (it is very sparkly).
After it dried I die cut an oval from the center then die cut another oval from black with a slightly smaller oval die to create a mat for my opening.  I used a foam sheet to raise
the background up, cutting an oval in the center first.
Then I glued another sprayed background behind the star cut outs and then glued the scene panel under the raised background panel.  I matted the card front onto royal blue cardstock 
to match my sky before gluing it to a folded card.


That's about it!  Go get crafty!!
Thanks for visiting today!
Robin


Read more...

Like Gnome Other!

>> Thursday, August 26, 2021

 Good morning!
Here is a Halloween card with some fun colors!
I used the open plain with various fun new Halloween colors that make great
cards for kids or maybe friends that don't like the scarier stuff.
I made the mushroom strip by stamping and masking some of the fun toadstool/mushroom DRS stamps plus the Mushroom Sign with DRS new Gnome Halloween sentiment.
My Gnome was colored in my bg colors.


My next card is an easel card.
I love making these cards because you can feature more 
especially when sentiments are a bit bigger (not really the case here 
but I decided  this would make a great easel card anyway!

I really like making little scenes and it really is easy with a bit of masking and forethought as to which to stamp first.  It helps me if I stamp the scene in no particular order onto scratch paper first then I can see more clearly which to stamp first and then mask.
I used a bit of white chalk pencil to try to get a glow around ghost and moon but that did not turn out as well as I wanted. Dang!  I used Wink of Stella on the moon and on the vellum ghost.
Thanks for visiting today!
Robin


Read more...

Have I toad you...

>> Monday, April 19, 2021

Happy Monday everyone. Trust you had a good weekend and found some time to get creative. I have a couple of fun cards to share with you today. The first one uses the new Have I Toad you greeting and I paired it with the toadstools and little frog. 


I started by stamping and masking the toad stools, colored them with Copics and die cut. This little frog was stamped, colored, fussy cut and glued on top of a toadstool. I used the splatter background on white CS, die cut the panel and attached it to a kraft card base. After attaching the main image I added the greeting with some foam adhesive for dimension. I think that tiny frog is so cute with his bow tie!

This next card uses the adorable chick on a nest image which I stamped, colored with Copics and die cut. The background on this card was created uses a TH stencil. I added some Nuvo Crystal Glaze to some of the dots and then added the cute as a button greeting. 


Thanks for stopping by today. 

blessings,
shelia


Read more...

Happy Birthday!

>> Thursday, February 18, 2021

 Good morning!

I am so happy to show the new Arched Window in this card!

Isn't it so cute?  Just think of all the things you can do with it.

The other new stamp shown today is the Blessings on St. Patrick's.

Besides those 2 new stamps, I've used several previously 

released stamps to form this scene:


The ovals dies are from Rubbernecker.
The way I did this card (because it takes a little planning) is this:
I stamped the main images in to separate pieces of acetate as well as on my stamp aligner acrylic
square.  I arranged the acetate on my piece of white cardstock to get an
idea of the scene I wanted to create.  This also helped me visualize which
images to stamp first.  I stamped the Gnome and the shamrocks first as they 
are in the foreground.  I then masked the images just stamped and used 
my stamp aligner to to stamp the window, masked and stamped the wood background 
(Vicki's Versatile Background) on top and bottom of the window.  
I stamped the mushrooms which did not need masking.  
Removing all the mask, I used a Copic liner to draw in the tree trunk lines and grass lines. 
(If you are using Copic markers to color you need to use only ink pens 
that will not smudge like the Copic black liner pen).
I hope this helps with making scenes out of multiple stamps such as above.
Stamp the sentiment and die cut.  I also used a bit of Crystal Stickles on the 
Butterfly wings.

My next card was done in the same way as the first
using different stamps of course.


This time I stamped the sign and sleeping Gnome first, masked and stamped the 
Mushroom line, masked then stamped the window and masked.
Next I used the aligner to stamp the Tree Slice masked and stamped the "trees" 
multiple times and different heights.  The butterflies were
stamped next and finally the Happy Birthday!
Thank you for visiting today!
Robin


Read more...

New Home Wishes and a Visit with Santa

>> Wednesday, November 25, 2020

Hello crafty friends!   I have been doing a lot of water-coloring lately, and I have some fun projects to show you using DRS Design stamps.  

This first card uses the sweet New Home Greeting that just hit the store (inside I used the new Just Moved House Key).  I love the fun little Mushroom Houses which I water-colored and tucked into this fun Tim Holtz Stitched Slots die.  

I kept my pallet pretty neutral because I love neutrals, but I did avoid using Vintage Photo ink on the edges - shocking!  LOL!  

I have been trying to learn to make scenery with watercolors and this is my favorite so far. The background was pretty easy and the Santa adds the perfect touch of whimsey. 
The Santa comes from one of my favorite DRS Designs images: Santa with Birds Christmas Scene.  I stamped him on water-color paper, colored him up, and fussy cut him so he could sit in the forest and feed a few sweet birds.  

Hope you liked today's post, and thanks so much for dropping by.

Hugz,

Nancy


Read more...

Gnome for the Holidays

>> Thursday, October 22, 2020


Good morning!
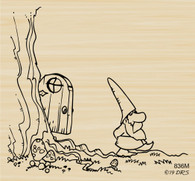
I drew the split door in the tree slice and masked it to stamp the Tree Slice Wood Grain.  First though, I stamped the sign with mushrooms and the Gnome Home.  I masked the wood slice and Gnome Home then stamped the mountains and trees.
I reverse masked the doorway and stamped the Peeking Gnome.  I did a bit more masking and stamped the mushroom lines.  The tree was stamped separately , colored and cut out then popped up.
I used a white painty pen to add snow to the mountain tops then added Stickles to make them sparkle.  I added Stickles to the ornaments too.

I used some Memory Box and Rubbernecker Dies on this one with gold paper.


The Lantern was stamped then I die cut it.  I die cut the gold frame using a combo of 2 dies then I popped it up.  I die cut the gold mat for the sentiment.  The pinecone was stamped separately then colored and cut out then glued it to the sentiment.

Thanks for visiting today!

Robin


Read more...

The North Pole?

>> Thursday, October 8, 2020


Good morning!
Can you believe Christmas is sneaking up already?
Well, I don't know about you but I start making Christmas cards in July!!!  It takes awhile to save up enough to send to all my family and friends!!
Today I've used a combination of DRS Designs stamps that you wouldn't normally think of including the toadstools and Gnomes.  Starting with the Mushroom Sign and Mushroom Line.  I used Merry Christmas on the sign then masking and working back to the Feeding Reindeer and Tree Home Gnome  masking again then stamping the Pine Tree Snowdrifts.  Masking the Pine Tree Snow Drifts I then stamp the Mountain and Tree Line Background 2 in 1.  I tried adding snow to everything using a Snow Pen and glitter but the Snow Pen was a little messy and not fine enough so I have what "sort of" resembles a new dusting of snow everywhere! LOL!  Oh well, lesson learned for the next time...use a different method!

My next card is a snow covered town square in the mountains.
I stamped the All in 1 Christmas Village first then masked it and stamped the Mountain and Tree Line Background and extra trees from the Christmas Village 4 in 1.  I then masked the first set of mountains and stamped the mountains again "behind" the first set to create a double row of mountains. 
Finally I stamped the first part of Christmas Especially To You greeting.
This time I painted on some stuff from the Snow Pen that I squeezed out onto a piece of scrap.  I used a fine brush and then glittered and heat set.  It was a little less messy this way!

That about does it except for matting and gluing it to a card base.
Thanks for visiting today!
Robin


Read more...

Thinking of You

>> Wednesday, September 2, 2020

 Good morning all!

Here I'm using some of the new stamp designs

with some of my favorite stamps from DRS.

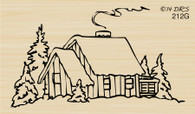
One of the new designs is 2 in 1 Mountain and Tree Line.  I used these with the Christmas Village cabin, Mushroom Line

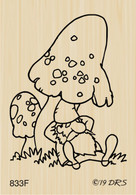
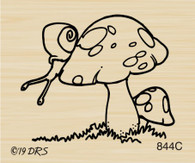
Mushroom Sign Post, Toadstools, Snail Toadstool

Sleeping Gnome, and Ladybug Toadstool , the sentiment 

is Warms My Heart


The tree frame die cuts are from Memory Box,  (I popped them up).  
The mountains, trees and cabin were stamped and colored then I sponged around the outside area.  Some of the foreground was actually going to be a different card but I just didn't like it so I cut away the bottom with the mushrooms and Gnome then added it to this card, adding in a few more mushrooms.  The trees were popped up between layers of mushrooms.
I also sponged around the outside with Wilted Violet after the tree frames were adhered to the card.
Thanks for visiting today!
Robin

Read more...

Gnome Home

>> Thursday, August 27, 2020

Good morning!
This little guy was lucky to find this big Redwood tree that had hollowed out because of a lightning started fire in it...it made it much easier to hollow out the rest of the way to make a nice Gnome Home.  He and his Gnome buddies cut down the tree and there you go.
The background was sponged with Distress Oxide Ink.
The die cuts are from Memory Box and I.O.
It took quite a bit of masking and stamp aligning to do the whole bottom portion 
then I cut the bottom out so that I could glue it over the background.


My next card started out to be a Halloween card but my Peeking Gnome ended up looking like he was IN the pot not peeking at what was inside so I changed my mind...didn't want the poor guy cooked in a witches brew!!!  So his friends are just keep his water the right temperature for hot tubbing!
My Hot tubbing sentiment is computer generated since I don't think the Gnomes have ever landed in hot water before!!!  My background was done with Distress Oxides again but this time I patted some color on a kraft sheet then sprayed it with water and dipped my watercolor paper into it. 
The dies are from Lawn Fawn, MFT's and Memory Box.
Thanks for visiting today!!
Robin


Read more...

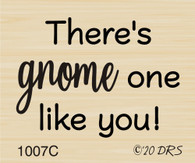
Gnome One Like You!

>> Thursday, April 30, 2020

Good morning!!
These little Gnomes are waiting for their friends to
show up for a birthday party.
I used rectangle dies to create a frame then popped it up.
I added some green enamel dots to the frame as well.


My second card has a variety of Gnomes
(in fact all of them I think!)
I extended the tree and added a window to it for the Peeking Gnome.
The Ladybug Toadstool and Snail Toadstool were fussy cut and added to the scene.
These guys are room-mate in that tree house.  It is bigger inside than it looks!
They are all just doing their own thing today, I think Peeking Gnome is 
having fun watching the ladybug and snail on the toadstools, he is actually 
taking a break because it's his job to do the dishes today!
Well, hope this gives you some ideas!
Thanks for visiting today! 
Robin

Read more...

Gnome one like you

>> Monday, April 27, 2020

Hi everyone. Trust you are staying healthy and safe. These are some crazy times we are living in right now. I don't know about you, but I am grateful for my craft room and being able to create cards during this time. It definitely relaxes me and helps bring things into perspective. I mean I can only clean and sort so much before I go a little bonkers and need to get creative!!

Today's card features the peeking gnome. I think he is the cutest thing.


The gnome, mushrooms and ladybug mushroom were all stamped onto white CS, colored with Copics and fussy cut. Next I sponged the cloudy sky with blue distress oxide inks and stamped the greeting with Versafine black ink and heat embossed it with clear EP, The grassy layers were created with an old Fiskars punch. Once everything was attached to the cloudy panel, it was glued onto a white card base. This was super easy to create and I really like the look. This gnome is so playful looking.

Stay safe and enjoy your card making.

blessings,
shelia

Read more...

Some Sunshine and Happy Thoughts

>> Wednesday, April 22, 2020

We have had a lot of storms in Central Alabama lately - some with tornadoes and damaging winds.  More are expected the next few days.  Sooooooo,  I am wishing for sunny days!   My card today is all about a sunny day.

I started with some of the background sheets I made last week.  Ink/Spray/Smash technique was used on all of them and then a little stamping with with the DRS Script Font Background in Vintage Photo Distress Ink.

I wanted to do a wall for my Peeking Gnome, and I had cut up some of the tags to layer them so they made the perfect building blocks. I colored the gnome, mushrooms and beehive with watercolor pencils.  The mushrooms are from the Tree Home Gnome, I trimmed up the Beehive image to make it fit, and then I added in some happy little handmade rolled flowers.  I made a happy banner with Sending You Sunshine and finished it all of with some glasses from the 4 in 1 Fashion Accessories. 

So I am sending you sunshine today - I hear C-19 hates it so that makes it even better.

Hugz,

Nancy

Read more...

Gnome Smile

>> Friday, April 17, 2020

by Julie Warner - The Write Stuff

 Happy Friday!
I hope your week has gone well! And that you & yours have managed to stay healthy! I guess you could say my little gnome is social distancing, even though it looks like no one else is around, lol. Truthfully, I think my Hubs is taking the social distancing thing a bit too far...I caught him putting dishes in the dishwasher but taking up way more room than they needed. I told him the dishes didn't need to be 6 feet apart & we'd be able wash more than 3 at a time if they were a bit closer.

To make my little scene, I stamped the gnome, masked him, then stamped one part of the stonewall a few times. The cabin was stamped in the background & the mushrooms across the foreground then everything was colored.
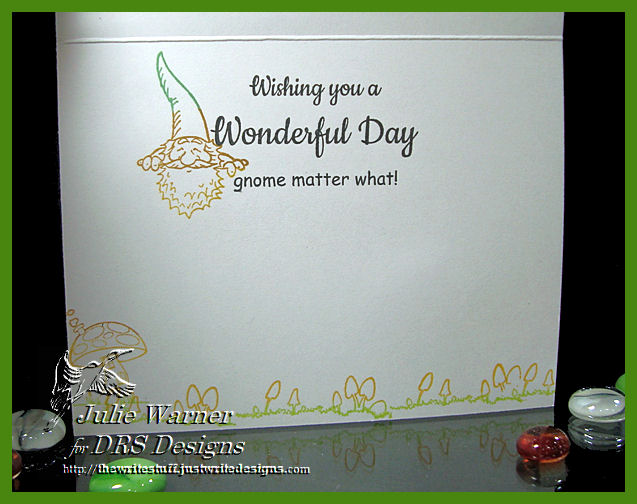
 Here's the inside & below it are the Copics I used.
Thanks so much for stopping by! Have a great weekend & stay safe!


Supplies:
paper:  Staples 110# white
ink:  Memento tuxedo black
accessories: Copic markers, Rubbernecker stitched rectangles dies


Read more...

Missing My Friends

>> Wednesday, April 15, 2020

Hello crafty friends,

I am missing my work friends and thought I would make some cards to send to them.  Because I plan to send a bunch of them, I did a large number of ink/spray/smash backgrounds.  I ended up with 12 tags like the one below and a few bases.

To make the backgrounds, I swiped some yellow, blue, pink, and brown distress and distress oxide inks on some aluminum foil and spritzed heavily with water.  Then I dipped my paper in the ink.  I did this several times making sure to do the colors in layers so it wouldn't be muddy.  Then I let my sheets dry.

Next, I stamped the Script Font Background stamp around on the sheets in various places using Distress Ink in Vintage Photo (my favorite ink pad).and the Lines O'Plenty Background stamp in Broken China Distress Oxide.  Then I scribbled some random words in various places with a white paint pen.  To cut the tags, I used the Tim Holtz Cabinet Die.  I could not find any of my cool tag hole punches so I used a SU! sentiment punch just wrapping the edge with the ribbon.

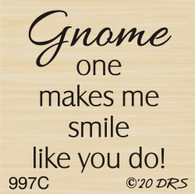
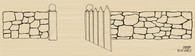
Then I stamped the new Peeking Gnome and Mushroom Sign Post, colored them up with water colors, and then fussy cut them (note, the Gnome has a smile, but I painted over it accidentally and then decided he should look a little sad so I left him without his smile line).  I also stamped the Stonewall and Gate image and cut out a section for my gnome to peek over.  The bottom of the Mushroom Sign Post did not blend as well as I wanted, so I added a bit of texture paste and painted it green when it dried.  For more whimsy, I added a few flowers with a paint pen and a little random edge of a square in the top corner (I was inspired by THIS fabric and THESE snippets at the Laundry Basket Website - the inspiration challenge site this week at Splitcoaststampers.com). I finished it up with the new Gnome Smile Greeting (is it great? It is only $3.25 unmounted ) and by writing "Miss You" in the sign post (only $5 unmounted and you can add anything you want to it).
This was a fun tag to make.

Hugz,

Nancy

Read more...

Caught a Bug?

>> Monday, April 13, 2020

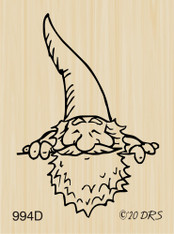
Happy Monday Everyone. Hope you had a great weekend and found some time to get creative. I'm having fun playing around with the newest images from DRS Designs. If you've been checking out the blog this past week, then you have seen all sorts of beautiful and fun creations using the new images, especially the new Peeking Gnome (994D). He's the featured image on my card today. He is just the cutest!


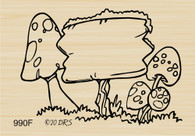
I started by stamping the Peeking Gnome onto white CS with black ink, colored him with Copics, fussy cut and set him aside. I wanted him peeking over some mushrooms, so I stamped the larger one from the Toadstool image, masked it, and stamped the smaller one from the same image as well as the ladybug mushroom. I continued to mask all of those images, and stamped another larger mushroom from the Toadstool image as well as the new Mushroom Sign Post (990F). After coloring them all with Copics, I added the Feel Better Greeting onto the sign, drew in the grassy border with a Micro pen and then sponged in the grassy area and stamped the easy grass background with some green ink.

I added all the masks back onto the images and sponged the sky with blue distress oxide ink using a MFT small cloud stencil. The Caught a Bug? greeting was stamped directly onto the panel with VersFine Black Onyx ink.

I decided I needed some more lady bugs on the mushrooms so I stamped two more onto white CS, colored them with Copics, fussy cut and glued them onto the card. I used a Micro Pen to dray their antenna into place so I wouldn't have to try and fussy cut those!!

Finally I glued the Peeking Gnome over top of the larger mushroom to complete the scene. This was a fun card to create! You can check out all these images and the other new releases from DRS Designs here.

Thanks for stopping by today.

blessings,
shelia

Read more...

Sleepy Hollow

>> Friday, April 10, 2020

by Julie Warner - The Write Stuff

 Happy Friday!
I hope your week has gone well! And that you & yours have managed to stay healthy! Since the pollen is so insanely high in my area, I can only dream, like this little gnome, about  being outside. 

To make my card, the sleeping gnome was stamped, masked & stamped just the tree of another gnome image, the line of toadstools (new!) & colored everything. The little toadstool sign (new!) was die cut w/ a large scalloped oval & I wrote in the Sleepy Hollow. I wanted it to look like he was dreaming about it so I added the Z's onto the little punched circles. 
Here's the inside & below it are the Copics I used.
Thanks so much for stopping by! Have a great weekend!


Supplies:
paper: X-Press It white, Staples 110# white
ink:  Memento tuxedo black
accessories: Copic markers, Rubbernecker stitched rectangles dies, circle punches


Read more...
Blog Archive

StatCounter

  © Blogger templates Palm by Ourblogtemplates.com 2008

Back to TOP