Racking Up another Birthday!
>> Monday, May 17, 2021

Thanks for stopping by today.
blessings,
shelia
Read more...

Thanks for stopping by today.
blessings,
shelia
Read more...Have you been enjoying the new fishing and billiard images from DRS Designs? They are awesome images and make the cutest cards - perfect for masculine birthday cards and father's day cards.
My card today features the new Best Fishes greeting.

Hi Everyone. Hope you had a wonderful weekend. DRS Designs has just released some fun new images and you are going to really like them, especially if you know any fishermen or pool players! :-)
Here's a card I created using the new Silhouette Fishermen (663G) and part of the new Fishing Birthday Greeting (549G).

Happy Monday everyone. Trust you had a good weekend and found some time to get creative. I have a couple of fun cards to share with you today. The first one uses the new Have I Toad you greeting and I paired it with the toadstools and little frog.


Happy Monday Everyone. Hope you had a great weekend. It has been pleasantly warm here which meant I just wanted to be outdoors enjoying the warmth while it lasted!! I did take some time to create a couple of cards over the weekend. Making cards is so relaxing for me. Here's one I created using the new flowering branch image.

Hello everyone. I hope you had a wonderful Easter weekend. Did Easter sneak up on you like it did me? I am can't believe yesterday was Easter! Even though Easter is past, I do have a couple of Easter cards to share with you today.
This first one features the new Tails up Bunny, which is just too cute! I paired it with the Some bunny loves you greeting and the jelly bean background. I colored the jelly beans with various markers and layered everything on this bright pink CS.


Thank you for stopping by today. You can see these new images and all the other images at DRS Designs on line store here.
blesssings,
shelia
Happy Monday Everyone. Trust you had a great weekend and found some time to get creative. I have had fun playing around with the newest images DRS Designs has just released. They are beautiful and perfect for this Easter season.
My first card uses the new Holy Week image, which I stamped wither Versafine black ink onto water color paper. The image was water colored with various Distress Oxide inks. It was die cut with s SB square die. I die cut several squares and glued them all together to give some dimension to the image. For the background I sponged three different Distress Oxide inks, splattered some water onto it and then die cut it with a Fawn Lawn stitched rectangle die. The Easter Greetings image was stamped with Versafine Black ink and heat embossed with clear EP. I really like how this turned out.


The cross and greeting were stamped onto white CS, die cut and layered onto plum CS. The little cross was colored with Copics. The white panel was embossed with a SB EF. Everything was attached to a matching plum card base. A few rhinestones were added to complete the look.
I hope you have a blessed Passion Week as you look forward to Easter this Sunday. Thanks for stopping by.
blessings,
shelia
Read more...Happy Monday everyone. Hope you had a great weekend. I have a couple of Easter cards to share with you today. They were quick and easy to create.
I started with a white panel and sponged on some yellows and even an orange DO inks using a Gina K stencil. For this first card I stamped the Happy Easter and small cross onto white CS, colored the cross with some Copics, die cut and layered it onto a die cut circle that had the same yellow inks sponged around the edges. The stenciled panel was die cut with a Fawn Lawn stitched rectangle die and glued onto the white card base. Easy peasy!

This next card is very similar. I used the same stencil, stamps and inks. This time I stenciled in the center circle with the same inks as the rays, then stamped the greeting along the bottom. The small cross was stamped onto white CS, colored with Copics, fussy cut and attached to the center with foam adhesive strips.

You can see these images as well as the newest Easter/Spring images here at DRS Designs on line store.
Thanks for stopping by today.
Blessings,
shelia
Read more...Happy Monday. Hope you had a great weekend. Can you believe March is half over?!! Time seems to be flying by! I have a couple of very similar cards to share with you today. They both feature the same sketch design.


Happy Monday everyone. Trust you had a great weekend and found some time to get creative. I've been enjoying playing with the newest St. Patrick's Day images from DRS Designs. My first card features the new Arched Window image and the little frog/toad from the Toad Made for you Recognition image.

To create my little scene I first stamped the silhouette shamrocks with Memento Bamboo ink, then I stamped the wood grain image with Distress Antique Linen ink. I sponged on some DO inks to color in the scene. The Arched window was stamped onto white CS with Memento Black ink, colored with Copics and fussy cut. I did the same thing with the little toad and the top hat from the Top Hat St. Patrick's Day Greeting. Once everything was attached to the panel the Get Your Irish On greeting was stamped with Versafine Black ink and then the panel was added to the white card base.
My next card is rather simple, but I really like the look. I did the same technique for the background that I did a couple of weeks ago. The silhouette clover image was stamped with some Altenew green ink. I stamped the image twice before reinking to give the two different shades of green. The Top Hat St. Patrick's Day greeting was stamped with Memento Black ink, colored with copics and die cut. I layered it on a couple more die cut rectangles to it some dimension,

I really like the simple look of this card. It would be easy to mass produce. I'm going to look through my stamps and see what other solid images I have that could be used to create a background like this. Easy peasy!
Thanks for stopping by today. You can check out all the new images at DRS Designs here.
blessings,
shelia
Happy March 1st everyone. Hope you had a great weekend. It was quite warm here and lots of the snow melted away. There's still some on the ground, but not much. Definitely has me thinking of spring. I even saw some buds on a flowering bush while walking my dog over the weekend!
I have another St. Paddy's Day card to share with you today that features the Shamrock of Shamrocks image the the St. Pat's Blessing greeting.

The large image was stamped onto the white panel with Memento Black and colored with Copics. The greeting was stamped with Versafine Black ink below the image and the panel was added to the green card base. Some clear gems wer added around the image for dimension. Here's another card using this same image and greeting.


I have another St Patrick's Day card for you today that features the new Top Hat St. Pat's greeting. I stamped it onto white CS, colored it with Copics, die cut it and layered it onto some black CS. I did go back and added some Nuvo Aquaflow shimmer to the gold coins in that pot. The green panel was embossed with a Darice clover folder and layered onto a black card base. Once everything was put together I added some flat gold sequins. I've had these sequins for a while and have no idea where they came from, but I thought they would look good with the pot of gold.
This next card features another new St Pat's greeting and uses the silhouette shamrock image for the background.
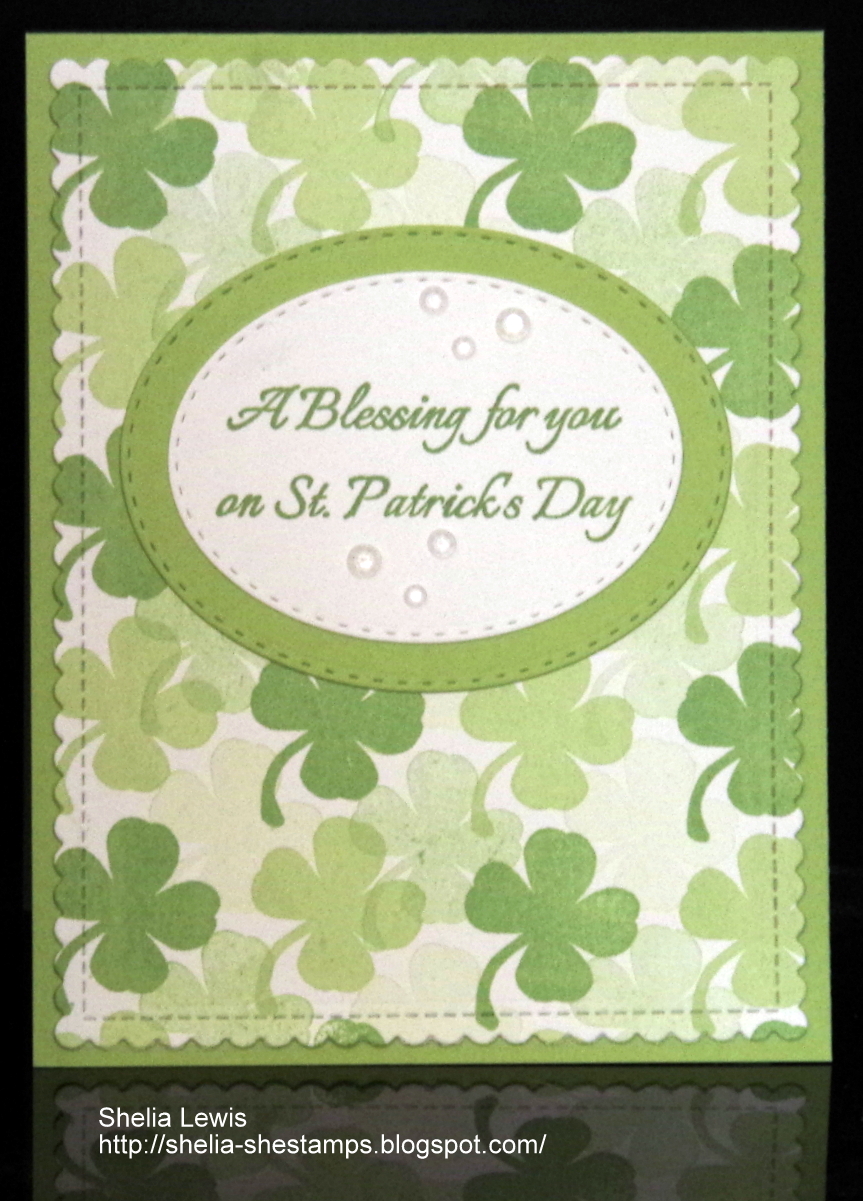
I started by stamping the silhouette clover with two green inks from Altenew onto white CS to create the background. Once the stamping covered the entire panel I die cut it with a MFT rectangle di and glued it onto the green card base. The new St. Pat Blessing was stamped with the same green ink onto white CS, die cut with a stitched oval and layered onto the same green CS as the base. Some clear crystal gems were added around the sentiment to complete the look. I really like the way this card turned out. I created this for a challenge at Splitcoast Stampers called Camo Fun. You can see the challenge here.
Thank you for stopping by today. You can see these new images along with all the other new images here.
blessings,
shelia
Read more...Happy Monday everyone. Hope you had a great weekend and found some time to get creative. It is bitterly cold here in NW Ohio, so I was quite content to stay indoors and stamp away the weekend! It's so cold our poor dog doesn't want to go for walks. She just dashes into the backyard, does her business and dashes back in doors! I really don't mind since I have little to no desire to go outdoors either!! With that idea in mind, here's my first card for today. It truly is Freezin' Season here!

I started with the dark blue CS, splattered some white gesso mixed with water to create the snow, then I used a MFT window die to cut out the window and then the Freezin season was stamped with VersaMark and embossed with white EP. I used the window in the blue panel to mark and die cut the same window in the white card base. Then I stamped and colored the Skating Snowman inside the card. I honestly believe if this snowman were here right now, he'd be skating off to someplace a tad bit warmer! Wind chill has our temps in the minus digits. That's pretty cold, even for a snowman.
My next cards are for Valentine's Day. DRS has some great new Valentine images and greetings.


Happy Monday everyone. Hope you are staying warm where ever you are. We are having our coldest temperatures so far and may even get our first proper snow. We've had a mild winter so far and only have had minimal snow. My husband may have to get the snow blower out tomorrow morning! We'll see. So in honor of this bout of cold weather I have a couple of snowman cards to share with you.
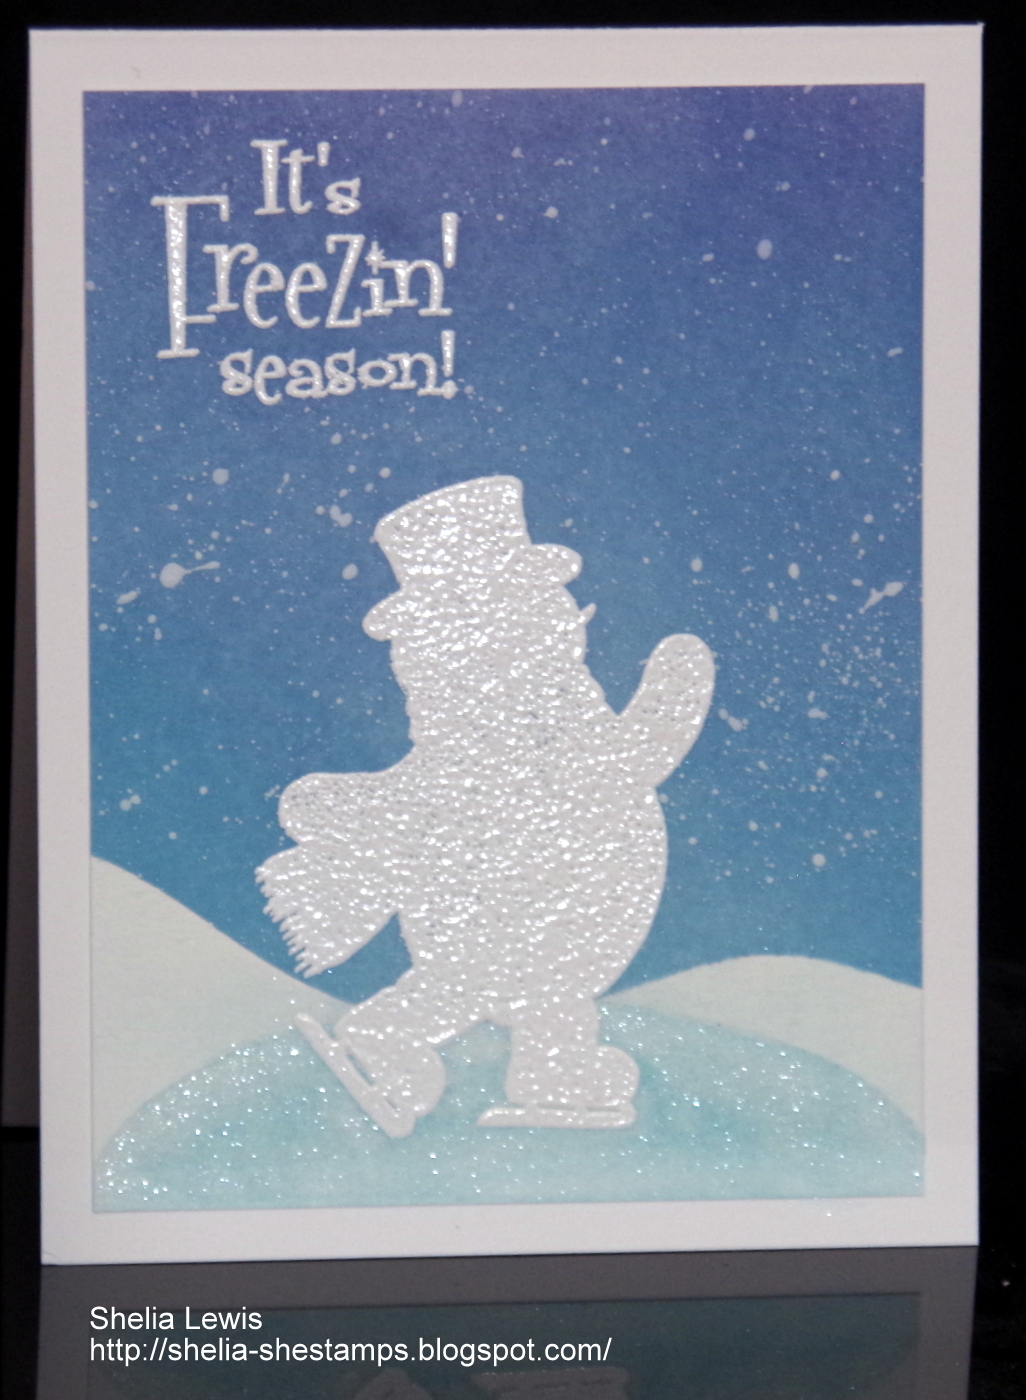

This card uses the same greeting but this time it's paired with the Skating Snowman image. The snowman was stamped onto white CS with Memento Black ink, colored with Copics and die cut with a oval die. The greeting was stamped with Versafine Blue ink, heat embossed with clear EP and die cut. The blue panel was splatter with the same gesso mix I used on the first card. Didn't want it to go to waste. After I got this card put together I noticed a blue ink smudge on the greeting, so I added a die cut snowflake with a navy pearl to hide it.
Thanks for stopping by today. You can see all the new images, including the ones I used today, here.
blessings,
shelia
Read more...Happy Monday everyone. Hope you had a great weekend and found some time to get creative. DRS Designs has some new images that I think you are going to like. My card today features the new Wild about You greeting. I paired the greeting with the cute lion from the Jimbo and the gang image.

I stamped the Jimbo and the Gang image onto white CS, colored just the lion and the ground underneath him. Next I die cut the image with a heart die and then fussy cut the lion. I sponged on some blue DO inks using a MFT mini cloud stencil and then die cut a heart using the same heart die. The cranberry panel was die cut with a FL stitched rectangle die and the same heart die. The new greeting was stamped with VersaMark ink and heat embossed with white embossing powder. The lion heart was added to the panel after attaching it to the white card base. I think this will be the Valentine for my youngest grandson. I better get busy and create Valentines for my other grandkids. Thankfully DRS Designs has some great images to choose from. You can see all the new images here. And all the other Valentine images here.
Thanks for stopping by today.
blessings,
shelia
Read more...Happy Monday Everyone. Hope you had a wonderful Christmas as you celebrated the birth of Jesus with family and friends. Things were a little bit different this year with the pandemic, but hopefully with the vaccine this will soon be behind us!!
I have another bowling card to share with you today. I have enjoyed playing with these new bowling images so much. They are easy to color and fun to use! If you know any bowlers you really must get these stamps for your stash!


Thanks for stopping by today. You can check out these images at the DRS Designs on line store here.
blessings,
shelia
Happy Monday! Trust you had a great weekend and found some time to get inky. Can you believe the first week of December has passed? I don't know about you, but I feel like this year has flown by in spite of all the restrictions due to Covid. I really thought the time would crawl by, but it certainly hasn't!
My cards today feature the new bowling images. I think they are so fun to work with. I am having a ball playing with them!!


Happy Monday Everyone. Hope you had a wonderful weekend and found some time to get creative. I've been having fun playing with the newest images DRS Designs recently released. I think you are going to like them!
Today's card features the new Love and Laughter greeting. I paired it with a house image from the all in one Christmas Village. Since it's almost winter and that means snow here where I live, I thought a snowy house would be appropriate. Anyway, here's the card.

The card is pretty self explanatory. I stamped the greeting and image onto white CS, colored the image with Copics, die cut and layered them onto cranberry CS. The white panel was embossed with a Darice EF and layered onto the same cranberry CS before attaching it to the white card base. A few cranberry gems complete the look. I really like how this card turned out. I think it's perfect for someone purchasing a new house this winter.
This next card uses the same greeting, but this time I paired it with a die cut house. I have no idea what die was used to cut the house. I die cut it years ago at a friend's house, but never used it. Because of the size of the die I went with a slim line card.


 Posts
All Comments
Posts
All Comments


© Blogger templates Palm by Ourblogtemplates.com 2008
Back to TOP


