Blog Widget by LinkWithin
Showing posts with label holly. Show all posts

Berries

>> Tuesday, November 21, 2023

Hi Everyone,


While I know Thanksgiving is this week, I couldn't resist showing off a couple of the new stamps soon to be released here at DRS Designs.  


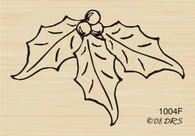
I stamped and colored up the new Berries and Bow Christmas Decoration (9275F), die cutting it and turning it into a tag by punching a hole in the top and adding a ribbon. I then layered it onto an embossed holly background and added the new Small Script Merry Christmas (272E) Greeting.  


To finish it off, I added some punched holly leaves and red gems as berries, and also added some glitter glue to the image berries as well.  It's the holidays, there is no such thing as too much glitter this time of year!


Be sure to stop back and see all of the new holiday and winter stamps!


Happy Holidays!
Karin

Read more...

We Can Build A Snowman

>> Thursday, December 5, 2019

Good morning!
I have something different today.  This is a log house from Cottage Cutz and it is 
my backdrop for today's Christmas card.
I used 3 DRS stamps with it.  The Snow Background, the Tiny Snowman and the Triple Holly.
Isn't that Tiny Snowman just the cutest with this house.


There is some glossy stuff on the berries and glittery dots on the snowflakes.  I used Dries White Adhesive and glitter on the snow (the roof, ground, trees).
Ok, so this might just be my dream home, right?!!
Someday! Complete with the snowman of course!
Thanks for visiting today!
Robin

Read more...

Pine Cone

>> Thursday, July 25, 2019

Good morning!
Hi friends!  Here is another Christmas card for Christmas in July.
I used a sketch from SCS for this one and used a shadow box for one of my elements.


Side view so you can see the shadow box better.


I stamped the pine bough on a piece of 3 1/2 X 4 3/4" panel then stamped the pinecone on another piece and fussy cut it then popped it up.  I stamped the Merry Christmas on the front box panel, top and bottom then made the shadow box and glued my pine bough panel to the back before completing it (keep the top open slide the panel in then glue it shut).  Edge the box with red ink and set aside.
For the background base.  Stamp dots on a piece of red cardstock (teammate Julie's idea) with white ink and emboss with white powder Cut it into two 1 3/16" (close enough) strips.  Stamp Open Plaid with red onto white panel 5 3/4 X 5 3/4". Glue two red panels and white stripe panels onto a red base 6 X 6".  Glue another white panel (about 4 1/4 X 4 1/2") on then red panel (4 X 5") before gluing the shadow box on. 
Stamp and color then fussy cut 4 sets of holly leaves then glue them to the corners.
Glue small red pearls to the box corners and larger red pearls to the card base corners.
I used Dries White glue (by Art Glitter) and loose glitter on the pincone tips.
That's about it.  Hope you're inspired to get started on your Christmas cards
Craft On!
Robin


Read more...

Merry 25th! 🎄

>> Friday, July 19, 2019

by Julie Warner - The Write Stuff

 🎄Happy Friday! 🎄
I hope your week has gone well! Continuing w/ the Christmas in July trend we have this week, I have a Christmas card. I'm part of the Splitcoast Fan Club Christmas Challenge team & this is one of the cards I made recently. 

To make my CAS Christmas card, I white embossed the polka dot bg onto red card stock using white ink & white powder. I die cut the largest layer, the scallop borders & the 25 out of it. The holly image was colored & fussy cut to add underneath. The half die cut/half stamped greeting was added on the largest white layer.
Here's the inside & the Copics I used on the holly.
Thanks so much for stopping by! Have a great weekend! 


Supplies:
paper:  Staples 110# white, red
ink: Memento tuxedo black, Colorbox frost white pigment 
accessories: Rubbernecker Rectangle Stitch Circle Stitch dies,Copic Sketch Markers, Spellbinders Holiday Sentiment, Long Scallop Rectangles dies, Sizzix Mini Reindeer & 25 set dies, white embossing powder


Read more...

Just a Bit Flakey

>> Thursday, December 14, 2017

Good morning!

Today my first card is made with the new release Flakey Friends 
and an older favorites Snowman Bird Buddies 232H.
I used heart dies by HFC and Label die by Taylored Expressions.
I used an embossing folder for the background squares.
There is a little bit of Liquid Applique on the hat of the bird for fur.


This next card combines two stamps with holly, berries and pine boughs
I fussy cut quite a bit of it to bring them together just right and to let the holly hang over the frame (by MFTs).  There is silver mirror paper inside the red frame and also inside the green frame. 
I used red rhinestones and green rhinestones for embellishments.

Thank you for visiting today and I hope you've found 
something here to inspire you!!
Go have fun.
Robin

Read more...

Candles Galore

>> Friday, December 1, 2017

Welcome!

Are you in a Christmas panic yet?  Many, many people around me seem to be :)  Here it is December 1st and my neighbors are making me feel like a slacker because I haven't decorated outside yet - let alone put up my tree!  Why??? I'm stamping, of course!


My card today was supposed to be a quick card, but I totally lost control at some point and just went with it!

I started by stamping our Candles Galore on some white card stock.  I made a quick mask (just cutting out the bottoms of the candles) and stamped our Floor image on top.  It was supposed to be another checkered tablecloth, but I lost control of that too, so I turned it into a wood plank table top and colored my candles red and green.  For my greeting I stamped out Deco Merry Christmas using red, black and green inks and die cut it.  Everything was attached to a folded black card.  I wasn't quite ready to call it a night, so I stamped the longer part of our new Poinsettia Vine Corner twice on a separate piece of card stock and sat back to color and cut.  I loved how it looked and decided to add two more poinsettia's at the top.

Thanks so much for stopping by!
Sue

Read more...

Peace and Joy

>> Sunday, November 12, 2017

Hello All,

I love this time of year, and all the beautiful cards of the holidays.


This is a simple card if you need to make several cards in a hurry.

I started by gold embossing the Deco Peace and Joy Christmas  then I die cut the red card stock. The Triple Holly was colored and fussy cut then add to the corners.

Have a wonderful day,


Read more...

Cowboy Boots Christmas

>> Wednesday, July 26, 2017

You know how I like to do surgery on an image, and I did some serious surgery on my card today!


I cut a BUNCH of boots from the new Lasso Cowgirl plus some lassos (to use as my rope twined around in the wreath.  I cut out a bunch of the greenery from the Holly Jingle Bells image and glued them together to make the wreath.  Then I did some surgery on two sentiment images to make my sentiment:  Christmas Especially to You and Better in Cowboy Boots.

Such a fun card to make and I have a lot of friends that would love this.

Many hugz,

Nancy


Read more...

Holly Days Snow Globe

>> Friday, December 23, 2016

by Julie Warner - The Write Stuff

Happy Friday before Christmas!
I hope your pre-Christmas week has gone well & you're all ready for Santa! I still have a couple of things to wrap. I'm still recouping from a bout of pneumonia and while I'm not coughing as much, I'm still weak as a kitten. Don't you hate that feeling? Anyway, since Christmas is day after tomorrow, I thought I share one last Christmas card. I love this big snow globe and the Christmas Village images fit perfectly inside it. Just had to decide which ones to use. Finally decided on the lovely Gazebo & Lamp Post & added a couple more trees for balance. After stamping the globe, I die cut a circle almost the same size out of copy paper & used the left over as a reverse mask to stamp the images inside & keep them from going out of the edges.
After coloring everything, I used a white gel pen to add snow where I wanted it & then some stickles for sparkle. The Triple Holly was fussy cut & added & the greeting was stamped on the red & I used the white gel pen to highlight the letters. 

Here's a look at the inside & below it are the Copics I used.
Thanks so much for stopping by! Have a great weekend & a very Merry Christmas!

Supplies:
Paper: Staples 110# white, red
Ink: Memento tuxedo black
Accessories:  stitched rectangle dies,  Copic markers, stickles, white gel pen, Misti


Read more...

Holly Days

>> Tuesday, December 20, 2016

Hi Everyone,

I can hardly believe that Christmas is in just a few days.  As I get older, the holidays seem to fly by more quickly with each passing year..And can I be honest? I'm just now finishing up sending out my cards. Yikes!  I hope the post office isn't as behind on things as I am :)

Here's a card that I would sneak out even after Christmas Day has come and gone, since it celebrates this time of year and everything holly.  I'd write or stamp a Happy New Year inside and not feel bad at all :)

I came across a card in my stash that I made eons ago and used it as inspiration for today's card share.  I began with a cream colored card base and dry embossed the green background using my holly berry embossing folder.  I cut another piece of green cardstock slightly smaller and die cut a round window out of  it, and then adhered my stamped Triple Holly image behind it.  I place a larger piece of cream behind that and embossed it once more, adding a piece of ribbon before adhering it to the card.


To finish it off, I added the Holly Days Christmas Greeting that I simply trimmed to fit the space.  Be sure to visit DRS Designs for these stamps and many more!

Happy Holly Days to you and yours!
Karin

Read more...

Holly Days

>> Thursday, December 15, 2016

Welcome!

Are you ready for Christmas?  Anywhere close?  Not me!!!  I've never been so late getting all my Christmas chores done.  Cross your fingers for me that I get a lot done tomorrow :)

I may not be getting my wrapping or decorating done, but I'm having fun stamping!!  I sat down the other night with a card in mind.  It was going to be great - a line of Santa faces across my card, die cut along the bottom and a red piece of card stock inside to show below the Santa's.  Sound great, right?  So how come this is what I stamped????


Don't get me wrong - I love how this card came out, but it certainly isn't Santa!  The problem was that I saw the Happy Holly Days stamp as soon as I sat down and just wanted to use it.  So out goes Santa and in come our Triple Holly Leaves.

To make this card I stamped the Holly Leaves 4 times on a scrap piece of card stock, cut them out and then colored them.  I also used a large round embossing tool and a mouse pad to curl them a bit for dimension.  Next I cut a piece of red card stock to approx. 2" and then sponged on the tiniest bit of black around the sides and attached it to the bottom of my white card.  I stamped the Holly Days greeting using bright red ink and then attached my row of holly leaves covering up the seam and attached all to a black folded card.

Thanks so much for stopping by!


Read more...

Blog Archive

StatCounter

  © Blogger templates Palm by Ourblogtemplates.com 2008

Back to TOP