Blog Widget by LinkWithin
Showing posts with label Stained Glass. Show all posts

Mother’s Day

>> Tuesday, May 2, 2023

Hi Everyone,


Since the new You Were Right Mother's Day Greeting mentions forgoing flowers and teacups, I thought I would make the card using non floral stamps.


I used my favorite Splatter Background stamp and inked it up multiple times using yellow, pink, orange and green ink.  I then used those same colors to color up the stamped Small Stained-Glass image.  


To finish it off, I added a couple of rows of matching gems.


Virtual stamping hugs to all the crafty moms out there!


Karin

Read more...

Comfort, Time, and Memories

>> Wednesday, July 7, 2021

Hello crafty friends!


I love when I figure something new out, don't you?  This past weekend, I figured out that the Large Stained Glass (1133P) image can be bent a bit and used to give your background a crackle look (I kind of folded it like a taco).  I used it on several of my art journal pages this weekend and also on this Sympathy card. 


I started my panels using the Ink/Spray/Smash technique (swipe ink on acetate, mist with water, then smash it on your paper).  I used green and brown on the bottom base panel and just green on the top panel.  After the ink dried, I stamped the Script Font Background  (098P - my favorite stamp ever) in Pretty Peacock ink. I sprinkled it with water because I was going for that wet with tears kind of feeling.  After that dried, I inked up only the middle of the Large Stained Glass image and stamped it all over the two panels.  

I wanted the top panel to have a different look so I also inked up the trees in the Mountain and Treeline 2-in-1 Scene (045P) and stamped the bottom section.   I finished it off with the Condolences (109K) stamp and a bit of Vintage Photo distressing around all the edges.  


I love how this came out - hope you can try something like it soon.  

Hugz,

Nancy


Read more...

Poppies and Memories

>> Wednesday, June 30, 2021

Hello crafty friends.


I love poppies - they are so pretty.  In a town near us, there is something called the Poppy Project.  They fill a field in near the center of town with ceramic poppies all made by a pottery shop downtown.  they have them up on Memorial Day weekend.  These are some of the facts.  

The poppies fill up the fields.  You can have one dedicated to a service member who died in the line of duty, and they hang a satin ribbon from a poppy.  It is breath taking to see all the gorgeous flowers. 
Right near the poppies, they have a picture of her son who died in the line of duty.  This town flies these flags with fallen citizens on them all around town.  They fly them from Memorial Day through Fourth of July.  Very cool. 
I visited her pottery shop this weekend and was inspired by her poppy flowers (you can buy them).  I wanted to do something with poppies and be very patriotic so I  loosely painted some poppies.  Then I stamped the Large Stained Glass stamp over them.  Next, I did a loose stiped background with water colors and stamped the Script Font Background stamp over it.  I topped it off with the God Bless America Greeting
I rubbed some Vintage Photo Distress Ink all over the images to age them a bit and added on a wooden heart I painted red.  

Hope you enjoyed the pictures.  I love getting inspiration from other talented people, and this Poppy Project really grabs my heart.  

Hugz

Read more...

Irish Leonard

>> Friday, February 26, 2021

  by Julie Warner - The Write Stuff

Happy Friday!
I hope your week has gone well! We've had more sun lately & a little less rain so that's been nice. I even saw a few stems of the daffodils starting to poke thru in the flower beds. Spring won't be too far away now. I don't know why, but the image of Leonard w/ this pot of gold just popped into my head so that's what I have here. 

I did the bg first..I found a soft, mottled left over piece, stamped the tall shamrocks & colored them very lightly, then gold embossed the stained glass rect. on top. A gold frame was added to give it a little punch, then I stamped & colored the pot of gold. Hmmm...the greeting is already on it, so after coloring it, I put it back into the Misti, stamped just the greeting w/ gold, & gold embossed it, hoping it would show up a little better. I sort of succeded. If you hold it just right. Leonard was stamped separately & fussy cut. I cut around just the top of the pot of gold & inserted Leonard & his hooves. Leonard looks pretty pleased w/ having found the entire pot of gold!
Here's the inside & below it are the Copics I used.
Thanks so much for stopping by! Have a great weekend!


Supplies:
paper: Staples 110# white, mirror gold, black
ink:  Memento tuxedo black, Ultimate metallic gold,  (Kaleidacolor fresh greens also used on inside)


Read more...

Stained Glass Lily

>> Friday, May 1, 2020

Happy Friday!
I hope your week has gone well! I also hope you're staying healthy! For the first day of May, it's kinda chilly here. Lows in the low 40's & yesterday, we only got up to the low 50's for a high temp. Feels more like the beginning of April than May. 

My card today is a sympathy card using these lovely calla lilies & a stained glass oval on top. You'll see that the lily & frame are all one image, but I didn't want the stained glass on top of the word frame, so I did them separately. I could have just left off the word framing, but I like how the big sympathy greeting echos the word frame. I die cut the white frame & inside rectangle first, then stamped the 2 parts of the lily & added a green frame. After coloring the lily, I stamped the stained glass on top w/ the gray ink & added just a hint of color here & there. I also added just a bit of color to the large greeting.
Here's the inside & below it are the Copics I used. 
Thanks so much for stopping by! Have a great weekend & stay safe!


Supplies:
paper:  Staples 110# white, green
ink:  Memento tuxedo black, flannel gray (new sprout used on inside)
accessories: Rubbernecker Rectangle Stitch Rectangle  dies, Copic Markers, Misti


Read more...

Stained Glass Birthday

>> Saturday, March 7, 2020

Welcome!

Have you ever seen an old card that you made and thought "I can do better?"  That was me last week the night before teaching a stamping glass using our stained glass stamps :)


This is one of the cards I've used as a sample when I teach a stained glass class and as I took it out I decided to change it up a bit.  


Not sure what possessed me to sponge on the rainbow, but I kinda knew by the 3rd color that I was on the right track.  Once my rainbow was finished I stamped our Sm. Stained Glass using black ink and then stamped our Silhouette Butterfly right on top using the same black ink.  Since I wanted to see more of the rainbow I choose to just trim the edges instead of fussy cutting the glass/butterfly combo and layered it it on black.  Since it was for a class I wanted to keep the background simple so I trimmed a piece of white cs and stamped our Happy Birthday using purple ink along the bottom and layered all on an embossed piece of acetate and attached that to my folded pink card.

Thanks for stopping by!
Sue


Read more...

Merry Christmas!

>> Friday, December 21, 2018

by Julie Warner - The Write Stuff

 Happy Friday!
I hope your week has gone well! I can't believe Christmas is next week! Seems everything is a little behind..shopping, mailing, sending cards. I know I'm right on schedule..for next year! At this rate, I'll be posting Christmas cards for a while here. 

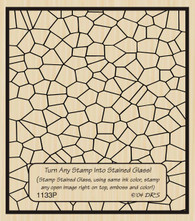
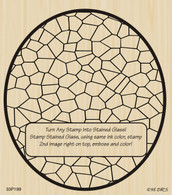
For my first card, I had an idea for a Christmas window of stained glass. I first stamped & colored the candles at the bottom, then I dropped pools of rubbing alcohol on the top & added drops of Copic refills in blues & lavenders. I let the colors pool & mingle but kept them mostly away from the candles by not wetting that area. 
Then I added the arched window frame (the rest of the window is on another card to come), & stamped, colored & fussy cut the holly greeting oval.  Here's a look at the inside & also the Copics I used.
Supplies:
paper:  Staples 110# white, X-Press It
ink: Memento tuxedo black
accessories:  Copic markers, Copic refills, ODBD Cathedral Window, Pierced Rectangle dies, Misti

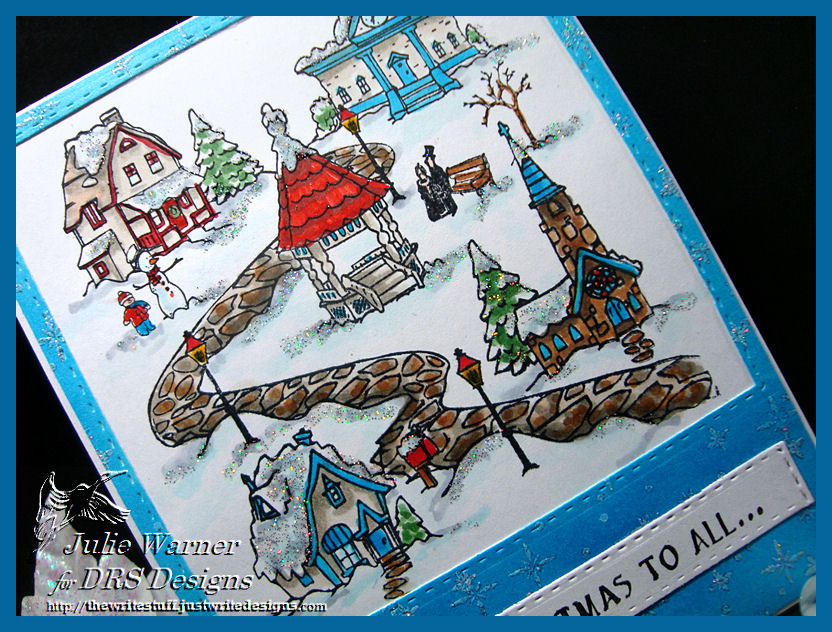
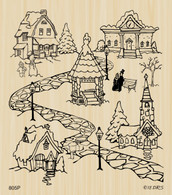
My second card uses the all in one Christmas Village. Isn't this fun?
This one kind of takes the guess work out of placing the images. It's all one big scene. All you have to decide is what colors to use. Since it has a lot of white snowy areas, I went w/ a fairly bright blue & red. After I colored it, I used a Versamark pen to go over some of the snow & heat embossed it w/ a clear, sparkly powder. 
For the blue over layer, I colored it w/ the same blue Copics then stamped the snowy bg w/ white ink & heat embossed it w/ the same powder Here's the inside & Copic colors.
 Thanks so much for stopping by! Have a great weekend!

Supplies:
paper:  Staples 110# white
ink: Memento tuxedo black,  Colorbox frost white pigment  (Distress oxide salty ocean used on inside)
accessories:  Copic markers, ODBD Double Stitched Squares dies, holographic embossing powder, snowflake punch, Versamark (or any clear embossing ink pen)


Read more...

Blog Archive

StatCounter

  © Blogger templates Palm by Ourblogtemplates.com 2008

Back to TOP