Blog Widget by LinkWithin
Showing posts with label window card. Show all posts

Valentine's Day

>> Thursday, December 30, 2021

Good morning!
My first card is a shaker card with lots of fun hearts
inside, both stamped and shaking about.

I used parts of 2 different sentiments for this card.
DRS stamps: Cheap Chocolate Eve and 
I also used the new  Candy Heart Background inside the shaker.
The heart cut out is from ODBD.  The shaker pieces are a combo of several different things.
I used some acetate for the shaker window.

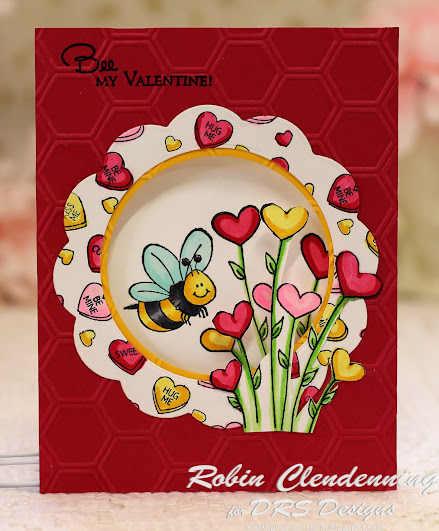
My next card is a window card of sorts.
This is the card closed, you can see through to
the inside.
I used DRS stamps: Happy Bee, Flowers Hearts,


Inside

I just love this card, it makes my heart happy to look at it!

Now it's your turn, go get crafty!
Robin


Read more...

Jungle Out There

>> Friday, April 23, 2021

 by Julie Warner - The Write Stuff

Happy Friday!
I hope your week has gone well! Our spring weather has backslid a bit..woke up to temps in the upper 20's this morning & it's not supposed to get above the 50's for a day or two. Hopefully it wasn't below freezing for too long so maybe the blooms will survive. The dogwoods & azaleas are almost at peak right now. 

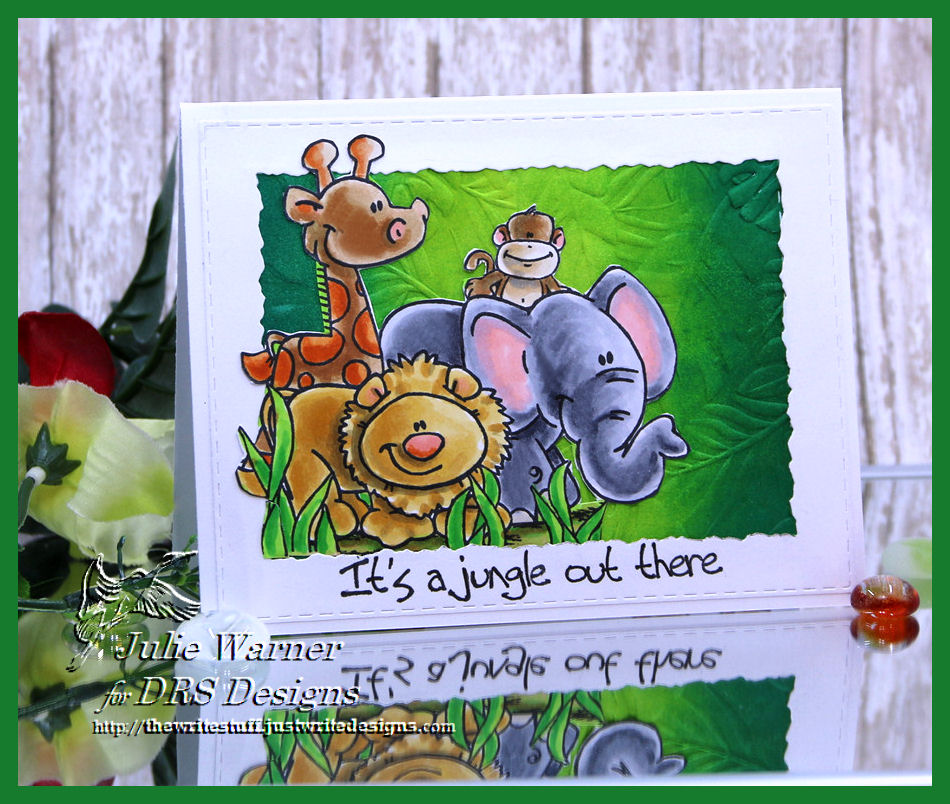
So..I made this bartered green bg a few days ago then couldn't decide what to do w/ it. I used an embossing folder on it that looks like a jungle full of leaves. That led me to the greeting & the collection of cute animals. After I colored & fussy cut them, I added them over & under the wide deckled frame where I put the greeting along the bottom. In case you can't tell, a lot of the tiny inside pieces around the animals are still there. When I have tiny areas like that, I'll usually just color them in to match the bg so they disappear. It's a little bit of time saver.

Here's the inside & below it are the Copics I used.


Thanks so much for stopping by! Have a great weekend!


Supplies:
paper:  Staples 110# white
ink:  Memento tuxedo black,  Kaleidacolor Fresh Greens
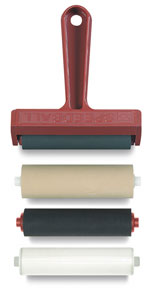
accessories: Rubbernecker Deckle Rectangle, Rectangle Stitch dies, Copic Markers, Sizzix Tropical Leaves embossing folder, brayer


Read more...

Wishing You....

>> Sunday, March 21, 2021


I love the new ARCHED WINDOW - 370K it is absolutely perfect to send new home wishes to anyone. I created this card by using the ARCHED WINDOW - 370K stamping it on white cardstock and then fussy cutting it and coloring it with copics. I then used an exacto knife to cut out the window. I put a pink cardstock down and added lace to the inside of the window and popped the frame up on dimensionals on the pink card base.


For the base layer of the card I used the BRICK WALL - 260P and covered the entire base coloringn it with copics.

I then die cut grass and punched a flower. 

The card was finished with the NEW HOME GREETING - 967G greeting popped up on dimensionals.

Thank you so much for stopping by to check out my card this week.

Read more...

Happy Thoughts!

>> Thursday, March 4, 2021

Good morning!

My first card this morning has the Arched Window looking 
out at an ocean scene in a shaker!
For the scene out the window I used:


The sentiment, Happy Thoughts is added at the bottom on a pennant/banner.  
I scored the bottom to look like bead board, every 1/4" and left the top plain then colored it 
with B000 Copic.  The bottom was lightly sponged with Morning Mist.     
I also added 1/4" chair railing in white and used a C2 Copic to make a shadow under the railing.    
My frame is from Lawn Fawn.  
I cut out the window panes and added acetate behind them.  
Next I made my little scene and colored with a variety of blues, grays, beige  and red.  
I made a sun stencil punching a circle from a post-it then used  
brushes to apply color to the sky.  
I made an inner popped up frame using a Fun Foam sheet then before adding  
the scene to the back of the front window scene.  
I added some shaker pieces mostly sequins and Prills.


My next card features the Arched Window on a yellow siding and brick house (I remember one from my youth that I thought was so pretty).


I stamped the window then masked and stamped the bricks and Wood Grain Background.  I stamped the wheelbarrow and butterflies separately and fussy cut them then glued them on.
I added some transparent red acrylic dots to my sentiment banner 
and fishtailed the end.

Thanks for visiting today!
Robin


Read more...

Doggone Wonderful!

>> Thursday, September 5, 2019

Good morning to you!
This first card is a very simple design using a window
frame die and the little Santa pup. My background is an embossing
folder that looks like it's snowing but it has no name 
on it so I have no idea who makes it, sorry.
The pup has white Liquid Applique added to the fur on his hat,
then I used a heat gun on it until it puffed up.  When
I add the Liquid Applique I do it with little dots so that when it puffs up it looks very textured like fleece does.
I used DRS stamps: Santa Puppy and Doggone Christmas Greeting.
The wall in back of the pup is just white linen that I sponged with Antique Linen Distress ink.
Because of the paper's texture it looks like a plaster wall painted ivory (that's my version anyway!!).


This second card is kinda fun with the star die by Sizzix on a background made with watercolor
paper and dunked in a pool of ink (super easy way to make some backgrounds to have handy.  I have them with multi colors and with just certain colors, love them all).
I used a colorful background panel behind the stars to get so fun color in the stars.

The DRS stamps I used for this are: Christmas Rooftops, and From Our House at Christmas
The house tops are topped with glue that dries white and glitter to look like the remains of snow (because it snowed the week before!!).
Hope this gives you some easy ideas for Christmas cards!
Thanks for visiting today now go get inky!

Robin 

Read more...

Season's Greetings Window

>> Friday, December 28, 2018

by Julie Warner - The Write Stuff

Happy Friday!
I hope your week has gone well & you had a wonderful Christmas! Today I have another card using the rest of the window die I used last week. And I added a similar fussy cut greeting. This would also be perfect for those cards you didn't have time to send before Christmas. Or change the inside greeting to a Thank You when sending those thanks for the presents cards.  
On this card, I used just the inside frame of the window (left from last week's card) & put a piece of white glitter paper behind it. I used an embossing folder on the white layer to dress it up then added the colored & fussy cut greeting. 

Here's a look at the inside & below it are the Copic I used.
 Thanks so much for stopping by! Have a great weekend & a Happy New Year!
Supplies:
paper:  Staples 110# white, X-Press It, white glitter
ink: Memento tuxedo black
accessories:  Copic markers,  ODBD Cathedral Window, Pierced Rectangle dies, Misti, embossing folder (SU)


Read more...

Floor and Wall Tutorial

>> Saturday, June 16, 2018

Welcome!

I recently did a "make n take" at a stamp show that I thought I'd share with you :)

I used 4 of our stamps to create this card:

Country Window

Spring Crocus

The Floor

Brick Wall

a few masks and a bunch of coloring :)

Once the masks were made, total stamping time is less than 5 minutes!


 Step 1 - Stamp window and tulip bucket


Step 2 - Cover both with masks


Step 3 - Stamp floor image on top of tulip bucket mask


Step 4 - Mask floor


Step 5 - Stamp brick wall slightly overlapping floor mask


Step 6 - Finish stamping brick wall.


Step 7 - Dab dark grey, black and red inks on bricks


Step 7 - Remove masks and start coloring (I did all the cement grout a medium grey)!


Thanks so much for stopping by!
Sue

Read more...

Blog Archive

StatCounter

  © Blogger templates Palm by Ourblogtemplates.com 2008

Back to TOP