Blog Widget by LinkWithin
Showing posts with label Holidays - Christmas. Show all posts

Merry Christmas

>> Monday, December 25, 2023


Thank you for stopping by to check out my card this week. I used the wonderful SMALL NATIVITY SCENE - 696D as it is perfect for today. I stamped it and colored it with copics. I then die cut a gold frame and heat embossed the CHRISTMAS STAR MERRY CHRISTMAS - 933F with gold emboss powder. The star was finished with a single gem.


From the entire DRS Designs team, we would like to wish you and your family a very Merry Christmas.

Read more...

Leaping Deer

>> Monday, December 11, 2023


Hello crafty friends. I finally had a chance to use this great new Leaping Deer - 276H image. Oh, how I love this great deer image. I actually have two cards to share this week with this wonderful image.


For my first card today: 


For my second card:
  • I stamped the Leaping Deer - 276H  and the THINKING OF YOU AT CHRISTMAS GREETING - 183D and heat embossed them with gold glitter embossing powder.
  • Next, I cut several strips of mirror gold to create more interest to the card.
  • I then punched several snowflakes and layered them giving them dimension and finished them with stickles.
On this card really shines.

Thank you so much for stopping by to check out my cards this week.

Read more...

Merry Christmas

>> Monday, December 4, 2023


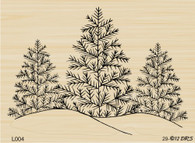
This new Simple Pine Trees 285E is just perfect for adding some quick trees to your cards. I have two cards to share today.

For my first card:

  • I started the card with sponging teal on a white card stock.
  • Next, I stamped the Simple Pine Trees 285E several times across the panel with versamark ink then white heat embossed the trees.
  • I then used some scissors and fussy cut some snow hills and popped the top one up on dimensionals.
  • The top hill is stamped with the new Small Script Merry Christmas 272E in teal to match the sponged teal.
  • I finished the hills with stickles and added some white gel pen to the sky and additional stickles to the white gel pen.
For my second card:


  • I stamped silver designer paper with versamark ink using the INTERLOCKING SNOW BACKGROUND - 015H and then heat embossed silver embossing powder.
  • I then cut apart the snow panels and layered on a die cut white panel popping the panel up on dimensionals.
  • Next, I stamped the Simple Pine Trees 285E with versamark ink and heat embossed the trees in green. I then fussy cut the trees and popped them up on dimensionals.
  • The Small Script Merry Christmas 272E is heat embossed with red emboss powder.
  • The card is finished with several clear sequins.

Do you have a favorite of these two card? I have to say, I love them both. The aqua is a great color but I really love the silver on silver embossing on the second card.

Thank you so much for stopping by to check out my two cards this week.

Read more...

Repeating Merry Christmas

>> Wednesday, November 22, 2023

Hello Crafty Friends!


Since Thanksgiving is tomorrow, we will now be starting the downhill slide into Christmas in 2 days.  It is more than a month away, but it will feel like 2 weeks.  I am in a mad rush to get some more Christmas cards done as a I am sending out a giant list this year (giant for me).  These fun new DRS Design images are helping me with lots of fun ways to use them.  


On this card, I stamped the new Small Script Merry Christmas (272E and coming to the store this weekend) repeatedly over my base and lined the word Christmas with Stickles.   Next, I layered on an embossed ink/spray/smash panel from my stash.  It was a fun base for the new Leaping Deer image (276H).  To underscore the Christmas theme, I added one more Small Script Merry Christmas on top. 

The base panel is also sponged with Tim Holtz Distress Ink.  Inside I have the Leaping Deer with the Merry portion of the Small Script Merry Christmas cut out and added on his bow.  

Hope your week is going well and that you are enjoying the holiday preparations like making Christmas Cards (I am!).  

Hugz,

Nancy


Read more...

Merry Christmas to All

>> Tuesday, December 20, 2022

Hi Everyone,

Here are a couple of last-minute Christmas cards that I whipped up.  I used the same embossing folder for both, so the backgrounds were a snap. 

I colored the World Globe, and knew I wanted to pair it up with the Merry Christmas to All sentiment, so I thought a Santa hat would be on brand and really bring on the holiday cheer.  I stamped and fussy cut two hats using one for the globe and another for an embellishment.  A few scattered gems finished it. 

The hats came from these stamps:


For this card I used a piece of the holly paper I made for this card here, and added the Santa Face and the Merriest Wishes Greeting, along with a few gems in the snowflake centers. 


Wishing you and yours the Merriest of Christmases!  

Thanks for stopping by!
Karin


Read more...

Merry Christmas to All

>> Tuesday, December 13, 2022

 Hi Everyone,


Using the new Merry Christmas to All sentiment on my card, I decided to pair it up with the Santa with Birds Christmas Scene because he's depicted with "all" the little birdies.


I stamped and colored up the scene but ended up with a big smudge along the top.  Don't you hate when that happens?  Lucky for me my dies saved the day by letting me crop out the goof up. The scene is simply smaller and, in the end, fit the card well.   I also added some glitter glue to the fur on his clothes for a bit of holiday sparkle.  


I layered it onto a background that was stamped using the Medium Filigree Snowflake and lined with a strip of embossed snowflake cardstock.  Finally, for embellishment I added the Small Cardinal that was stamped, colored and fussy cut. 


Happy Holidays!
Karin


Read more...

Peace in the Country

>> Wednesday, October 26, 2022

Just like the stores, I have moved on to Thanksgiving and Christmas Season!


This first card has a bit of fall in the colors, but there is snow and a wintery sunset.  To make this, I stamped the new Windmill and then watercolored the scene behind it.  Then I added the new Peace on Earth greeting with a bit of Stickles around the edge.

Wishing us all a peaceful holiday season!  

Hugz,

Nancy


Read more...

Merry Wishes

>> Tuesday, December 7, 2021

 Hi Everyone,


I feel like I'm finally into the swing of things for this holiday season!  My house is decorated for Christmas, and we hosted friends for games and snacks on Saturday night.  During all this, holiday music has been playing in the background, and I'm sure the song Silver Bells had to have come up at least once in the rotation.


I stamped, colored and die cut the Bells Holly and Bow image for my card, and tried to color them to appear silver.  Taking inspiration from the colored image, I embossed a die cut piece of yellow cardstock and layered it onto a background that was stamped, and silver embossed using the Interlocking Snow Background.


For the greeting, I used the new Merriest Wishes Greeting, die cutting it and embellishing it with a bit


 of sponging. To finish it off, I added a few punched holly leaves and berry gems. 


If you're looking for a few stamping goodies for yourself, DRS Designs is running a customer appreciation sale just for you!  


Happy Holidays!
Karin


Read more...

Piggy Presents

>> Friday, January 1, 2021

 by Julie Warner - The Write Stuff 

Happy Friday & Happy New Year!

I hope your week has gone well & you have a wonderful Christmas! Are you as happy to say adios to 2020 as I am? Seriously, all I can say to 2020 is don't let the door hit you on the way out. Since today is also the January Christmas Challenge on Splitcoast, I thought I'd sneak in one more Christmas card. 
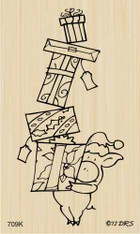
My card is pretty easy...I stamped the piggy w/ presents onto kraft & colored it in using Prismacolor pencils. I really love the look of Prismas on kraft & especially when paired w/ a bit of white. The snowflakes were stamped on the large kraft layer using Distress picket fence ink then I added a white layer behind piggy & a scalloped edge down the left.

Here's the inside. I figured the greetings would work well for Christmas, New Year's or any winter holiday.
Thanks so much for stopping by! Have a great weekend!


Supplies:
paper: Staples 110# white, Kraft
ink:  Memento tuxedo black, Distress ink picket fence
accessories: Rubbernecker Rectangle StitchNested Scallop w Holes die, Prismacolor Pencils


Read more...

Lovely Gifts

>> Thursday, December 24, 2020


Good morning!
Merry almost Christmas!
I have a couple of Christmas cards today, (hey why not get started on next years cards while I'm in the Christmas mood, right?).
This first one features the new Potted Christmas tree and

I used a new die I bought at our local stamp store from Hero Arts.  I cut it in white for the lights and cut it in green too...you get it, right?
Just a little shading on the bulbs and glitter and woohoo, Christmas lights!  I also used a snowflake embossing folder on this card for texture.


My next card features the new Potted Christmas Tree and Lovely Gifts Christmas Greeting.
I used a snowflake embossing folder and some oval dies from Rubbernecker on this card.
I also used several enamel dots to accent.
These were super simple cards to make in a hurry.
Thanks for visiting today and Merry Christmas!
Robin

Read more...

Merry Christmas!

>> Monday, December 21, 2020


Happy Monday before Christmas!! I can hardly believe Christmas is this Friday. I hope you have a wonderful holiday this year, even if it is a bit different than usual due to the pandemic! 

I have a slim line card to share with you today that features the Beauty of the Season greeting.


I started with the white panel and die cut the poinsettia image with a Sizzix die. Next I added a piece of water color paper to go behind the poinsettia that I had colored with some Nuvo Aqua Flow pens in red and green. I added the green panel and the greeting stamped in Old Olive ink and layered on the same green CS, then everything was attached to the white slim line card base. A few gems were added for embellishments.

Merry Christmas!

blessings,
shelia.

Read more...

Beauty of the Season

>> Sunday, December 13, 2020


As we get closer to the winter season I find myself pulling out my snowflake stamps. This INTERLOCKING SNOW BACKGROUND - 015H makes a very quick background.

For this card I stamped the INTERLOCKING SNOW BACKGROUND - 015H  with versamark and then used white perfect pearls pigment on the snowflakes. It really shines and the picture does not do it justice.

I then stamped the BEAUTY OF THE SEASON CHRISTMAS GREETING - 118F in blue ink and die cut the sentiment popping it up on dimensionals.

Thank you so much for stopping by to check out my card.

Read more...

Just Moved

>> Tuesday, December 8, 2020

Hi Everyone,

I'm showing off a couple of the new stamps that have been released here at DRS Designs, and they celebrate one of the best milestones in life, getting a new home!  Whether it's purchasing a new place, or moving into an apartment, DRS Designs has got you covered :)

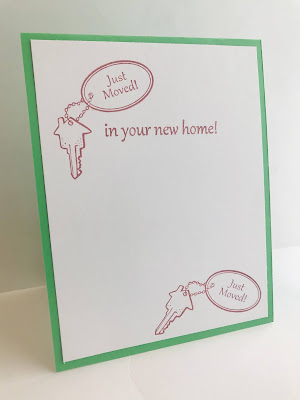
Here I stamped, colored and die cut the Just Moved House Key image.  I'm not sure it shows up in the photo, but I colored in the key using a silver gel pen, so it has that nice shiny metallic look of metal.  I paired that with an embossed background of keys, added a strip of glitter and a few gems to balance it out.


This card is a mini nod to my team mate Nancy. She made a card last week using a portion of the 
New Home Greeting, and I decided to borrow that idea.  She also makes the absolute best wreaths on her cards.  ( Just click here, here or here!)  Mine is not like hers, its simply made using a die (Spellbinders Shapeabilities) and some ink.


Here I continued the greeting inside and stamped the Just Moved House Key a couple more times.


Thanks for visiting today!  

Happy Holidays,
Karin


Read more...

Sweater Weather

>> Sunday, December 6, 2020


It is fast approaching sweater weather where I live and that makes me think of creating sweater cards. This POTTED CHRISTMAS TREE - 182G is perfect for the front of a sweater.


I stamped the POTTED CHRISTMAS TREE - 182G image and colored with copics. Once colored I fussy cut it and added it to a red card stock and cut a notch out of the top and layered on a white card base.


Using an argyle emboss folder I embossed the base layer with some punched snowflakes added around the tree.


For the collar on top and the base I used a ribbed embossing tool and glued those down trimming them off to fit the card.


I finished it off with pearls for a necklace.


I have a second card again this week.

This NEW HOME GREETING - 967G is so perfect to send to anyone getting a new home. When we bought our home I remember the dogwood trees were in full bloom and I just had to use the DOGWOOD BRANCH - 1092H with this sentiment.

I stamped the dogwood branch a few times around the edge of the card panel. Then colored with copics. I added the sentiment and die cut the panel with a wonky border die.

I finished with some soft pink gems and popped it on dimensionals.

I have a surprise 3rd card for you this week.
This card reminds me of my lasts home. When buying a home the first thing that comes to mind is all the projects that need done. We had to strip all the floors in our home and restain them.

For this card I used the WOOD GRAIN BACKGROUND - 626P stamped on Kraft card stock. Next I embossed it with a wood grain emboss folder.

I stamped the JUST MOVED HOUSE KEY - 193F and colored it with copics. While rooting through my supplies I found this washi tape that was perfect for trimming the card. It made me think measure twice cut once. I finished the card with a couple of dimensional flower stickers from my stash.

Thank you for stopping by to check out my cards this week. I hope you have a wonderful week.

Read more...

December Calendar

>> Friday, December 4, 2020

  by Julie Warner - The Write Stuff

Happy Friday!

I hope your week has gone well! We're getting much closer to Christmas! And it sure feels like winter has arrived. We had about an inch of snow Monday night & it's been in the low 20's at night. Brrrrr!!! Had to dig out my peacoat! 

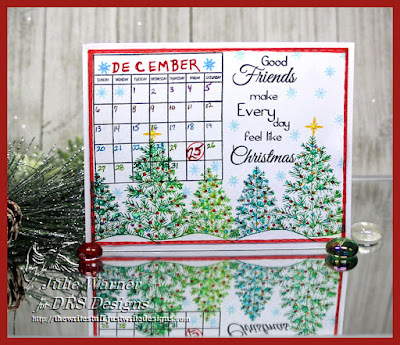
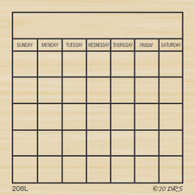
I've struggling, trying to figure out a way to use this new post it size calendar on a card. I know it will come in handy for making little calendars, but I wanted it on a card. And since I don't have the month birthday greetings, I thought this greeting went well w/ a December calendar. Since my printing is as great as it could be, I'm suggesting to Sue, that we need a set of little month names we can stamp on this. Hint..hint!  After stamping the blank calendar, I stamped the greeting w/ black & the trees at the bottom w/ a K-pad in shades of green. The little snowflakes were stamped w/ tumbled glass then I filled in the calendar. A little stickles was added for some sparkle. But uh-oh..I forgot when you put stickles on top of the K-pad, it tends to run a bit. Ooops!
tre
Here's the inside.
Thanks so much for stopping by! Have a great weekend!


Supplies:
paper: Staples 110# white, paint chip, (sm piece of green for inside)
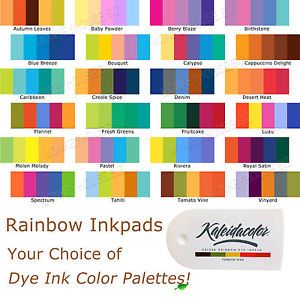
ink:  Memento tuxedo black, Kaleidacolor greens
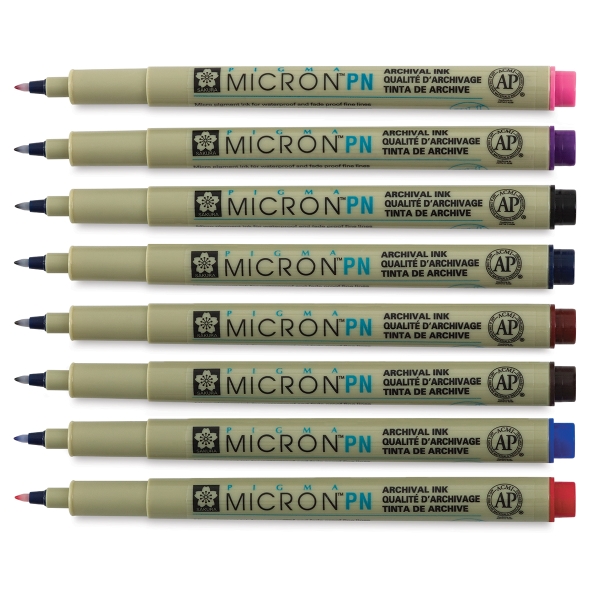
accessories: Rubbernecker Rectangle Stitch die, stickles, Micron pens


Read more...

Fa La La Fun

>> Wednesday, December 2, 2020

I hope you are getting in the holiday spirit and getting your shopping and card making all finished up.  I am getting close!  

Today, I have two cards focusing on the fun Fa La La verse from Deck the Halls.  

This first card was made using the (new) New Home Greeting and my favorite Script Font Background.  I cased THIS card done by Melissa at Splitcoaststampers.com (she is this week's Featured Stamper and a new member of the Dirty Dozen).  

I hand cut the hearts and painted them with watercolors.  I used the leftover water colors on my background.  Once the hearts dried, I used a Tile Embossing Folder and then sponged over the embossing to bring it out using Tim Holtz Vintage Photo Distress Ink.  I had the love part of the greeting covered so I had to add something to represent the laughter .  I love the  Fa La La La La  verse in Deck the Halls so I cut them out using the small Recollections Alpha die.  I doubled them up for support.  Some faux stitching finished this card up.

The negative of the die cut was laying on my counter so I decided to use it as a stencil and make one more card.  I sponged on several colors of SU! and CTMH inks and made the Fa La background.  Isn't it fun?
I have been wanting to use the new Sticky Note Calendar on an actual sticky note so I tried it and it worked perfectly.  When looking through my stamps to finish this off, the Peeking Gnome jumped right out (literally - lol).  I think he adds a lot of fun to this already fun card.  The greeting is the Small Merry Christmas Greeting cut in half.  Super quick and easy card. 

Hope your week has been going well.  

Hugz,

Nancy


Read more...

Blog Archive

StatCounter

  © Blogger templates Palm by Ourblogtemplates.com 2008

Back to TOP