Blog Widget by LinkWithin
Showing posts with label Gnomes. Show all posts

Happy Halloween

>> Tuesday, October 10, 2023

 Hi Everyone,


The jack o lantern that's part of the new Spooky Jack Halloween greeting, reminded me of the one that's part of the Witch Gnome stamp.  So, I went ahead and paired them up on my card today.  


For my backgrounds, I stamped, and heat embossed the Empty Spider Webs first, and then stamped and colored up the greeting on my white background paper. I then used the Starry Background and stamped the purple stars, doing my best to avoid getting stars inside the pumpkin image.  


I used some circle dies on my gnome and attached him on top of the border that was embellished with a strip of patterned ribbon.  


I have my pumpkin ready to be carved, purchased my Halloween candy, and found my cat ear headband that I wear every October 31st, so I'm all ready for the trick or treating!


Thanks for stopping by!


Karin


Read more...

Dream

>> Thursday, July 6, 2023

Good morning!
Today I have a fun card featuring our cute little gnomes.


I used a Sizzix star die in the sky. The background is dabbed alcohol inks.  I stamped the treeline with green alcohol ink.  The mushroom scene is done with Copic Markers.

Thanks for visiting today!
Robin


Read more...

Navy Proud

>> Tuesday, May 23, 2023

 Hi Everyone,


Since we're coming up on Memorial Day weekend, I thought I would share a military themed card.  DRS Designs has recently released a group of military emblems and my card today showcases Navy Proud.


I took inspiration from some of the emblems I saw online, which contained the colors of yellow and blue.  I heat embossed the emblem and also the background made using the Starry Background stamp.


To complete the card, I added a die cut banner along with a few die cut stars.


This card is one I made for a friend's birthday, and I took inspiration from this card:


Karin


Read more...

Someone Special

>> Thursday, May 18, 2023

 Hello crafty friends!

My card today is an all-occasion card with fun peachy ombre colors brayered on the background panel then embossed with a 3D Spellbinders folder.

I used DRS stamps: Sleeping Gnome, Mushroom Line Background, Toadstools and Special Birthday Wishes (using just the bottom line).

After stamping my scene (doing some masking along the way), I die cut it using this scalloped frame (by Pink Fresh) then I colored the inside (where the image is) and also colored the frame a little lighter.
That's about it.

Thanks for visiting today!

Robin

Read more...

Hello There

>> Thursday, May 4, 2023

Hello my crafty friends!
Today I've made a couple of fun cards, 1 birthday and 1 Father's Day.

This first card uses DRS stamps to create a fun Gnome scene.


Plan your scene then stamp the foreground first, mask.  You will need to pre-stamp everything on a plain piece of paper first to understand which images to stamp first then mask and keep stamping until you finish the scene then color.


Just add a few sparkles around the Happy Birthday.

My next  card is a Father's Day card with dad's favorite things!

I had these tool dies from ODBD so figured it was time to get the dust off of them!!
They work really well with my stamps.
I made this an easel card to give more room for the sentiment.


Thanks for visiting today!
Robin


Read more...

Happy Birthday!

>> Thursday, February 9, 2023

 Good morning crafty friends!

Today I have a Gnome card to share. 


I also used an embossing folder by Tim Holtz-Sizzix, Distress Ink-Walnut Stain, 3D foam
Silk flowers, Spanish Moss, and Prills (at the bottom for flowers).

In this close up you can see different thicknesses of foam used to pop up the images 
after fussy cutting them.
The stitched rectangle dies are from MFTs.
I hope you like this idea.  You get crafty!
Thanks for visiting!

Robin


Read more...

Gnome One!

>> Thursday, January 26, 2023

Good morning crafty friends!
Today I've used some masking techniques to make this card (except that I added some mushrooms after I was finished because I decided I needed more base).
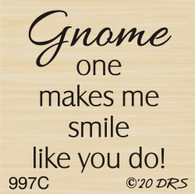
I stamped the sentiment Gnome Smile first so that I knew where to start the scene.
I then stamped the Peeking Gnome, masked it then stamped the Tree Slice Wood Grain.

I stamped the Tree Slice again on a tan paper then die cut the center with a heart shape.  I colored the wood to match the my other Tree Slice, used a dark brown to edge the heart then added the initials.
with black pen, added brown glitter pen and gold glitter pen to the letters.  I popped up the heart to match the pattern on the card base.
 

So here is where I decided to add something.  I masked the Tree Slice again then stamped the Mushroom Line Background.  I stamped the Lady Bug Toadstool and the Snail Toadstool separately because they have to be in front of the Tree Slice. I colored them and fussy cut then glued them to my card.  


Lastly I stamped the One Line Valentine, trimmed it then edged it with red and popped it up.
Hope you like this Gnomie Valentine!
Happy crafting!

Thanks for visiting!!
Robin

Read more...

Moonlight and Magic

>> Thursday, September 15, 2022

 Good morning crafty friends!


I have a Halloween card for you today (obviously, LOL!!)


The ghostie is stamped with white on shimmer vellum then white powder, heat embossed then fussy cut.
The tree is a die from Tim Holtz Sizzix.


The rest of the stamping was down with black ink and masking techniques.  The onlt fussy cutting was the ghost because I wanted a see-through white ghost.
I added bits of white gel pen for the moon highlights.
I used Copic markers for coloring then used mask and added ink sponged around the edges to darken.

Thanks for visiting today!
Robin


Read more...

Happy Birthday!

>> Thursday, June 2, 2022

 Good morning! 

Today I've used the Barn Door with the Wood Grain Background to make a barn for Cow Cutie ol' Betsie!   Some how she got out of her enclosure and now she's looking for some fun!


I used the Herd It's Your Birthday at the top.


For the inside I used part of Saddle Up Birthday and  Cow Cutie.  I also added some pearl halves. 


These cows are out to party tonight!


My next card uses several stamps to make a scene...I just love scene building, don't you?

This type of scene card takes quite a bit of masking and so to figure out which stamps I want to stamp first I stamp everything on a scrap paper (not worrying about over-stamping each image). That helps me to figure it all out.  Then I stamp mask on Post-it paper and cut them out.

Thanks for visiting!
Robin

Read more...

Gnome One Like You

>> Tuesday, March 22, 2022


Hi Everyone,


I'm still plugging along with my March birthday cards and being lazy for ideas, I copied the card I made in this post, and just updated it using spring colors.  


I stamped the Tree Slice Woodgrain behind the window for the fussy cut Peeking Gnome and used some die cut grass along with some punched flowers. The Gnome One Like You Greeting finished it off.


Embossing Folder-Darice
Flower Punch-Stampin' Up

The reason I made a gnome themed card, is because the gift is this spring colored, gnome themed butter dish :) Cute, eh?


Lastly, a personal note....Happy Birthday to my dad! 86 years young today, but not the recipient of the butter dish...lol! 


Happy Spring to you and yours!
Karin


Read more...

Silver Bells

>> Thursday, November 11, 2021

 Good morning!
Today I've used DRS Designs Bells Holly and Bow, and


I also used an embossing folder on both the silver and white panels.
The oval dies are from Rubbernecker.
I used some rhinestones by Spellbinders.
When I was growing up the song Silver Bells was always my favorite
Christmas song.  You can imagine that now every time I hear it I think 
of those sweet Christmases in my childhood.
These bells made me think of that song as soon as I saw them!

Merry Christmas Gnome Boy
Z Fold card

I used the new Plaid Fir Tree
and on the inside I used the Plaid Fir Tree, Merry Christmas Arc, Tree Home Gnome ,


I used Spellbinders dies for the frames.

Thanks for visiting today!

Robin


Read more...

Happy Fall Y'All

>> Monday, September 20, 2021


This WITCH GNOME - 664D is so adorable  and can be placed in any scene. I thought he would look super cute in the PUMPKIN PILE - 781H.


I stamped the gnome then masked him and stamped the pumpkin pile. I added the HAPPY FALL Y'ALL GREETING - 635B sentiment then colored the image with copics.


I just can't get enough of this fun gnome.


I have a second card to share with you this week.


I started off with white heat embossing the HALLOWEEN CROW/WITCH FRAME - 670H on black card stock then I cut the layer and framed it with the white scalloped frame. I then added 2 layers of ribbon some black die cut leaves and finished with some silver brads.


Thank you for stopping by and checking out my cards this week.

Read more...

Gnome Halloween

>> Tuesday, September 14, 2021

 Hi Everyone,

This past weekend we marked 20 years since that terrible day on 9/11.  Reliving it in my own thoughts, watching coverage on tv and talking with loved ones, I really couldn't do scary or spooky when it came to my crafting time, so I went cheerful for my Halloween theme instead.  

I knew a gnome would lift my spirits, so after stamping and coloring the Peculiar Pumpkin Patch, I decided to add the Peeking Gnome for fun.  He was fussy cut and made more festive by swapping out his hat for the one from the Witch Gnome.


The card base is a simple orange and yellow, with a die cut pumpkin vine glued on top.  For the sentiment, I stamped the Halloween Gnome Greeting and die cut it in the shape of a pumpkin and added it to the corner of the vine.  A few gems we added for design balance. (Pumpkin & Vine die - Darice)

Do you like this gnome themed card?  Be sure to stop by DRS Designs to get your stamps today!

Thanks for stopping by!
Karin

Read more...

Gnomie Halloween

>> Thursday, September 9, 2021

Good morning! 

I created my little Halloween scene using DRS stamps:
After coloring I used the star die (Sizzix-Tim Holtz) on the sky.
I set aside my sky and used a background I previously made with ink sprays
and stenciled it with spreadable Stickles-Black (it is very sparkly).
After it dried I die cut an oval from the center then die cut another oval from black with a slightly smaller oval die to create a mat for my opening.  I used a foam sheet to raise
the background up, cutting an oval in the center first.
Then I glued another sprayed background behind the star cut outs and then glued the scene panel under the raised background panel.  I matted the card front onto royal blue cardstock 
to match my sky before gluing it to a folded card.


That's about it!  Go get crafty!!
Thanks for visiting today!
Robin


Read more...

Wishing You...

>> Monday, August 30, 2021


Oh my goodness this little gnome is super cute and in the new collection you can pair him with this wonderful new sentiment.

I started off by stamping the gnome then I masked him and stamped the Hanging Sign Post - 773L, Finally I added the sentiment to the sign.

The entire scene was colored with copics and the base was embossed with leaves. I added a few punched fall colored leaves and kept the card very clean and simple.

Thank you for stopping by to check out my card this week.

Read more...

Like Gnome Other!

>> Thursday, August 26, 2021

 Good morning!
Here is a Halloween card with some fun colors!
I used the open plain with various fun new Halloween colors that make great
cards for kids or maybe friends that don't like the scarier stuff.
I made the mushroom strip by stamping and masking some of the fun toadstool/mushroom DRS stamps plus the Mushroom Sign with DRS new Gnome Halloween sentiment.
My Gnome was colored in my bg colors.


My next card is an easel card.
I love making these cards because you can feature more 
especially when sentiments are a bit bigger (not really the case here 
but I decided  this would make a great easel card anyway!

I really like making little scenes and it really is easy with a bit of masking and forethought as to which to stamp first.  It helps me if I stamp the scene in no particular order onto scratch paper first then I can see more clearly which to stamp first and then mask.
I used a bit of white chalk pencil to try to get a glow around ghost and moon but that did not turn out as well as I wanted. Dang!  I used Wink of Stella on the moon and on the vellum ghost.
Thanks for visiting today!
Robin


Read more...

Halloween Gnomes

>> Tuesday, August 24, 2021

Hi Everyone,

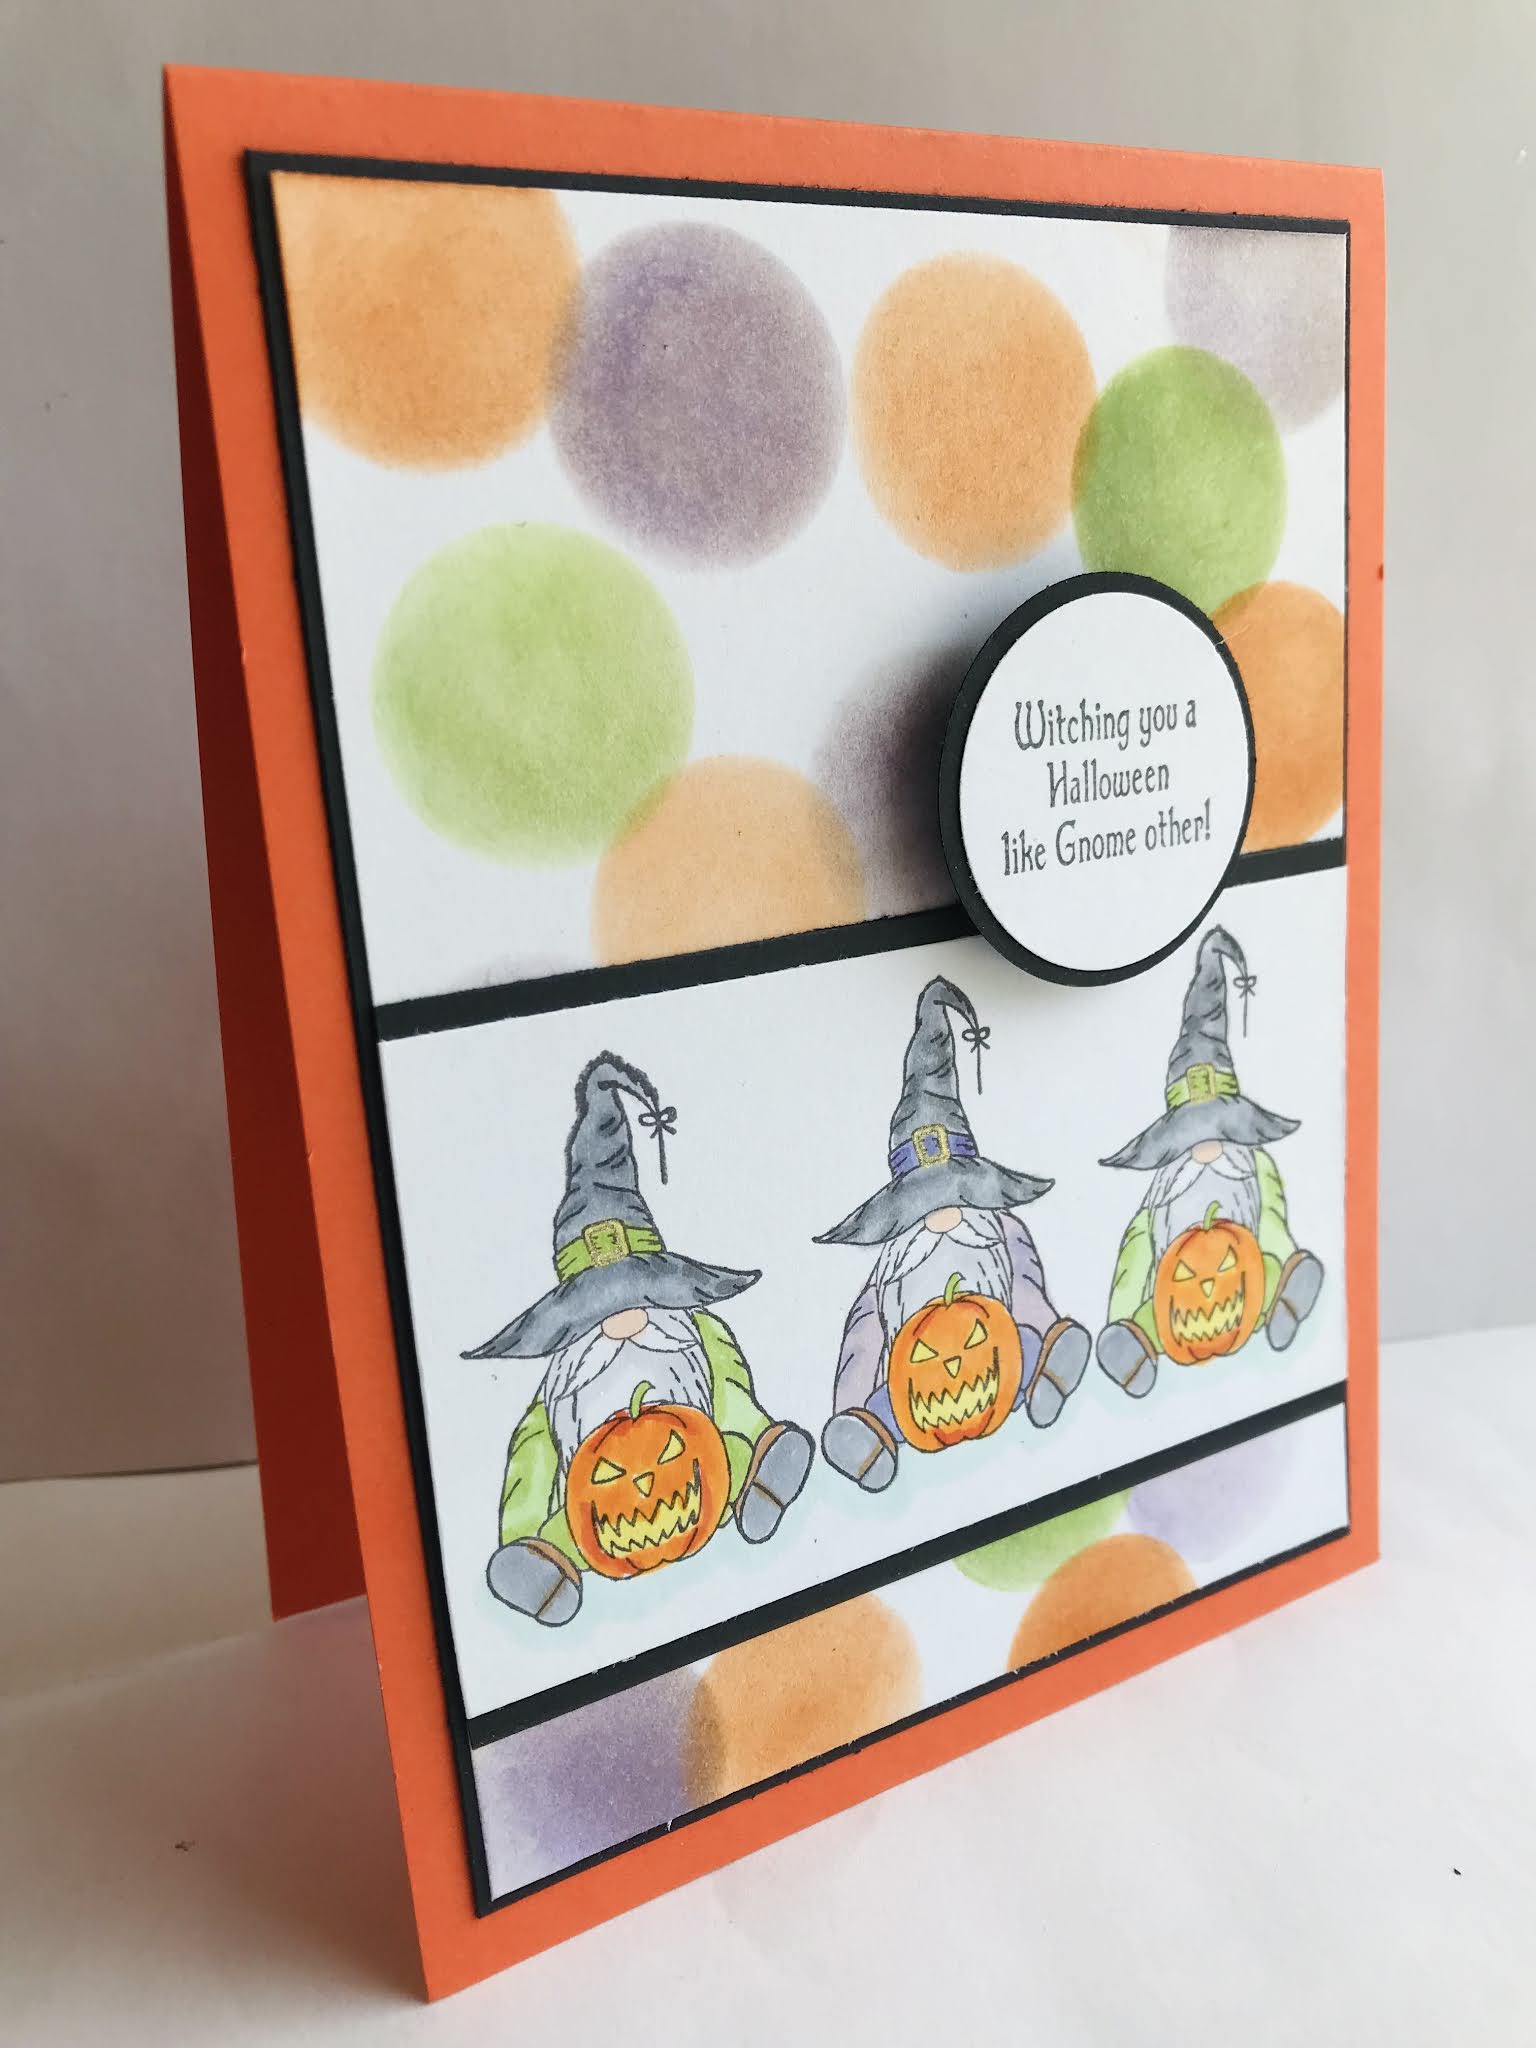
I'm in love with this adorable Halloween Witch Gnome!  Isn't he cute?! This stamp is one of the new stamps just released and it goes perfectly with the Halloween Gnome Greeting too.

Too cute to stamp just once, I made him a triplet and colored them up.  For the background, I had a scrap of paper that had a hole punched out, so I used that as a stencil and sponged on some Halloween colors.


To finish it off, I punched out the greeting with the same size circle punch, and then attached it with dimensional foam tape.

I wasn't done stamping gnomes, so here I colored and fussy cut one out.  I wanted to use the new Enjoy the Ride Greeting, so I placed the little Witch Gnome on a Broom and attached it to a Starry Background, for his magical ride.


Lastly, I added a die cut bat for embellishment! Ta-da :)

There are so many wonderful Halloween stamps to be found in the online store...Be sure to check out
 all the spooky fun!


Thanks for stopping by,
Karin

Read more...

Halloween Magic

>> Wednesday, August 18, 2021

I love Halloween (the day before my birthday) AND gnomes, so I was super excited about this new Witch Gnome image being released this week.


Isn't the new Halloween Gnome Greeting fun a well?


I made my background panels using vellum, scribbling on some alcohol markers, adding some rubbing alcohol, and splatters of ink and alcohol untill it looked magical enough.  


Head on over to the DRS Designs Store and see the other new Halloween images.

Hugz,

Nancy


Read more...

Gnome One Like You!

>> Thursday, July 29, 2021

Good morning!

I used a separate background piece for the inside of the window and some lace for curtains.
To do this I cut out the window panes and popped up the image panel over the background with "curtain" glued to the back of window.  It gives a little depth better seen in person.
The butterfly and mushrooms are glittered.
The lacey border is from Concord and 9th.  I used some purple pearls in the lacey holes.


My next card is an easel card done with a single die.
The glossy paper for the frame die cut was colored with alcohol inks first, the other matte paper for the flower and butterflies die cut was sprayed with inks first then die cut.  I sponged the edges on the card with Green Brilliance. The die including frame, card base, flowers and butterflies is from Memory Box in 1 set.
Thanks for visiting!
Robin


Read more...

Gnome Window

>> Friday, March 5, 2021

  by Julie Warner - The Write Stuff

Happy Friday!
I hope your week has gone well! I think spring is just around the corner. We had some daffodils & crocus start blooming in sunnier parts of the flower beds. Pollen & allergy season is on its way..Yay! Better stock up on the allergy meds. 

For my card, I started by stamping the gnome, masking him then stamping the window. I colored it so it would look like the gnome was sticking his head out the open window. The dk brown bg was stamped w/ the brick wall & I added a little more color to it. For the greeting, I had to stamp it a line at a time in order to move the lines a little closer together since I didn't have the room to stamp it as is. The lg white panel was a little short, so I added very thin brown strips above & below to give it some balance.

Here is the inside & below it are the Copics I used.
Thanks so much for stopping by! Have a great weekend!


Supplies:
paper: Staples 110# white, dk brown
ink:  Memento tuxedo black,
accessories: Rubbernecker  Rectangle StitchSquare dies,  Copic Sketch MarkersMISTI,

Read more...

Blog Archive

StatCounter

  © Blogger templates Palm by Ourblogtemplates.com 2008

Back to TOP