Blog Widget by LinkWithin
Showing posts with label Fairies. Show all posts

Drink in Your Hand

>> Tuesday, July 13, 2021


Hi Everyone,

Since we're in the thick of summertime, I used the new Toes in the Sand Birthday Greeting for today's card. Even though it has a beach vibe, I decided to focus on the "drink in your hand" portion of it.

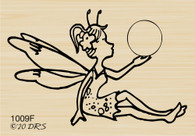
I masked off the globe from the Fairy with a Globe stamp, and paired it up with the Wine Glass image from the Pour Me Bottle and Glass stamp, and also sat her on a Toadstool as well. I colored it up and added some glitter glue to her wings.


The background was dry embossed and attached a punched border that was stamped using the Easy Dot Background.  I finished off the card with some flowers and enamel dots. 

Thanks for visiting! 

Karin


Read more...

Something's Fishy

>> Thursday, August 20, 2020


Good morning friends!
I have a couple of different cards today!
This first fairy card uses MaryAnn Designs die to make it a shaped card.
I also used some premade flowers to embellish and
I.O. Butterflies with pearls.
I used DRS Design Stamps: Fairy With Globe and Mushroom Line
I embossed the die cut and inked while the die was still on the paper.
The little bow is a hand dyed piece of seam binding.

My second card uses a lot of stamps and dies.  I got this idea from Pinterest.  It was originally done as a forest scene by Kittie Caracciolo of Kittie Kraft.
I thought is would be fun to use some of my underwater dies by Memory Box and I.O. to do the front Z Fold without coloring it so that it would not take away from  the stamped images on the card base.  This Z-Fold is actually a Box fold as it has a box in the center.
This next view is looking straight on.
I glittered the panels a bit too.  The sand is just torn paper.  I added pearls just for fun.  DRS Design Stamps used: School of Fish, 4 in 1 Ocean Design, 3 in 1 Ocean Floor, 4 in 1 Seashells, and Bubbles.

I used 2 pieces of 4 1/4 X 11" white paper to make this card scoring both at 5 1/2 and 2/3/4".  Turn one upside down so that 1 card panel has the 5 1/2" fold first and the other has the 2 3/4" fold first.  The front panel was cut away in the center leaving about 1/4" border all the way around then I glued by die cuts to the back side.  I stamped my scene on the back panel then sponged and colored.  I torn paper for the sand and glued it across the bottom making sure to fold where the folds should be while gluing (otherwise it doesn't fold right).  Then I glued the front on just at the 2 3/4" left side and right side, around the 3 edges of each.  It is NOT glued in the center.  Now fold it as a Z and the box will appear!! Magic! LOL!

Thanks for visiting today!

Robin

Read more...

Fairies and Gnomes

>> Tuesday, May 5, 2020

Hi Everyone,

I have two final (well, just for now. Not forever!) fairy and gnome cards to share, and they both feature the Tiny Flying Fairy stamp.

Along with the fairy on this card, I stamped the Sleeping Gnome and Mushroom Sign Post.  
I colored the scene, and paper pieced a greeting onto the sign.  I used the
Tiny Happy Belated Birthday for the greeting, masking off the belated portion.

I took the colors from my image panel and used them for my background, embossing one half and covering up the seam with a punched border and a piece of card stock stamp with the
 Mushroom Line Background. I added a few gems and punched corner pieces in red for embellishment.


I took inspiration from my card last week, for an easy monochromatic card.  I dry embossed my panel using a dandelion embossing folder (Darice) and punched a window for my Tiny Flying Fairy.


The best wishes greeting came from the Engagement Wishes Greeting, and I added some silver glitter glue to finish it off.

Thanks for taking the time to visit the blog today!
Karin


Read more...

Where is Your Fairy God Mother When You Need Her?

>> Wednesday, April 29, 2020

I could sure use a visit from my fairy godmother - how about you?

Today I have two cards featuring the new Fairy with Globe image and the Dream Big Graduation sentiment. I am thinking she is granting some wishes with her ball.

It was really hard for me to get a good picture of this but this card is all kinds of shinny and cool.  I did the background with ink, distress resist spray and copper embossing.

My next one is the same basic card is the first one, but I shuffled around the images and did white embossing and lighter colors (the top one actually started out this same color - lol).  I distressed this panel a bit to get some more interesting embossing.
Here is hoping that your fairy godmother comes to visit you soon.  Hugz,

Nancy

Read more...

Moon Fairy

>> Friday, April 24, 2020

by Julie Warner - The Write Stuff

Happy Friday!
I hope your week has gone well! And that you & yours are staying healthy! My card today features this pretty little fairy gazing at her globe. To me, it looked like she was holding the moon so that's where I went w/ it.

I started by stamping the fairy & masking her. A reverse circle mask was placed around her & I sponged in the colors for the blue planet. Then I placed the circle mask on top of it & used black acrylic paint over the entire area. After it dried, I added some different blues above a circular line I drew to represent the planet she's sitting on. White acrylic paint splatters were added for the starry sky. I stamped another fairy, colored & fussy cut her to add on top of the stamped one & I white embossed the greeting on the dark planet.
Here's the inside & also the Copics I used for the fairy.
Thanks so much for stopping by! Have a great weekend & stay safe!


Supplies:
paper:  Staples 110# white
ink:  Memento tuxedo black, Colorbox frost white pigment, Distress ink tumbled glass
accessories: Copic markers, Rubbernecker stitched rectangles dies, white embossing powder, acrylic paint


Read more...

Fairy Best Wish!

>> Thursday, April 23, 2020

Good morning!
Another fairy card today, this time I've used a new
die from Memory Box to accent my Fairy with Globe
The die includes the frame and inner frame so
it was a very easy card to make.
It came with a stencil so I used it to give a bit of color to the leaves and flowers. 
I used part of a word die from Cheery Lynn. 
Each flower center has a little pearl for a center. 


My second card is the fairy sitting in a mushroom garden
wishing a Fairy Happy Birthday to her
favorite friend/daughter/niece/favorite little girl!
I wrote "Have a fairy" on top of the Happy Birthday for the sign.
There was a bit of masking to do but I love the way
masking puts her in the middle of a bunch of mushrooms
I masked everything especially at the top before
sponging the sky.
I colored everything with Copic Markers before sponging the sky, 
I don't like to use my markers on top of other "dye" inks just because
it dirties them up and pollutes the tips (in my opinion anyway)
Sometimes I will use them in conjunction with colored pencils though.
The clouds are done with torn paper towel and Distress Inks sponged on.
The little butterflies are from a triple butterfly punch, I used just the small ones.
Thanks for visiting today!
Robin


Read more...

Happy Birthday!

>> Thursday, April 16, 2020

Good morning!
Today I have a magical world of fairies for you!
Tiny butterfly is a punch.
I used Distress Inks to do the background and I put white acrylic paint dots on the 
Dandelions.  The little orb I decided to use a punch, I punched a circle from a previously made 
background panel I made.  My fairy isn't sitting in this card, she is sort of floating above
the ground and picking up the orb.  
I put glitter on her wings. 


I also used the tiny butterfly punch for this card.
The orb was punched again (It has a sort of galaxy look to it).
This fairy has glittered wings as well.
Thanks for visiting today!
Robin


Read more...

Fairy 2 Ways

>> Tuesday, April 14, 2020

Hi Everyone!

These magical little stamps in the form of fairies and gnomes sure have brightened my days at home. So much so, that I'm kind of inspired to maybe make a fairy garden outside, once things warm up around here.

Both my cards feature the new Fairy with Globe stamp, but in I've chosen to show her in two different ways.

Here I stamped the backgrounds using the Large Original Plaid and the Dandelion Puff in purple and pink ink.  Both the fairy and Toadstool were stamped, colored and fussy cut before attaching them to the die cut circles.  I also added a bit of glitter glue to the globe before choosing the sentiment, which came from the Birthday Candle Burst.


I wanted to make a second fairy card, so I used the same stamps, but colored everything black, so she looks like she's in silhouette.  I colored the background around her a light blue and the ground a grey, and added white glitter glue to the globe and black glitter glue to the toadstools.


I attached everything to a dry embossed panel (Darice) and used the 1 Lined Blessed Day for my greeting.  

If you haven't checked out the new stamps a DRS Designs, be sure to pop on over to the store!

Have a Blessed Day!
Karin 

Read more...

Magical Images and Stencils

>> Wednesday, April 8, 2020

Hello friends!

I have had a wonderful time using these new images from DRS.  On my first card, I used the Tiny Flying Fairy, the Mushroom Line Background, and the Deco Deepest Sympathy.  I sponged on some circles using a stencil.

On my second card, I used the new Peeking Gnome and Gnome One Like You Greeting. I drew my rock wall.  I got some ink on my white background so I stenciled some magical letters and a sun.
Hugz,

Nancy

Read more...

Blog Archive

StatCounter

  © Blogger templates Palm by Ourblogtemplates.com 2008

Back to TOP