Blog Widget by LinkWithin
Showing posts with label Candy. Show all posts

Favorite Peeps!

>> Thursday, April 6, 2023

 Good morning crafty friends!

Today I'm sharing a couple of last minute Easter cards with you.  I've used DRS stamps: Favorite Easter Peep, Simple Easter Bunny, Jelly Bean Jumble, and Splatter Background


Bunnies are fussy cut.  The jelly beans were colored and then I made a mask to show only the jelly beans so that I could use the splatter background with multiple colors.


I used the same Jelly Bean Jumble and Splatter Background for the background panel of this next card as well.
I also used Somebunny Loves You and Big Bunny Face for this card.
Big Bunny Face was fussy cut then popped up.


Thanks for visiting today!

Robin

Read more...

Happy Haunting

>> Monday, September 26, 2022


    I thought it is about time I work on a few Halloween cards. For this card I thought it would be fun to create a candy corn shaped card.

  • To create the candy corn shape, I first cut off one side of the black card stock base. I then used that cut off piece as a template for the other side of the card.
  • Next, I cut down the white card base and again used the cut off black as a template to get the same angle on the white card base.
  • I then added the orange and yellow and turned the white piece over and used my scissors to cut the orange to fit the shape.
  • Once the candy corn was glued down, I stamped the HAPPY HAUNTING HAT - 310F and colored it with copics.
  • I cut the HAPPY HAUNTING HAT - 310F with a circle die cut then cut an orange layer slightly larger and finished with a scalloped black layer.
  • I have a bag of these orange bows on my craft table that I am trying to use up and I thought one would be perfect to add to the front of the card.
    Thank you for stopping by to check out my card this week.

Read more...

Happy Easter Peeps

>> Thursday, March 31, 2022

 Good morning friends!

I've made 2 Easter easel cards today.  This first one features 

Easter Ears Leonard Pig.  I used him with a really cute Tulip embossing folder on the front.  I actually embossed it twice, once white and once pink then cut out the ribbon only from white and glued it to the pink for more interest.

Leonard is cut out with a stitched oval from Rubbernecker, popped up and glued to the embossed panel in the non embossed space between tulips.

For the inside I used the same oval die set and popped up the sentiment Easter Greetings
I added 4 mat enamel dots to the corners that show when the card is open and on display.


My next card features the Simple Easter Bunny.
I also used the Jelly Bean Jumble Background for the front and inside.
The little Nuvo Drops all around the circles reminds me of candy we had as a kids, Candy Dots on a strip of paper...you ate them right off the paper, yes weird! 

The sentiment inside is Favorite Easter Peeps and die cut.  I stayed with the candy dot
designs and matted with yellow then purple/lavender.

I hope you are inspired today.  Go get crafty!

Robin


Read more...

Hoppy Easter

>> Thursday, March 24, 2022

 Good morning friends!


This first card uses the Jelly Bean Jumble Background in the strip element.
My light wasn't very good this day so it might be hard to tell the main colors are purple and yellow
but it's a fun card anyway I think.  I've added pink, green and orange to the mix as well, all the lovely spring colors. 
I also used Happy Easter Everybunny and Sneaky Bunny Flowerpot for this card.
I love the cheery Easter colors on this card the most, makes me happy!


My next card also uses basically the same colors but what a difference the overall look is
when the main colors are blue and white.
For the Jelly Bean Jumble Background I colored all the Jelly Beans in fun Easter colors
then used a reverse mask to stamp the Splatted Background on the Jelly Beans only with pink and blue mostly, some green then after stamping all the jelly beans I decided to do and overall stamping of the Splatter with yellow.  You might think I wasted a step but it really would not have looked the same if I hadn't stamped the jelly beans separately with other colors.
For this card I used the Bunny Face die cut with a square wonky die from Rubbernecker and scallops out of blue from Spellbinders.  The Happy Easter is the same as the one I used for the first card but I just used the top line.  I also used Somebunny Loves You.
Before I glued the background panel to blue I wrapped it with blue ribbon then made a multi-loop bow from sheer blue polka dot ribbon.
The image panel and sentiments are popped up.


I hope these cards give you some inspiration to make some cute Easter cards for your kids or grandkids, maybe even some neighbor kids or children at church.
Have fun and create!
Thanks for visiting today!!

Robin


Read more...

Chocolate

>> Monday, January 31, 2022


I love chocolate and I really love chocolate when there are no extra calories.  My card today features the new LOVE YOU MORE CHOCOLATE GREETING - 1057E. I stamped a portion on white card stock and die cut the ovals. I then stamped the CHOCOLATE CHIP BACKGROUND - 361H with versamark and heat embossed it with copper emboss powder on tan card stock.

The sentiment is popped up on dimensionals and then the heat embossed GIANT CHOCOLATE CHIP - 195D is fussy cut with a added banner and a punched heart.

The inside of the card has the rest of the LOVE YOU MORE CHOCOLATE GREETING - 1057E

Thank you for stopping by to check out my card this week.

Read more...

Loved!

>> Thursday, January 27, 2022


Good morning!
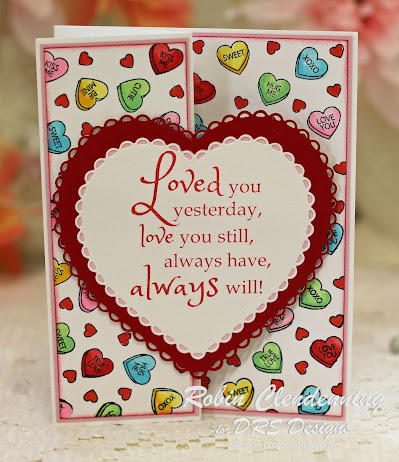
Today I'm sharing a Z-Fold card.
Here in this first photo it is closed.
I used DRS stamps: Candy Heart Background and Loved You Yesterday on
this part of the card.


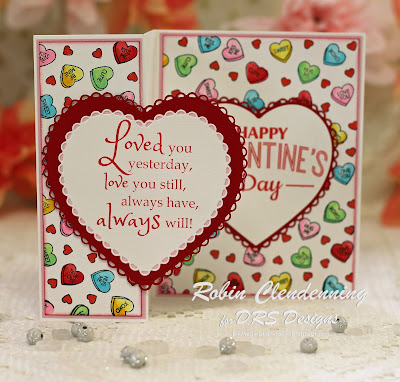
As you open

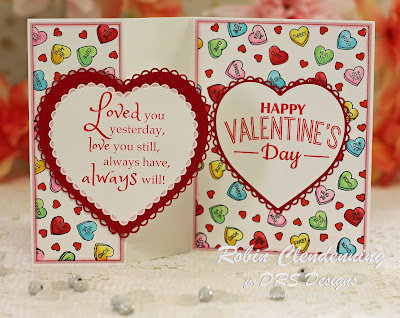
Fully opened you see the 


This is a 4 1/4 X 5 1/2" card when closed.  I scored the left side
of the 4 1/4 X 5 1/2" card at 2 1/8" (half of front) then folded opposite 
of the center fold to form a Z.
I made a 2 X 5 3/8" pink layer and a 4 1/8 X 5 3/8" pink layer for the outer left side and the inside.  I then stamped 2 panels with the Candy Heart Background stamp, one 1 7/8 X 5 1/4" the other 4 X 5 1/4". I colored the hearts with Copic Markers in shades of yellow, red, pink, green and blue.  I then glued the layers to the card in size order.
Next, I stamped the 2 love sentiments using a red ink on white cardstock, cut the front sentiment out with the HC scallop heart, the inside sentiment with the HC plain edge heart.  Under the scallop heart I glued a layer of pink cardstock.  I cut the next size up scallop heart from dark red then glued it to the bottom under pink.  For the inside I used the scallop heart fitting the smaller plain edge heart.
I used the inside heart to the center of the inside of card.
The outside heart was popped up on one side (left side) then only that left side was attached
to the left side of card (with the candy hear background).
Optional, attach ribbon under top heart to go all the way around card and tie at right side to keep card closed until recipient opens.
Hope you like my card, thanks for visiting!
Robin

Read more...

Happy Valentine’s Day

>> Tuesday, January 18, 2022

 Hi Everyone,


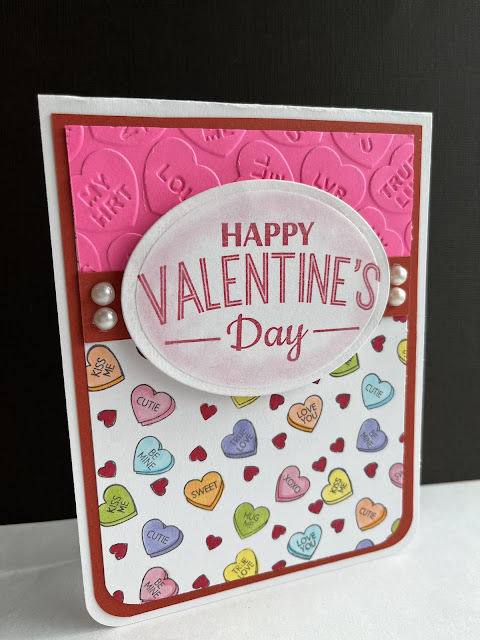
I was inspired by my design teammates past cards and decided to color up some Candy Hearts for the background on today's card.  They're easy and fun to color, so I simply added a matching embossed background (Darice) along with the new Double Line Happy Valentine's Day Greeting.  A few half pearls completed the look.


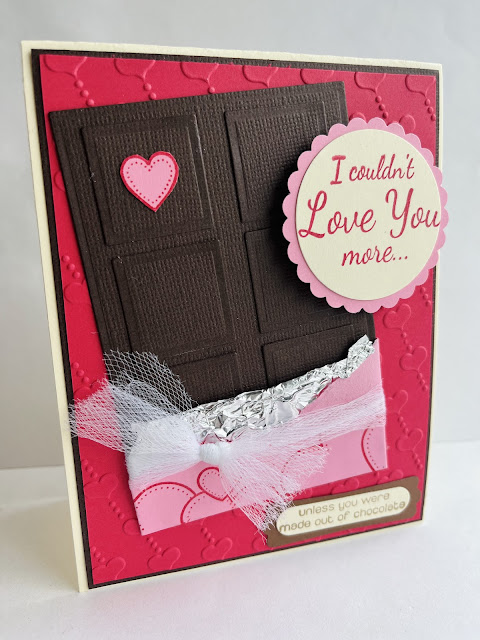
I couldn't resist making another chocolate card.  Last week I made bon bons on my card, and here is a regular old chocolate bar.  I'll take chocolate in any form!

I used my rectangle and square Spellbinders dies for my bar, and I wrapped it in foil and some pink paper that I stamped using Scatters Hearts.   For embellishment, I stamped and fussy cut a heart, and wrapped the bar in a piece of tulle.


I attached my candy bar to an embossed heart background (Darice) and used the new Love You More Chocolate Greeting that I divided into two parts, using some punches.

Thanks for visiting!  Be sure to stop on over at the DRS Designs store and see all of these stamps and more!

Karin


Read more...

Candy

>> Tuesday, January 11, 2022


Hi Everyone,

I'm featuring the new Cheap Chocolate Eve Greeting on my Valentine card in today's post.  I love any kind of chocolate, so I decided to make some bon bons to match up with it.   

I used a 1 1/4" circle punch and then sliced off the bottom portion to form the little truffle, and I did the same to the sentiment.  The cream colored white ones I dry embossed and the brown chocolate colored ones I left plain. I added a punched flower and little hearts to top them off.  The hearts were fussy cut from the Candy Heart Background. 


All the pieces were attached to the pink background that I stamped using the Chocolate Chip Background and pink ink.  To finish it, I added a strip of lace to fancy it up!

This is just a quick birthday card I made for my sister in law's 60th birthday.  Unfortunately any large celebration had to be scrapped due to Covid, but my niece planned an intimate wine tasting dinner for her, and the extended family and friends sent in videos.  Of course I realized I forgot to take a picture of it until I was getting ready to send it, so ignore the weird background...lol.


Here are the stamps I used:


Pour Me Bottle and Glass


Bunch of Grapes


Magnificent Birthday Greeting


Thanks for stopping by and have a great day!


Karin

Read more...

Candy Heart Wreath

>> Wednesday, January 5, 2022

 Hello Crafty Friends!


You know how I love to turn an image into a wreath, and these candy hearts from the new Candy Heart Background are perfect for a wreath!

The background was made by scribbling alcohol ink marker on a Ziplock bag, dropping on rubbing alcohol, and then pressing the paper into the mixture.  I let my grandsons do the scribbling and pick the colors.  The candy hearts were colored using alcohol markers, and then they were fussy cut.  I added the "happy" from the new Double Line Happy Valentine's Day Greeting (the rest of the greeting is on the inside). 

Extra Supplies: tile embossing folder (SU!) and Funky Wreath thinlet die (Tim Holtz/Sizzix). 

Valentines Day is just around the corner!

Hugz, 

Nancy


Read more...

Happy Easter Speckles!

>> Thursday, April 2, 2020


Good morning!
Easter is coming soon, are you ready with your cards?
My grand kids love colorful candy in their
Easter baskets so I thought I'd make some speckled
Jelly Beans for this card. I used the Splatter Background

To make the Jelly Beans spreckled.  I needed to make a mask first
but then it was very easy using a few different colored inks.
and out.
Inside


My next card uses the Splatter Background again, this time for one of the eggs.
I made a mask for this card as well.
The other stamps used were: Easter Egg with Bow
I love these colorful cards and I know kids of all ages will too!
Thanks for visiting today!
Robin

Read more...

Candy, Hearts, and Rabbits

>> Wednesday, January 22, 2020

Don't you love to play with new stuff?

I finally broke down and bought some more Distress Oxide inks this weekend.  I immediately made a sheet of ink/spray/smash page, and then made these fun creations from it.

I used a previous sheet of green ink/spray/smash paper to make my hills on this Easter card. The die cut bunnies are from Impression Obsession and the greeting is the DRS Designs Happy Easter Everybunny.
I used a new die to get this fun hunter, dog, and bird die cut I used to cover this $1 candy box.  I had theDRS Designs On My Mind greeting out so I used it.   
Lastly, I made a Valentine's card using the Hugs, Kisses and Valentine Wishes greeting.  I cut a few hearts out of my leftover background paper.  

I love the pink and yellow colors on these creations, they work really well for Valentine's Day and Easter. 

Hope your week is going well!

Hugz, 

Nancy

Read more...

Christmas Tag Trio

>> Friday, December 13, 2019

by Julie Warner - The Write Stuff

Happy Friday!
I hope your week has gone well! And I hope you're ready for the holidays! I'm about 95% there. Almost all of my presents have been sent, almost all of the cards mailed & I was actually early getting the tree & decorations up. Since I don't need any more Christmas cards, I thought a few Christmas tags would be helpful. I love Christmas tags & every year I vow to make some, but hardly ever have the time. I also love Prismacolor Pencils on kraft so I'm combining those two. Tags are little quicker to make than cards but like potato chips, you can never have just one.  So I picked three images that would fit on the tags, stamped & colored w/ the Prismas, then added a little detail die cutting on the bottom edges. It's easy & to me, dresses them up a bit. Plus there's plenty of room on the backside to write To & From.

Thanks so much for stopping by! Have a great weekend.


Supplies:
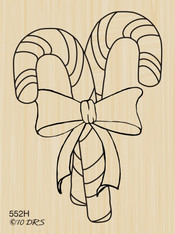
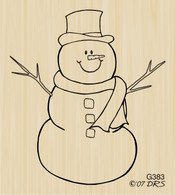
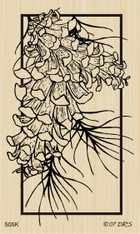
stamps: DRS Designs - Candy CanesSimply SnowmanPinecone Square, Snow Bg 
paper:  Staples 110# white, kraft
ink:  Memento tuxedo black, Colorbox frost white pigment
accessories: Misti, Rubbernecker  Tag StitchBorders 1Borders 3 dies, Spellbinders A2 Curved Borders 1  dies, Prismacolor pencils, 


Read more...

Boo!

>> Saturday, September 15, 2018

Welcome!!

I have a sneak peek at a new Halloween image today - yeah!    We'll actually be releasing 7 new images that will be available on our website on Wednesday.  Our new Boo! image is probably my favorite, but I will admit that once I got all the new images home and started stamping I didn't stop until I had used each and every one of them (think 11 1/2 hours of stamping fun)!


My card today is using our new Boo! image that I stamped on a piece of scrap card stock, cut out the center portions with a blade and then colored (using watercolor pencils) and fussy cut.  I adhered the Boo! to a piece of yellow card stock and then embossed some white and orange paper with my swiss dots folder and attached them above and below and trimmed them to fit.  For my candy corn borders I stamped our Candy Corn Border on white 6 times and colored and fussy cut just the 3 pieces of candy corn that are overlapping each other and attached them together covering my paper edges and mounted all on white and then a folded bright green folded card.

Thanks so much for stopping by!
Sue

Read more...

Valentine Wishes Treat Bag

>> Saturday, January 20, 2018

Welcome!

I have so many kids in my life that when I think of Valentines I can only think one thing...chocolate!

Our new Hugs, Kisses and Valentine Wishes got me thinking outside the card and I decided if I started reaaallly early (like now) I just might have time to make all the kiddo's a Valentine treat!

Here's a trick I read on the internet before Christmas.... purchase leftover Christmas Kisses at a discount if possible.  You  can use the red and silver for Valentines and save the green ones for St. Patrick's Day, unless you snack on them like I did ;)


This ended up being much simpler that I thought :)  The clear plastic bags I found are approx. 2 1/4" wide so my paper size is 2 1/2" x 8 1/2" folded at the 2 1/4" mark.  I stamped our new Valentine Greeting on the folded portion using red ink.  I used a portion of a scalloped rectangle to die cut the bottom and then layered red card stock behind it.  For the long portion in back of the kisses I tried several different backgrounds but just wasn't happy with any of them till I stamped our You're so Sweet greeting along the bottom and simply sponged on some pink along the edges.  My initial thought was to staple the bag inside, but realizing one of if kids is only 2 years old and not wanting to ruin my artwork I simply used double stick tape on both sides of the clear bag and taped it all together.

Thanks so much for visiting!!
Sue

Read more...
Zombie Candies

>> Wednesday, September 14, 2016

Now that we have had a few cooler mornings, I am starting to think of some fun Halloween and Fall decorations and treats I can make up  cheaply (cheaply is the key here).  I bought a Jumbo Salad from Olive Garden the other day and they gave me a ton of those yummy mints.  I thought they would work well in my latest project (I will show it to you in the new challenge this Thursday). 


I stamped my paper with the Accent Bats stamp and then cut my paper 2 1/2 inches by 1 1/4 inches.  Then I made score lines at 1/2 inch, 3/4 inch, 1 1/2 inch, and 1 3/4 inch. I sponged on the color and then used adhesive on the last flap to keep it closed.  I stamped the Beware of Zombies sign, sponged on some color and then glued it down. 

These were super fun to make!  I am going to get some Andes mints and make more.  Look how cute they look in my Halloween table decoration I made a few years ago. 


Hugz,

Nancy


Read more...
It's Beginning to Look a Lot Like Christmas!

>> Monday, August 31, 2015

Today we thought we'd show you a little Christmas card recap..since Shelia is on vacation (& we're sure she's having a wonderful time!), we have some beautiful Christmas cards using this month's new images as well as some older favorites. Sit back & enjoy the show!
Shelia

Nancy
Robin
Janett
Sue
Jennifer
Karin
Julie

Shelia
Janett

Robin
Jennifer
Sue
Karin
Nancy

Julie

It's not too early to start your Christmas cards! Plenty of ideas to get you going, right here. If you'd like more ideas, just click the "Holidays-Christmas" category over on the left side bar. Or just click HERE (I've linked it for you).

Have a great week!


Read more...
Blog Archive

StatCounter

  © Blogger templates Palm by Ourblogtemplates.com 2008

Back to TOP