Blog Widget by LinkWithin
Showing posts with label Gift Box/Gift Card Holder. Show all posts

Birds and Birthdays

>> Tuesday, January 15, 2019

Hi Everyone,

My sister in law and her husband have birthdays a few days apart, so I made them matching cards for the celebration.  Tony is a bird lover, so I'm always on the hunt for a bird stamp I haven't used for him before, and it's a good thing too; he said he's saved all of them throughout the years! I'm not 100% convinced that's true, but both of these bird stamps were new to both of them :)

I took inspiration from last weeks card for these, using an embossing folder with flourishes and birds on it, and the original sentiment ends with the word, "sweet".  I just swapped it out for "tweet", to match the bird theme.

Here are the stamps used:
Bird Feeder
Sweet Birthday Greeting
Extra Tweet Birthday Greeting


And here is the inside and the stamps used:


My sister in law's card is virtually the same; except I made it a little girly using glitter on the snow and a ribbon.  

Here are the stamps used:


And the inside stamps:


At the last minute, I realized I didn't have a birthday gift bag (just lots of those Christmas ones!), so I took a plain navy bag with white trim and jazzed it up with a row of gems, some die cuts and the big Brush Happy Birthday Greeting.  Hurray! DRS Designs to the rescue!


I literally took the photo after putting it together before running out the door to the party, but I think everyone was more impressed by the bag, than what was in it...lol :) 

Thanks for stopping by!

Karin

Read more...

Coffin Box-By The Light Of The Moon

>> Saturday, September 10, 2016

Good morning!!
More moonlight fun here!


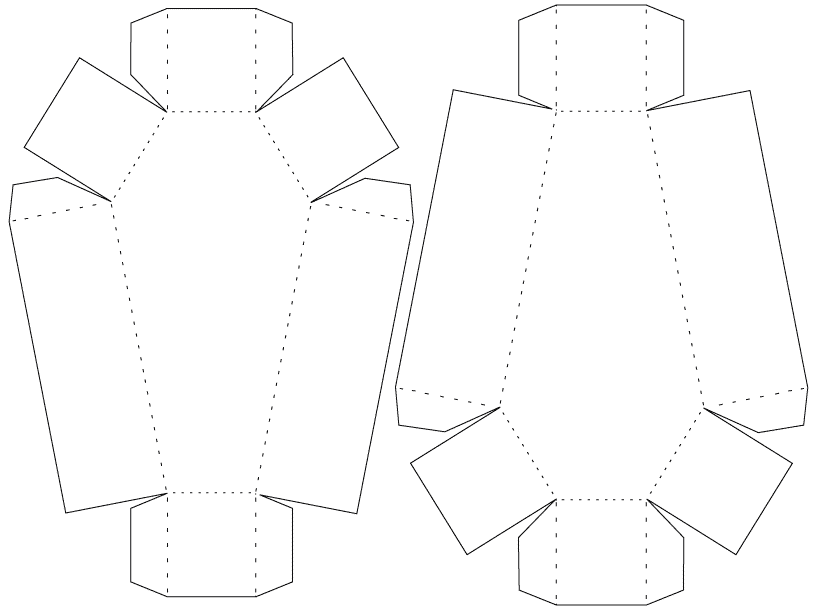
Find the template for the coffin box HERE.  I found it on Pinterest at a site called Bird's Cards.  The trim around the sides of the box is Halloween colored chevron Washi Tape.  I used some moss as filler for the bottom part of the box since I don't have any candy around the house!!


This is the perfect box for Halloween candy for a party and your favorite kid!
The box is very easy to make.  After making it, I used the pattern again to make a top and just trimmed it a bit smaller.  I drew the top onto a scratch pad and then stamped by images onto it first to plan out which to stamp where and in what order.  Once I was satisfied I used and stamp aligner to stamp my box top.
I masked as I went stamping my image onto post-it notes and cutting them out for my mask.
Once finished I punched a circle from Post-its for my moon and sponged it in for light source then I started coloring.
I have to admit it took a while to color because there is quite a lot going on but when I was finished I was very happy with the results, I just think those zombies are too cute!
Hope you are having a great weekend!!
Thanks for visiting and I hope you give this one a try!
Robin

Read more...

Gift Card Holder

>> Monday, December 23, 2013

Happy December 23rd!! Christmas is almost here. I hope you are not in a panic and can relax and enjoy the holiday. Today I want to share a gift card holder that I created for my mom. She loves poinsettias so I used the Poinsettia ribbon slide as a belly band to hold the card closed. I think she'll like it.


I started with a 2.5 x 7 inch piece of red CS and scored it at 2.5 and 5 inches. The front was stamped with the Splatter background in VersaMark ink. The plaid was created by stamping the open plaid in Real Red ink and Handsome Hunter Ink. I used a Sakura Silver Gelly Roll pen to add some silver lines to the plaid background. This was layered on some green CS. The poinsettia slide was stamped in Memento Black ink on white CS, colored with Copics, fussy cut and highlighted with a Sakura Stardust Gelly Roll pen. Some sheer red ribbon was used for the belly band.

Here's a look at the inside.


The edge was punched with a MS snowflake border. I added a piece of white CS that was punched with the same border and stamped with the sentiment in Real Red ink. I added a couple of the red snowflakes punched from the border with white half pearls to finish the look.


I apologize for the color of these photos. I don't know why the red ends up looking so orange. It really is a very pretty shade of red!  I'm sure there's some way to remedy this, but I don't know what it is. :-(

Thanks for stopping by today and have a very Merry Christmas!!

Until next time,
shelia


Read more...

Congrats

>> Sunday, April 22, 2012

Good Morning, hope you are all having a great weekend. Today I wanted to share with you a cute little gift card. These would be great for the graduate in your life.


I used the Large Original Plaid 011D, and black ink to create the background. I stamped the Congrats Address Frame 1152K, and the Gothic Gift Card Greeting 018D, and cut it out. The edge was sponged with Distress ink Peeled Paint.


Have a wonderful day,

Janett

Read more...

Gift Card Holder

>> Tuesday, April 17, 2012

Hi Everyone,

Since the current challenge here at the DRS Designs blog is "Make a Gift Card Holder", I thought I would go ahead and show off another one that I made using some of the new stamps that were released.

I used a 12 X 12 piece of card stock and folded up a small lip at the bottom of the card to hold my gift card.  Obviously I took my color inspiration from the colors on the gift card.  I used the Flying Cash background stamp to make my papers and added some ribbon, rhinestones, flower and brads in coordinating colors.


The Congratulations and A Gift Card for You are both in the new releases section at the DRS Designs store.

There's still time to join us for this challenge!  I can't wait to see what you've made :)

Karin

Read more...

Challenge #20-Gift Card Holders

>> Thursday, April 12, 2012

Hello and Welcome back to Challenge Thursday!


Big Congrats goes out to


Heidi-Mari


You are last week's Food For Thought Challenge Winner! Please contact us at info@drsdesigns.com to claim your prize.


Anyone up for another challenge? With Mother's and Father's Day, Graduations and the wedding season right around the corner, gift cards are sure to be popular. Show us your
Gift Card Holders
and you could win a $10 Store Voucher to DRS Designs!


Below you will find Gift Card Holders created by the DRS Designs DT. **Pay close attention to many of the stamps used on these projects. Some of them are brand new from DRS Designs and will be available for purchase this Saturday April 14th, 2012. Check the New Release page to see them as soon as they become available.


Thanks for playing along and Good Luck!

Karin

Janett

Shelia
Jennifer E.


Julie

Sue


_________________


Read more...

A Card and Gift for Dad!

>> Friday, May 21, 2010

Happy Friday! Hope you're all looking forward to the weekend. I know I am!

I've been busy this week finishing up DT requirements for the last batch of new releases from DRS Designs.  The project I have to share with you today shows off 4 of the new stamps!

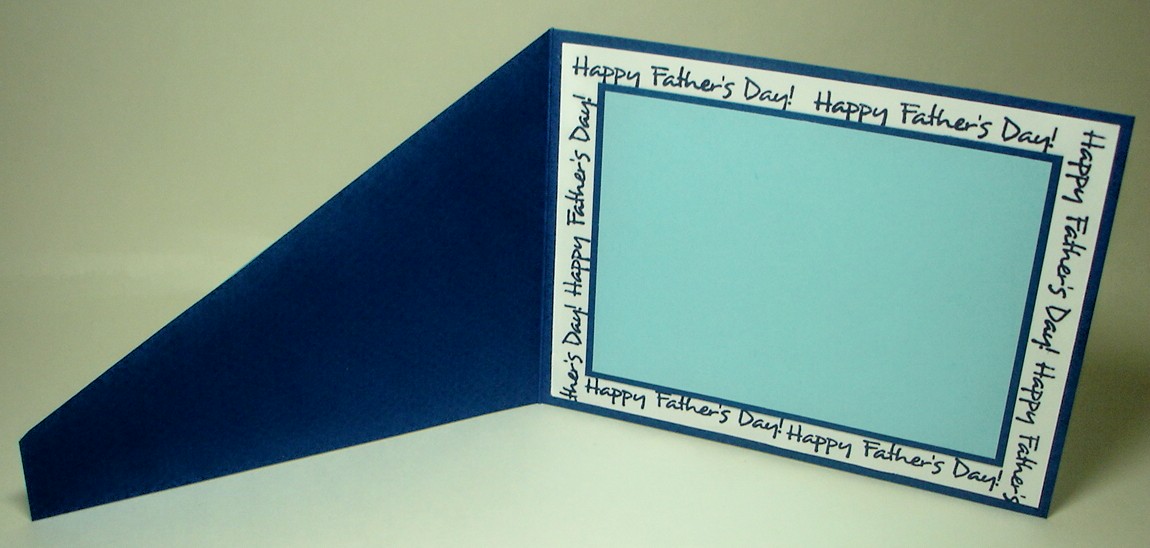
This is my Father's Day card and gift for my Dad.  The front of the card was cut on a diagonal and layered so that it formed a pocket.  I stamped the Remote Control Greeting (K288) on the front and embellished it with the King of the Remote Greeting (C290) and ribbon. I colored the crown with yellow Copic Markers and added Yellow Stickles to give it a bit of sparkle!

The above picture shows you where the pocket was created a little bit better, now that The Ultimate Remote (K292) has been removed. I know it's a bit hard to see on these photos, but that remote is hilarious!  Some of the buttons on it read:
Snow Blower
Lawn Mower
Leaf Blower
Beer
Pizza
Nachos
Backrub
Naptime
Now you can see why it is the perfect compliment to the Remote Control Greeting!


I used just a portion of the 10 Mile Father's Day Greeting (G280) to create a frame around the inside of the card.  This left plenty of space for my own personal message.


And finally, the best part of this project--the gift for Dad!  The Ultimate Remote is actually a gift card holder!  What could be a better gift for my Dad on Father's Day then a FREE dinner from his favorite Daughter! *wink!*

Thank for visiting today!

Smiles,
Jennifer

***PS: Don't forget about the Spoon Full of Sugar Blog Challenge that DRS Designs is sponsoring this week.  You have until Monday May 24th to create some that is Cute and Girlie to be entered to win a prize from DRS Designs!

Read more...

Show Your Appreciation!

>> Tuesday, May 4, 2010

By Debbie Seyer - A Peek Into My Stamping Room

Did you know that this week is Teacher Appreciation Week? Well, I found out about it and got busy. I wanted to give my daughter's teacher something I know she will love!


This box is made from a template I downloaded. After cutting and scoring, I stamped the Chocolate Chip Background using Rich Cocoa Memento ink. I stamped the All That Box of Chocolates greeting onto white cardstock using the Rich Cocoa ink and cut/embossed using the Mega Curved Rectangles Nestabilities. The sentiment actually has Thank You underneath but I did some selective inking and didn't use the thank you portion. Since I know this teacher loves chocolate, I think she will get the idea, don't you? This is the last of my Teacher Appreciation gifts that I will be giving. I sure hope my kid's teachers enjoy them! Tell a teacher you appreciate them this week!

Read more...

Teacher Appreciation Gifts!

>> Sunday, April 18, 2010

By Debbie Seyer - A Peek Into My Stamping Room

Well, the school year is almost over and its time to thank those wonderful teachers who teach our children everyday. It's got to be a hard job, don't ya think? I know its not a job I could do! So to show my appreciation, I have been making some gifts this week so I will be ready for Teacher Appreciation Week which is the first full week of May every year! Fun! Here is a set of cards I made that I think any teacher will love to have!Each card uses a different sentiment but I kept the colors and patterned paper all the same! Here is a close up of the cards!


This card uses the Get Well sentiment from the Get Well Prayer stamp. Inside the card, I stamped the rest of the sentiment to complete the card. I used various dies from Spellbinders to dress up this simple card.

This birthday card uses a new release called Happy Birthday Arc for the sentiment over the cute Picnic Basket. By using paper piecing for the basket and the tablecloth, I tied all the colors together! The rest of the image was colored using Copic markers. I love that picnic basket!


I'm not sure how well this card fits with the rest of the sentiments but I just couldn't help myself. The Coffee Trio stamp is just cute and the Espresso-ly Wonderful sentiment just sets it all off, don't you think?
My final card uses the With Sympathy sentiment and the new release Circle Spiro Design stamp. As you can see, I used the same Kraft cardstock base and colors for all 4 cards. I also made a box to hold the cards!

DRS Designs has a stamp for all occasions! Be sure to show your appreciation to a Teacher during Teacher Appreciation week! Have a great Sunday!

Read more...

XOXO for Your Sweetie!

>> Tuesday, January 12, 2010

By Debbie Seyer - A Peek Into My Stamping Room

Have you thought about what to make your Sweetie for Valentine's Day? Well, here is an idea using some cute new DRS releases!


I made a chipboard coaster box for his favorite chocolates and a matching card! Directions for making the chipboard coaster box can be found on Splitcoaststampers. The sentiment on the box is the Script Happy Valentine's Day (F357). I stamped it onto a Classic Heart Nestabilities in Tuxedo Black Memento ink. I mounted that onto a black Scalloped Heart Nestabilities and attached it all to the box using some really strong red-line tape. I stamped the OXXO stamp (G188) onto white cardstock using red ink. I cut the OXXO apart and attached it to the box as you can see in the above picture.

For the card, I stamped the Hugs & Kisses Valentine Greetings (G190) onto a piece of white cardstock. I cut/embossed the Classic Scalloped Frame from Spellbinders out of black cardstock and centered it over my sentiment. I stamped the OXXO stamp(G188) using red ink and cut it out whole this time.

I think my hubby will love this on Valentine's Day, if I can keep it hidden! LOL Be sure to check out all those great new releases for Valentine's day! They are wonderful!

Read more...

So many stamps, so little time!

>> Saturday, November 14, 2009

by Sue

Welcome! I'm happy to say I had extra stamping time this week! I had a lot of fun with several of our new images and a couple of our classic images too!

My first card is using an idea I had a couple of weeks ago when I ran out of baby wipes and had to open a new package. I use baby wipes that don't come in a plastic bucket but rather in a plastic bag with a flip top lid. As I was preparing to toss said bag and flip top I somehow asked myself if there was something I could do with it and well, now I know there is!

This is how it came out ~


This picture shows the side view, and where the flip top is ~

Picture number 3 shows how the flip top is actually the perfect size to hold a gift card!


Last but not least this picture shows what's under the gift card :) ~

This was a perfect project for our new Address Label Frame (K107). The stamp was really designed to be stamped on your envelope and have an address either written in or a sticker placed there. I love getting 2 uses for the price of one!

Stamps: K107, B1014, D096 and H688
Paper: White card stock, bright blue card stock, silver mirror card
Ink: Vivid turquoise and ultramarine


My next project was the most challenging - I wanted to get the background just right, and it took several tries!

After I assembled the blue and white card stock I stamped both with my snowflake background stamp and embossed using my clear embossing powder/ultrafine glitter mix - I love that stuff!!!

For the 3D golf ball I used a product called "Snow Writer" I purchased it at Walmart about 3 years ago. It's gotten a little thicker and it was easy to make a ball and let it dry overnight. I glued it to my card the following day!

Stamps: K448, P481, H015, F229
Card Stock: White, bright blue, olive green, red
Ink: Vivid turquoise and black, versamark
Embossing Powder - I call it Susie Mix 1


Card #3 ~ There's just something about our new Christmas mouse that I just love!


The only unusual thing I did on this card was after I stamped the plaid in red, I used a pink marker and added pink lines to the red. I even colored on a few squares pink too.

Stamps: P631, E134, E140
Card Stock: Red, White and Pink
Ink: Vivid Hot Red, Colorbox Black

Thanks for stopping by! Have a great weekend!!!

Read more...

It's Coming...

>> Saturday, October 25, 2008

posted by: Cathy

you know, that time of year...the gift giving season!!!! Much loved and dreaded at the same time for some of us! So what do you do when you need to give a gift but don't have any idea what to get???? YES!!!! You give a gift card! Of course you can't just give the gift card you have to package it up just right...right? Well, that's why I'm here today...to show you an awesome way to package your gift card AND if you need to mail it, it shouldn't cost much if any extra postage!!


This is a standard size card....4.25 x 5.5in. The card itself opens like a normal card. The gift card enclosure is on the front of the card...this way you have plenty of room on the inside to write a message. I used the new snowflake backgrounder on the shimmer green layer...I really like the way the flakes look in black on this green. This bow stamp is so cool (hint - you could use this stamp year round if you just snip off the tag after stamping ;-) ) I simply made my package from the black and red panels and then stamped the bow three times. I layered the first one in its entirety on the package, then I cut out just the bow portion and adhered that with pop dots and finally I cut out the knot and adhered that with a pop dot. I colored along the ribbon border with a marker. I stamped the tag portion on a scrap and adhered that with a pop dot too. The flakes on the "package" were stamped in versamark ink.

So, you're probably wondering how the whole gift card enclosure thing works...here is an inside view...


This sentiment is a new release and is perfect with this bow image. I simply cut my white paper 8 x 3.75 in. I then scored at 2.75 and 5.5 in. The gift card fits in snugly (you could make it a smidge wider if you want). A circle punch was perfect for the cut out. I adhered the sides together with very thin strips of two-sided tape. I adhered it to the card front, inserted my gift card and my gift is all ready to go!!

I hope this inspires you to get a jump on your holiday gift giving/making!!!
Be sure to stop by again on Monday...we have another challenge in store for you. You won't want to miss this one...anyone can play along.
See you soon...

Read more...

Blog Archive

StatCounter

  © Blogger templates Palm by Ourblogtemplates.com 2008

Back to TOP