Blog Widget by LinkWithin
Showing posts with label Plaids. Show all posts

Plaid Background

>> Tuesday, November 7, 2023


Hi Everyone,

It's that time of year when I pull out the Woven Plaid background stamp, because it makes the best, fall and winter backgrounds.

I colored and fussy cut my Give Thanks Pumpkin Stack and layered them onto a die cut rectangle.  I took inspiration from it when it came to choosing the colors for the plaid background.  


I also looked to my image for embellishment inspiration and added a ribbon, sunflower and matching fall leaves.

I'm getting excited for Thanksgiving.  Not so much the cooking part, but the eating part for sure!  

Have a great day!
Karin

Read more...

Hot Diggity!

>> Thursday, May 19, 2022

 Good morning! 

Another doggy card for you today, isn't he just adorable!! Let's Play Puppy, Dog Bone, Dog Paw Background, Small Dog Print and Hot Diggity Dog Birthday

I used the dog print like a dog tag and for the greeting, I reversed the sentiment.  I also used one of my favorite sketches.
The bone was inserted in the puppy's mouth after I made a little slit.


My next card uses the happy Diving Frog Legs...creative license saying 
the frog is happy, LOL! I used part of the Woven Plaid for my background paper, Happy Happy Happy Day for the decorative strip behind the frog square, Village Rocks/Pond Edge
with the diving frog and Have I Toad You sentiment (to go with the happy happy happy day!!)

I used Liquid Applique and glitter on the splashes. Also added 3 enamel dots...this is one very green card! LOL!
Thanks for visiting today!
Happy crafting everyone!!
Robin

Read more...

Plaid Christmas

>> Tuesday, November 16, 2021

Hi Everyone,

I decided to feature the recently released Plaid Fir Tree on my card today, and I began by stamping and fussy cutting 3 trees.  Once they were cut, I turned them over and stamped them on the opposite side, and then glued them together by adding glue down the center of the trees.  

I attached my three dimensional tree to a die cut and plaid embossed panel, which was attached to a background made using the Woven Plaid Background stamp. 

A die cut border embellished with enamel dots was added at the bottom and I finished the card with the new Tis the Season Greeting.


Here is a close up of the tree...


Thanks for visiting and be sure to check out all of the newest holiday stamps over at the DRS Designs store!

Karin

Read more...

A Plaid Christmas

>> Wednesday, November 10, 2021

Hello Crafty Friends!


I am loving the fun new Christmas images and greetings at DRS Designs. You can make up some easy CAS cards for the holidays. 


This Plaid Fir Tree is super fun and easy to dress up with a bit of bling or sparkles.  I stenciled my plaid background lightly and then stamped the tree on top.  Next, I added the new Small Season of Peace Greeting and some Stickles and it was done. 

I used the same tree (stamped very lightly) and the new Christmas Star Merry Christmas for the inside. 
Hope you have a good start on your Christmas cards, but if you don't, these new stamps can help you get a bunch done quickly. 

Hugz,

Nancy


Read more...

Celebrating Autumn and Birthdays

>> Tuesday, October 12, 2021

Hi Everyone,

Even though it's so warm outside and doesn't feel like October here, I'm celebrating fall with my card share today.

I have a love of hot drinks, so I made a fall themed coffee cup that I paired with a cheerful greeting.

The cup and die cut embellishments were layered onto a woven, scarf themed background.


Here are the stamps I used:


I needed a quick birthday card, so I took inspiration from this card and simply used monkeys instead of cats, along with a fun greeting that I split in half.


Here inside is the rest of the greeting and another monkey :)


Here are those stamps:


Michelle Monkey


Walk on the Wild Side Birthday Greeting


Want more stamps and project ideas?  Visit the DRS Designs store!


Thanks for stopping by! 

Karin


Read more...

Blessings!

>> Thursday, September 16, 2021


Good morning!
This was a fun card to make, I started out making a plaid panel with 
Woven Plaid just to make these leaves then I thought
a border (Lawn Fawn) would be fun too.  I made the 
inner border with a Memory Box die.
I used the Pumpkin Bouquet for the main image
and the Open Leaf for the plaid leaves.
The sentiment is Thanksgiving Blessings.


I added copper nail head stickers in the corners and copper Nuvo on the leaf stems and the sentiment.


My next card uses a leaf frame die from Memory Box.
I cut it 3 times in different colors of orange then inserted the 
leaves back into the frame.
Yes, here is the rest of that plaid panel, I embossed this part and glued it
under the leaf frame.
I used Give Thanks Pumpkin Stack and an oval die from MFT for the image/sentiment.
That's about it!
Thanks for visiting now go get crafty!
Robin

Read more...

Fore You

>> Friday, June 11, 2021

by Julie Warner - The Write Stuff

Happy Friday!

I hope your week has gone well! We've had warm days & a few afternoon rain storms here. The cicada invasion I think is winding down. Gosh..talk about loud! Apparently only 3 counties in N. Georgia had the invasion & my county seems to be the epicenter. 

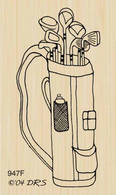
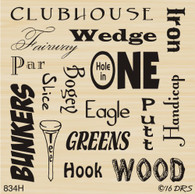
My card today features a wonderful golf bag w/ a split bg of golf words & plaid. The golf bag & greeting were stamped, colored & die cut. I had a dk forest green panel already cut so I used it behind the golf bag. The golf words were stamped w/ Kaleidacolor pad called fresh greens. The plaid bg was made using the same Kpad. I sponged on some of the lighter greens then stamped the plaid on top.

Here's the inside & below it are the Copics I used.


Thanks so much for stopping by! Have a great weekend!


Supplies:
paper:  Staples 110# white, forest green
ink:  Memento tuxedo black, Kaliedacolor fresh greens
accessories: Rubbernecker Rectangle Stitch  dies, Misti, Spellbinders labels 8 die, Copic Sketch Markers

Read more...

Chicks and Bunnies

>> Tuesday, April 6, 2021


                                                                        Hi Everyone,

 I last weekend was a nice one for you and yours, and that you are in Spring time mode now!  Once the Easter holiday is past for me, it means stepping outside and getting the yard ready for warmer weather.


While these two cards celebrate Easter, this cute images are appropriate for any spring time card! 


Here I made a background using the Large Original Plaid stamp in pink, green and yellow inks.  The Chick in Nest was stamped, colored, die cut and matted.  The Favorite Easter Peep Greeting was a cute match.   


This was a last minute card made from left over scraps from my craft table.  I had an extra Tails Up Bunny that I couldn't use when I made this card, so I attached it to a background stamped using the Splatter Background stamp. 


I had a scrap of pale green cardstock, so that was attached behind the bunny and I added the 

Thanks for visiting the blog today!

Karin


Read more...

St. Patrick's and Spring

>> Tuesday, March 16, 2021

 Hi Everyone,

I'm celebrating St. Patrick's Day and the imminent arrival of Springtime and the Easter holiday with my cards today.

This card has a shamrock background that was stamped using the Shamrock of Shamrocks stamp.  
I chose the Irish Blessing for a greeting and added the tiny Mushroom House because I thought it  matched the words in the sentiment.  I anchored it with a strip of white paper tied with a green ribbon and finished it off with a few gems.


New stamps have arrived for spring and Easter and I was so looking forward to stamping with this adorable Tails Up Bunny stamp!  Isn't it the cutest??!  

I stamped and colored them up, using some glue and flock on the tails to make them soft.  I punched them out and made the background while they dried.  

I used the Woven Plaid stamp, which was cut apart, so that I could stamp in multiple colors.  I used 2 kinds of pink, green and brown.  The embossed strip was layered onto a lace border and attached that to the background along with the bunnies.  The Happy Tails to You Greeting was a natural fit, and I added a die cut butterfly and pink gems for embellishment. 


And here is a peek at the simply stamped inside. 

Stamped used are;


I'm so excited for you to see all of the new stamps! The design team will be posting their cards, but you can see all of the stamps now, by clicking over to DRS Designs!

Happy stamping, happy spring!  Happy happy everything!

Karin


Read more...

Blessings for You

>> Sunday, February 21, 2021


My mother in law loves this card. She is a quilter and this brought a huge smile to her when I showed it to her.

For this card I used a few stamps and I either stamped them with green or black or heat embossed them with white. I used POLKA DOT BACKGROUND - 688P, SHAMROCK BACKGROUND - 326H, LARGE ORIGINAL PLAID - 641P, SMALL SHAMROCK GROUP - 749A and the new Shamrock of Shamrocks 407M.


I used several different greens really just had fun playing with the layout and all the different variations of the hexagon and glued them down. Once the background was created I stamped the new Blessings on St Patrick's Day greeting 372E and die cut the  sentiment popping it up on dimensionals.

I finished off the card with some scattered sequins.

I have a second card for you today.


In February I have 1 day where 6 family and friends share the same birthday. So I needed to get a head start on birthday cards for that day.

I thought this GOLFER DUFF - 457L image would be perfect for a quick clean and simple card. I stamped the image and colored with copics and added the BALL ON YOUR BIRTHDAY GREETING - 207D.

Nest I masked the image and sponged some clouds around the image.

Thank you for stopping by to check out my cards this week. I hope you have a wonderful week.

Read more...

Thanksgiving Sunflowers

>> Saturday, October 10, 2020

 Welcome!

What is better on a cool fall afternoon to be warm and cozy inside sitting at my stamping desk?  It definitely inspired my card today


I started my card today by making getting out my Woven Plaid stamp and my yellow and orange stamp pads. I used the plaid that I had previously cut into 3 pieces and used the largest 2. Next I stamped our new Sunflower Bucket on a scrap of white card stock and colored it using a combination of  watercolor pencils and alcohol markers.  Next I stamped our Happy Thanksgiving Arc on white and die cut the oval and sponged the edges in yellow. I attached everything to a folded orange card.


Thanks so much for stopping by!

Sue


Read more...

Happy Thanksgiving

>> Thursday, October 1, 2020


Good morning!
I decided to make a covered front porch today complete with fall
decor.  It IS time isn't it?  October 1st already, wow!
This year will be over before we know it and won't we all be glad?
I sure hope 2021 is a lot better year than 2020.

So today I've used  new and a few older designs from DRS.
The new stamps: Autumn Harvest Chair, Sunflower Bucket and World Changed.
The older DRS stamps: Open Plaid, Floor, and Wood Grain Background

I stamped the chair with fall decor first then masked it and stamped the wood wall 
and floor for my inside panel.  
I stamped the bucket on a separate piece of white and cut it out.  
I stamped the plaid on white with oranges and browns mostly then cut it to fit.
I made a shadow box and then made the roof with little pop up corbels.  I then glued my scene inside before gluing my box together.  I made another back and glued 3 sides so that I could slide a sentiment tag into it.
I stamped the sentiment and glued it to my tag that I made using a decorative
die to embellish to pull.  I then slide it inside the pocket.  A personalized sentiment
can be written on the back of the tag if you want. The tag can slide in and out.
I finished by gluing my bucket to the outside left bottom corner.
Thanks for visiting today!
Robin

Read more...

Trick or Treat

>> Tuesday, August 11, 2020

Hi Everyone,

I have a couple of Halloween cards that feature scenes that were easy to stamp. 

Here I stamped and die cut the Trick or Treaters Last Stop, jazzing up the the scene by stamping the witch using the 4 in1 Halloween Silhouettes stamp.  Adding a mat and some ribbon, I layered that onto a background that was half dry embossed and half stamped using the Woven Plaid.  I finished it off with the perfect greeting using the Small Trick or Treat.

Here I made a cemetery scene by stamping the Silhouette Grave Yard a couple of times, along with the Silhouette Halloween 3 in 1 Tree.  I sprayed the scene with some glue and covered it in a neutral glitter.


For the sentiment, I stamped and heat embossed the Batty Happy Halloween.

Thanks for checking in today!

Karin

Read more...

Fairy 2 Ways

>> Tuesday, April 14, 2020

Hi Everyone!

These magical little stamps in the form of fairies and gnomes sure have brightened my days at home. So much so, that I'm kind of inspired to maybe make a fairy garden outside, once things warm up around here.

Both my cards feature the new Fairy with Globe stamp, but in I've chosen to show her in two different ways.

Here I stamped the backgrounds using the Large Original Plaid and the Dandelion Puff in purple and pink ink.  Both the fairy and Toadstool were stamped, colored and fussy cut before attaching them to the die cut circles.  I also added a bit of glitter glue to the globe before choosing the sentiment, which came from the Birthday Candle Burst.


I wanted to make a second fairy card, so I used the same stamps, but colored everything black, so she looks like she's in silhouette.  I colored the background around her a light blue and the ground a grey, and added white glitter glue to the globe and black glitter glue to the toadstools.


I attached everything to a dry embossed panel (Darice) and used the 1 Lined Blessed Day for my greeting.  

If you haven't checked out the new stamps a DRS Designs, be sure to pop on over to the store!

Have a Blessed Day!
Karin 

Read more...

Plaid St, Patrick's Day

>> Saturday, February 8, 2020

Welcome!

I'm not sure what gremlins possessed me as I sat down to stamp the other night, but I really need to do a couple of Valentine cards for my boys, but somehow I ended up going with Irish.

Ever since Julie posted her beautiful Cherry Blossom Thank You card a couple of weeks ago I've been dying to do something similar.  Thanks for getting in my head Julie - I can use all the help I can get!!


I started by stamping a diagonal plaid on a scrap of card stock using our Woven Plaid and spring green ink.  I then used just the 1/4" strip of plaid (see our tutorial on our "Cut Apart Plaid") and added some yellow ink between the green stripes.  Wanting to add a bit more I then used the smallest strip to add some more yellow directly on top of the fattest green sections.  I layered it on green card stock and set it aside.

I stamped, colored and fussy cut our Everything Irish image and then used just the center of our St. Patrick's Shamrock Scroll by applying masking tape to the scroll parts, inking it in green, removing the masking tape and stamping on a scrap of white.  Once I had all my pieces I layered it on white and attached everything to a folded green card.

Thanks so much for stopping by!
Sue

Read more...

Two Plaids

>> Tuesday, February 4, 2020

Hi Everyone,

As shown by the themes of my cards today, I'm ready for spring!  I say, bring on the sunshine, flowers and all things cheerful :)

My two holiday cards, showcase a couple of plaids that I made using background stamps from DRS Designs.

Here the framed panel was made using the Open Plaid, along with the Small Happy Valentine's Day Greeting.  


My Easter card has a panel that was made using the Large Original Plaid in yellow ink.


The other stamps used are:

You'll want to check out the DRS Designs store right now, because there's a list of retiring stamps.  You don't want to miss out on anything that's been on your wish list!

Sending you sunshine and smiles!
Karin


Read more...

Homemade by...

>> Saturday, December 14, 2019

Welcome!

Did you check out Julies Gift Tag post yesterday?  Are they adorable or what? 

I have another tag for you today - I just came at it from the opposite direction... I am so completely far behind I don't even have time to sit down and make a whole card so I went the gift tag route to attach to some of my home baked treats that I hand out at Christmas :)  At least I'm ahead on something!


I started by stamping our Woven Plaid using red, green and yellow inks. I stamped our Handmade Santa on a scrap of white, colored it  and trimmed it to fit my plaid with just a bit of green layer behind it.  Everything was layered on handmade green tag with 2 holes at the top for my ribbon.

Thanks for stopping by!!
Sue

Read more...

Filigree Pumpkin

>> Saturday, November 9, 2019

Welcome!

Can you believe I'm back?  It's been so long since I have been able to stamp, but I just couldn't let fall go by without making a Thanksgiving card! 


Here's the funny part.... I've had so many stamping ideas running through my head but when I sat down to actually stamp, my mind was a total blank.  It was like I'd never stamped before!  Once I decided on the stamps I wanted to use things got a bit better :)

I started by inking our Filigree Pumpkin using orange ink and using the corner of my green pad for the stem and leaf and stamping it on white card stock, trimming and sponging the edged with yellow ink.  I also tapped the edges on my orange ink pad for a very fine line border.  I was a bit lost until I found a scrap of plaid paper I made last year using our Woven Plaid and yellow and butterscotch inks.  All that was left was to add the Happy Thanksgiving in orange ink and layer it all on a folded orange card.

Thanks so much for stopping by!!  Fingers crossed I'll be back next week :)
Sue

Read more...

Masculine Chirstmas

>> Monday, December 10, 2018


Happy Monday! Hope you had a great weekend and were able to get inky. I'm having such a fun time stamping with the newest images from DRS Designs. I especially had fun creating these cards for today's post.

For the first card I started with a piece of red CS and used the medium size part of the woven plaid stamp to create my buffalo plaid background. My Misti helped me line it up and keep it straight. Not sure I could do this without the Misti!

Next I stamped, colored and fussy cut the new Tool Christmas Stocking. The new matching greeting was stamped onto white CS, die cut and layered onto black CS. The tool border was stamped onto red CS and layered onto the same black CS. The little die cut tools were created using a TE die set. I added some white blizzard Nuvo drops to the white part of the stocking for some dimension.

Here's a look at the inside. I stamped the same tool border with red ink along the base of the inside.


My second card uses the same stamps and dies. I used green CS to create the plaid on this one. The sketch is from last week's Tuesday Morning Sketch layout. I thought it would look cute with some tools hanging below the stocking.


Thanks for stopping by today. Be sure to check out the new images at DRS Designs on line store.

shelia

Read more...

Blog Archive

StatCounter

  © Blogger templates Palm by Ourblogtemplates.com 2008

Back to TOP