Blog Widget by LinkWithin
Showing posts with label Argyle. Show all posts

Argyle Valentine

>> Saturday, February 1, 2020

Welcome!

I was so happy that I finally found some time to sit and stamp last night!!  As soon as I sat down I decided to keep my card relatively simple and uncomplicated yet I still wanted a lot of color.  Our Argyle Stamp immediately came to mind.


I started by stamping our Argyle across my white card stock using red ink and then stamped it a second time above my first image and then a third time above that.  I used our Diamond Fill-in stamp and raspberry ink to fill in the solid diamonds of the argyle and was having so much fun I kept going with soft pink ink in all the white diamonds that were left :)

I stamped our Valentine Scroll Oval on a separate piece of white card stock using the raspberry ink and after trimming and sponging the edges with the soft pink ink I adhered it to the center of my argyle and then attached both to a folded white card that I also sponged with the soft pink.

It was a fun, relaxing hour that I'm hoping to repeat asap!!

Thanks for stopping by!
Sue

Read more...

Halloween Argyle

>> Saturday, October 6, 2018

Welcome!

It's been a long time since I dragged out my Argyle and Diamond Fill in stamps, but since Halloween is so colorful it seemed like a perfect fit!  It took me a couple of tries to get the colors just right, but I think it was worth the effort :)


I stamped our Argyle stamp 3 times horizontally across a piece of white card stock.  For the pattern shown here I used the Fill In stamp and yellow ink to fill in the diamonds with the heavy solid line.  Next came the orange ink and I again used the Fill In stamp to stamp the dashed line diamonds (this does cover up part of the yellow I'd just stamped)  At this point I had rows of yellow and orange separated by rows of white.  I was looking for a bit more color so I filled in those white rows using a green watercolor pencil and blender pen to smooth it out.

For my oval in the center I stamped white card stock with our new Deco Happy Halloween greeting using lime green ink and die cut it with my nesties as well as a slightly larger yellow oval.  I purposely left a larger section under the Halloween Greetings to add an orange die cut bow, but it was still missing something so I added the orange dots around the upper portion of the oval and then added some to the orange bow as well.

Thanks so much for stopping by!

Sue

Read more...

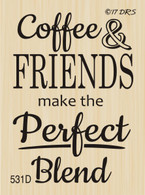
Coffee Blend

>> Friday, February 2, 2018

by Julie Warner - The Write Stuff

Happy Friday!
I hope your week has gone well! I hope you're staying warm, but just in case, here's a hot cuppa Joe to warm you up! I had a lot of fun making this one. I used the greeting as background & stamped it over & over in white then heat embossed it in white powder. I know a lot of people will use clear ink/white or black powder or else white or black ink & clear powder, but in my experience, I get a much better, clearer result (especially when using black) if I use the same color ink & powder. Just my 2 cents...well, w/ inflation it's probably a dollar now. 

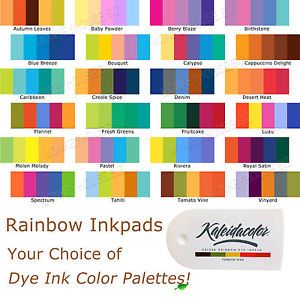
So after it was all embossed, I sponged on inks from a Kaleidacolor rainbow ink pad called Cappuccino over most of it. Then I stamped the coffee cup on a separate piece of white & sponged it w/ the same colors. The band was done again, masking it & using the Argyle pattern then cut & attached on top. Since the greeting was all over the bg, I made a little flag w/ just the die cut letters Coffee on it.

Here's a look at the inside.
Thanks so much for stopping by! Have a great weekend!

Supplies:
paper: Staples 110# white
ink: Colorbox frost white pigment, Memtento rich cocoa, Kaleidacolor cappuccino 
accessories: Spellbinders A2 matting basics B, Font One alphabet dies, white embossing powder, MFT fishtail flag die


Read more...

>> Thursday, October 19, 2017

Welcome!

I have a quick and fun card to share today!


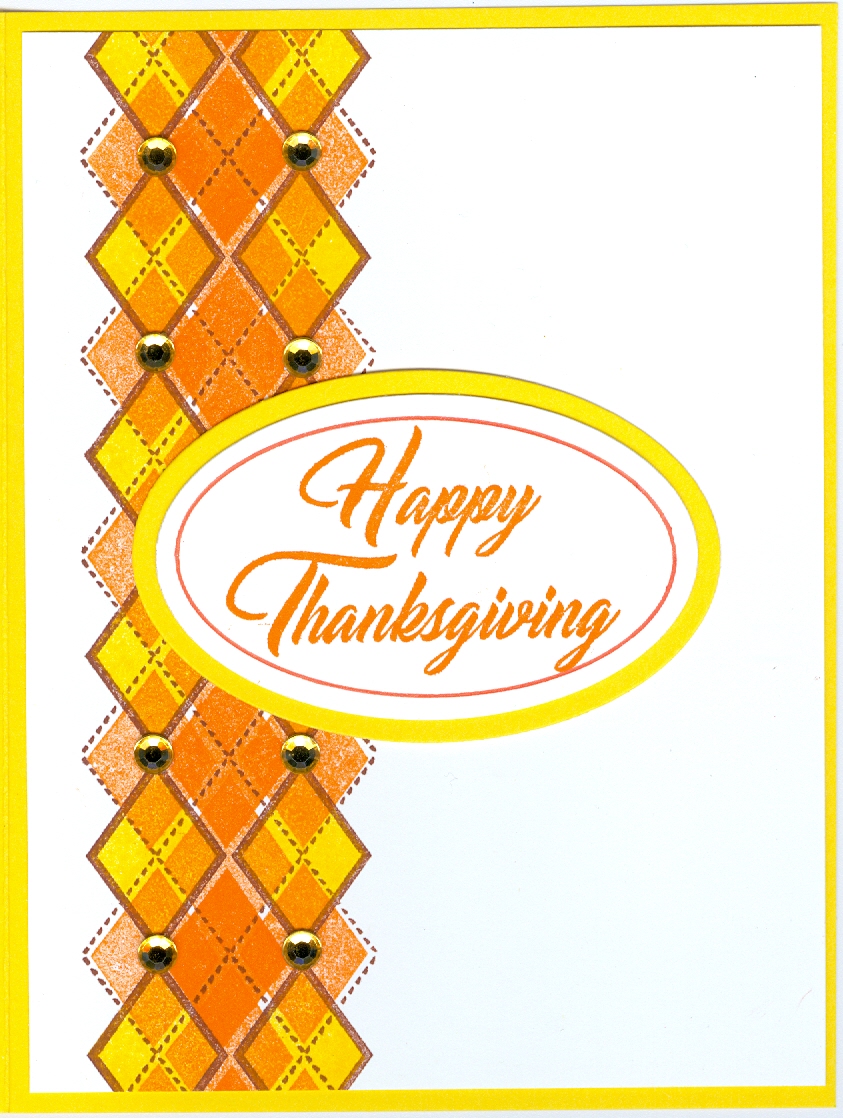
As I sat down to stamp a Thanksgiving card last night my first impulse was to pull out my plaid stamp and get to work - talk about stuck in a rut!!  So instead of the plaid I dug out my Argyle stamp and the Argyle Diamond, which haven't seen the light of day in way too long!

I started by stamping the Argyle stamp  on the side of my card stock using brown ink.  I used the Argyle Diamond stamp and yellow ink to fill in the heavy line diamonds.  Wanting a bit more color to my argyle, I added some orange ink (some stamped off once) to the other diamonds.  I stamped our new Script Happy Thanksgiving Greeting using orange ink and die cut it using an oval die and a slightly larger oval for the yellow layer in back.  After everything was layered on my folded yellow card I added a bit of bling.

Thanks so much for stopping by!
Sue

Read more...

A Happy Birthday Without Saying It

>> Wednesday, March 25, 2015

Woo hoo! New stamps will be available soon from DRS Designs! I've had the privilege of playing with them over the weekend and now I have a sneak peek to share with you. This card features the new Rest Best of Your Life Greeting (385F). 

I love how this greeting says "Happy Birthday" without coming right out and saying it.  I have a friend who literally dispises her birthday.  She really has a hard time dealing with the fact that she's getting older and this type of greeting would be perfect for her.  We use our birthdays as an excuse to "just get together" for dinner since we don't see each other very often and a birthday card like this that doesn't say "Happy Birthday" would compliment our meal nicely!


I made this greeting the focal point of my card front by stamping it in blue ink and then cutting it out with a Nestability die.  Before I took it out of the die, I sponged the same blue ink it was stamped with around the edges of the die.  I love the nice clean and framed look it creates around the stamp I want to show off.  I paired it with some other great DRS stamps like the Argyle Background (438P) and the Argyle Diamond (441A), which always make a great background design.  The other embellishments I used include some crimped cardstock, a scalloped border punch, white satin ribbon, a button and twine tied in a bow.

I hope I've inspired you to get inky today!
Thanks for stopping by!

Smiles,
Jennifer 

Read more...

Fall Flowers

>> Friday, September 26, 2014

by Julie Warner - The Write Stuff

Happy Friday!
I hope your first week of fall has gone well! Wow! It has really felt like the beginning of fall around here. Cool, breezy, dry...just perfect. Even some leaves here & there have started turning. I think my fave time of year is fall...the cooler temps, the vivd colors..I just love it. 

My fall card today features a pretty little Autumn bouquet of flowers & wheat. I tried a technique on the flowers called "stamp etching". I also did it on my leaves in yesterday's challenge card. I didn't add as many little "etching" lines on the flowers today, but I like the depth they give. After coloring them, I added some gold stickles to centers of the sunflowers and orange stickles to the other 2 little flowers. A few leaf outlines were stamped w/ the rust ink, then overstamped w/ the solid leaf versions using a combo of inks & spritzing. After cutting them out, I wrinkled them so they'd look more realistic.
The argyle background was stamped w/ the peeled paint ink & the diamonds were stamped w/ the scattered straw ink, stamped one off so it wouldn't be so dark.The finished card is 5.50 x 4.25 and these are the Copics I used.
Thanks so much for stopping by! Have a great weekend!
Supplies:
paper: white, olive textured
ink: Memento tuxedo black, Distress Inks in scattered straw, peeled paint, rusty hinge, ripe persimmon
accessories: Copic markers, stickles, narrow olive ribbon, Spellbinders A2 matting basics A & B, acorn confetti

Read more...

Challenge #121- Inspired by Color Challenge!

>> Thursday, May 8, 2014


Welcome to DRS Challenge Thursday! 
First, our winner from last week is....
Mel C  


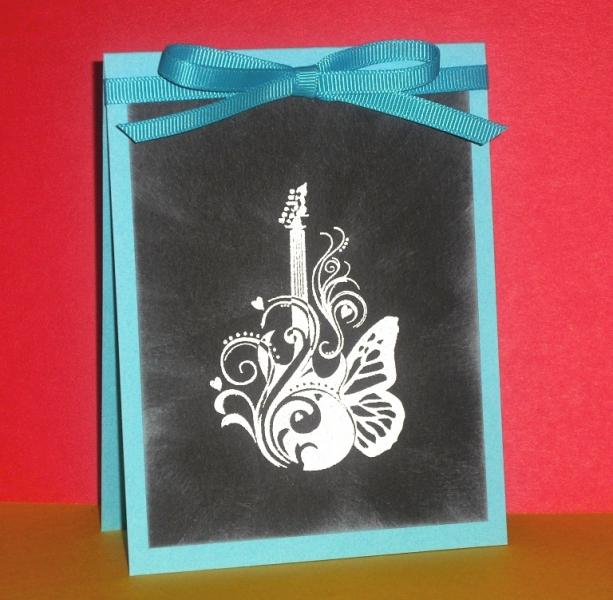
Congratulations,you are the winner of our Put it on the Chalkboard Challenge! And what an awesome job she did on her chalkboard technique!
Please send an email to info@drsdesigns.com to claim your prize.

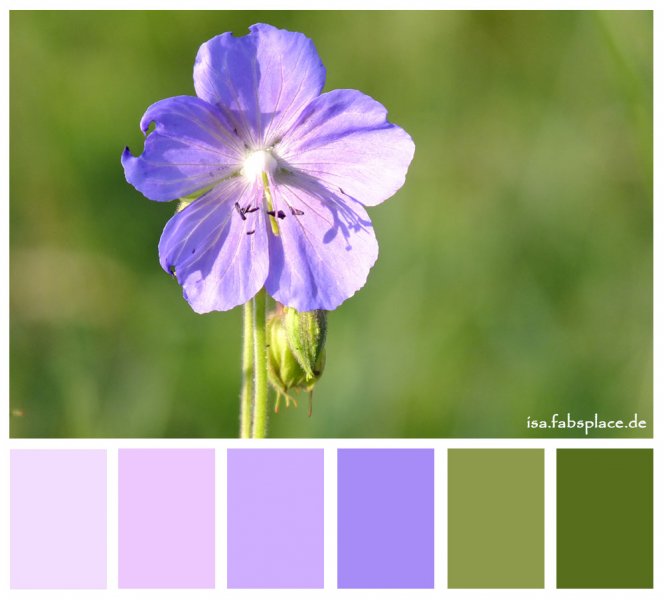
For this week's challenge, we are doing an Inspired by Color Challenge! The theme for this challenge is 

Purple & Green!
 (use some of the colors inspired by this picture somewhere on your creation)
You don't have to use all of these colors, or only these colors.
To enter, show us your card  by linking it below and we'd love for you to leave us a comment.  The deadline for this challenge is Wednesday, May 14, at 6 pm EDT. Challenge entries don't have to use DRS Designs stamps, but if you use them on your challenge card, you'll get an extra entry into the prize drawing.
For the prize, one winner will be randomly selected to win the following 3 stamps:

Here are the Color Inspired Challenge cards from our talented DRS Design Team and we'd love for you to leave us a comment!

Sue


Read more...

Thank You!

>> Monday, December 30, 2013

I hope everyone had a wonderful Christmas! I have been working on some thank you cards and thought I'd share one with you today. This one uses the argyle background stamp. I like how versatile this stamp can be. You can create any color combo you want and it's easy to stamp. I used browns and blue to create a more masculine look.


I started by stamping the Argyle background stamp in Memento Cocoa ink on cream CS. I stamped the Argyle diamond with Memento Cocoa, TH Antique Linen and SU Bashful Blue inks. The sentiment was stamped in Memento Cocoa, die cut and layered on brown CS. Some brown ribbon, a blue button and twine finish it off. Hope you like it.

Thanks for stopping by today. This week's challenge is "Frosted Flakes." We'd love to see what you create using snowflakes or snowmen. You can see details here.

Happy New Year!

shelia

Read more...

Masculine Birthday Cards

>> Wednesday, October 16, 2013


Happy Wednesday!

Not to brag or anything ;) but I spent this past weekend in Pennsylvania at a stamp show.  My "job" (wink, wink) was to show folks how to use our argyle stamp and the diamond fill in stamp that goes with it.  Here's a quick run down for you...


By Sunday, when things slowed down a bit, I got to do a little fun stamping and I set myself the challenge to make a masculine card or 2.  How'd I do?


Now to give credit where credit is due..... I stole the star idea from our very own designer Karin who came up with it about 6 months ago - is she a genius or what???  Thanks Karin - the Ladies at the show and I had a lot of fun adding the stars to our Argyle backgrounds!
 

Thanks for visiting!
Sue

Argyle Background
Fill In Stamp
Vertical Happy Birthday
One Line Happy Birthday


Read more...

Challenge #73 -Go Fish

>> Thursday, June 6, 2013

Welcome back to the weekly challenge here at DRS Designs! 

Please help me congratulate our newest winner, 
Dee!!
Thank you so much for participating in our blog challenge to show off some beautiful trees! 
Please contact us at info@drsdesigns.com to claim your prize.

Want to be a winner just like Dee? Then, I invite you to participate in this weeks challenge. The theme is 
"Go Fish"
For this challenge, we're looking for cards with a fishing theme.

DRS Designs is giving away the following 3 stamps to one lucky winner:
Slice of Cake (261F)
Single Birthday Candle (258B)
Brush Birthday Greeting (761H)

I hope our DT has inspired you to create some fun cards this week! You can see their cards below.  Upload your challenge card by next Wednesday June 12th at 6pm EST to be eligible to win. We look forward to seeing your work!
Thanks for playing along and Good Luck!

 Karin

Jennifer E.


Shelia


Julie


Janett


Sue
Pam
_______________


Read more...

My Father, My Hero!

>> Wednesday, May 22, 2013

What could be more perfect than a shirt and tie card for Dad this Father's Day? I've seen these origami cards in galleries in the past and had to give it a try. I created the card below using this tutorial.


After folding the smooth green cardstock to form the shirt, I used the Argyle Background (438P) and the Argyle Diamond (441A) to create the pattern paper I wanted to use for the tie. Next, I used the tie tutorial to add the argyle tie to the shirt. I stamped the right side of the shirt with the Fathers Big and Small Greeting (873G) and used the "Happy Father's Day" portion of the Father's Day Greeting (782G) for the left side of the shirt. I added 2 white brads to the shirt collar for buttons and then the shirt was then adhered to a 5.5" x 5.5" dark green cardstock base.  I hope Dad like's it! 

Smiles,
Jennifer

Read more...

Mother's Day Rose

>> Wednesday, April 24, 2013

DRS Designs is featuring the fun Argyle Background stamp (438P) this month and today's Mother's Day card shows you how it works! 


I first stamped the Argyle Background with black ink.  Then I used the Argyle Diamond (441A) to add color to it.  To do this, I first stamped the dark black diamonds using a dark pink ink and then I used a lighter pink ink to stamp the dotted diamonds on either side of the dark one. It's so easy, but I can understand if you need more examples.  Just click THIS LINK to view other posts on the DRS Designs Blog that feature the Argyle Background.

Here are few more details on the card seen above: 
The focal point is the Single Rose (774G).  I colored it with Copic Markers and then sponged pink ink around it while it was in a Nestability die.  (That's how I got the white frame around it.) I used the Mother's Day Greeting (783G) for the sentiment but split it up and put "Happy Mother's Day" on the banner below the image. A little layering and a border punch helped complete this layout. Finished card size is 4.25" x 5.5" 

Hope you enjoyed seeing it!
Have a great day!

Smiles,
Jennifer

Read more...

Celebration of your Liberation

>> Tuesday, April 16, 2013

Hi Everyone,
 
I have another graduation card to share with you in today's post.  I chose navy and gold as my colors this time around as they seemed like a classic combination. I know they belong to the University of Michigan, but that's a taboo subject with me living in Ohio :)
 
I stamped the Tassel along the top of my background and added the bottom panel made from the Argyle background stamp and the Argyle Diamond.
 
 
The Culmination Graduation Greeting was stamped in navy ink, die cut and highlighted with some matching gold ink.  I only added a ribbon strip to the bottom and ribbon knot attached with a glue dot at the top of the sentiment. I was trying to keep it gender neutral.  Did I succeed?
 
Thanks for visiting us today and don't forget the current challenge is "Stitching"!
 
Karin

Read more...

ConGRADulations!

>> Monday, April 8, 2013


Hi Everyone! Can you believe we are starting the second week of April? It will soon be graduation time, so I thought I'd share a grad card I created using my own high school colors: blue and orange. I started with a white base and added a piece of navy card stock. On top of this is a white panel that was stamped with the Argyle background stamp in Night of Navy ink. I used the small diamond stamp to fill in some of the spaces with navy and pumpkin pie ink. The Tassel is worth the Hassle sentiment was stamped in Night of Navy on white, cut with square nesties and layered on a lacy square nestie in orange. The tassel was stamped in Pumpkin pie, fussy cut and attached with some pop dots. The conGRADulations was stamped in nave, sponged with some pumpkin pie, cut and layered on navy CS. Some orange dew drops were added to complete the look.

Thanks for stopping by today. You still have time to join our most recent challenge - to use paper flowers on your card. You can see the details here. Hope you have time to play along with us!!

until next time,
shelia

Read more...

"Cat"itude Birthday

>> Wednesday, April 3, 2013

Welcome!

I can't believe Easter has come and gone already.  And it's only April 3th!  Seems very strange to have St. Patrick's Day and Easter be only 2 weeks apart!  Now all I have to do is keep my fingers crossed for a little bit of nicer weather!


I started by stamping the top 3/4's of my card using our Argyle Background and grey ink 4 times across the card stock, and then filling in the diamonds using our Argyle Diamond Stamp and spring green ink.   The floor was stamped with Vicki's Versatile Background (several times) and turquoise ink, and sponged with a little more turquoise ink.  I added a white strip of card stock for my molding. 

I stamped our "Purr"fectly Comfortable Kitty on a separate piece of card stock using black ink and both colored and cut it out.  After attaching the Kitty, I added the "Has it All Birthday Greeting" using black ink and then attached everything to pink card stock and then to a light green folded card (4 1/4 x 5 1/2).  Last but not least I "glammed" up our Kitty with a touch of eyeshadow and blush and gave her a new rhinestone collar :)

Have you had a chance to enter our Paper Flower Challenge?  You have until 6pm tonight to enter!  Stop by tomorrow to see if your our winner and see what new challenge we have in store for you ;)

Thanks so much for stopping by! 
Sue

Read more...
Blog Archive

StatCounter

  © Blogger templates Palm by Ourblogtemplates.com 2008

Back to TOP