Blog Widget by LinkWithin
Showing posts with label Get Well. Show all posts

Are You Cured Yet?

>> Monday, March 25, 2024


While cleaning up my craft room, I came across this emboss folder and thought oh...it looks like a blanket. Well, I just had to use it for a card and thought this image was perfect for it.

For the card:

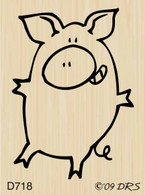
  • I stamped LEONARD PIG SICKDAY BLUES - 1019G and colored the image up with copics.
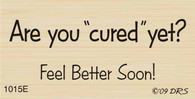
  • Next, I stamped just a portion of the CURED YET? GREETING - 1015E sentiment. This is my way of stretching my stamps. I love using just portions of them.
  • I then cut down the layers and popped the sentiment up on dimensionals.
  • I finished the card with a few scattered buttons.
Thank you for stopping by to check out my card this week. I hope you have a fun crafty week.

Read more...

S’More Wishes

>> Tuesday, September 26, 2023


Hi Everyone,
 
I've been out of town, and I was overly ambitious in thinking I could make a fall card to show off here on the blog.  So, until I get back in stamping mode, here are a couple of cards I made for friends and family before I left. 

This was a get-well card that I made using S'more Birthday Greeting and Smooshed S'more.  I separated the greeting and replaced it with the words get well from the Get Well Prayer stamp.  Otherwise, I copied myself from the card on this post. 


This was a quick card that I made for my dog loving cousin. All I did was use an embossed dog themed background and made it a 4 1/4" square card, just to be a little different.  


And here is the inside greeting...


Here are the stamps I used:
Doggie Dilemma Dog with Fence

I think the someone special greeting on the front may be retired, however, you can find that phrase as part of the Special Birthday Wishes Greeting.

Thanks for dropping in!
Karin


Read more...

Get Well Soon

>> Tuesday, August 30, 2022

Hi Everyone,


Masculine cards are not my strong suit, but I have a friend recovering from back surgery, and he's a guy, so before I left for a visit, I whipped up this simple card. 


I stamped the Sailboat in a navy blue to match the card base and distressed the edges before wrapping the panel with some twine. The Cheerful Smiles Get Well Greeting was die cut and sponged with some blue chalk before I attached it to the card.  


The boat seemed too plain, so I added a bit of light sponging around it as well, and that seemed to finish it off.


Thanks for stopping by and I hope your day is smooth sailing!
Karin


Read more...

Get Well Soon

>> Thursday, July 2, 2020

Good morning!
Today I've used blue and kraft to make this
masculine card.
The DRS Design stamps used were: 

I used an embossing folder for my blue background.  The corners are
punched squares cut in half then blue enamel dots glued on top of each.
Dies are from Lawn Fawn and My Favorite Things.

My next card uses DRS Design stamps:

I used a dot embossing folders for the blue background, Spellbinder scalloped dies and Heartfelt Creations banner die.
The embellishments are 3 enamel dots.
Thanks for visiting today!
Robin

Read more...

Tough Times

>> Thursday, June 25, 2020

My cards today used DRS Design stamps: Crutch Assisted man

The dies are from Rubbernecker and My Favorite Things.

My second card uses: Tough Times Don't Last

I used dies by My Favorite Things and Heartfelt Creations.
The embellishments are enamel dots on paper circles cuts.
Thanks for visiting today!
Robin

Read more...

Care Giver Cards

>> Tuesday, June 23, 2020

Hi Everyone,

I have a couple of cards in honor of care givers, specifically nurses and doctors.  
I used the 
A Nurse Brings...Greeting, and attached it to a background made using the Bandage stamp, and a strip embossed with hearts.  I decided to go all in with the heart theme, and added the 
Small Silhouette Heart to the center of the greeting.  For an image I stamped, colored and fussy cut  the Boo Boo Bear image, to which I added a glitter embellished heart. 


This was originally a nurse card, but once I made it, I realized nurses don't wear white coats, so a doctor card it is!  I cut a piece of cardstock in half, and folded down the inside corners for the coat. The shirt was a scrap of blue that I added behind the "V" and I glued on real buttons down the front.  I used my tag punch to make a pocket and the doctor items were stamped and fussy cut from the Medical Bag stamp.  In place of the name tag, I used the thank you that came from the 


The inside uses the sentiment, I just cut off the top part that mentions nurses, and added a punched heart to the bottom. 


You can find all of these stamps and many more at DRS Designs!

Have a nice day!
Karin

Read more...

Caught a Bug?

>> Monday, April 13, 2020

Happy Monday Everyone. Hope you had a great weekend and found some time to get creative. I'm having fun playing around with the newest images from DRS Designs. If you've been checking out the blog this past week, then you have seen all sorts of beautiful and fun creations using the new images, especially the new Peeking Gnome (994D). He's the featured image on my card today. He is just the cutest!


I started by stamping the Peeking Gnome onto white CS with black ink, colored him with Copics, fussy cut and set him aside. I wanted him peeking over some mushrooms, so I stamped the larger one from the Toadstool image, masked it, and stamped the smaller one from the same image as well as the ladybug mushroom. I continued to mask all of those images, and stamped another larger mushroom from the Toadstool image as well as the new Mushroom Sign Post (990F). After coloring them all with Copics, I added the Feel Better Greeting onto the sign, drew in the grassy border with a Micro pen and then sponged in the grassy area and stamped the easy grass background with some green ink.

I added all the masks back onto the images and sponged the sky with blue distress oxide ink using a MFT small cloud stencil. The Caught a Bug? greeting was stamped directly onto the panel with VersFine Black Onyx ink.

I decided I needed some more lady bugs on the mushrooms so I stamped two more onto white CS, colored them with Copics, fussy cut and glued them onto the card. I used a Micro Pen to dray their antenna into place so I wouldn't have to try and fussy cut those!!

Finally I glued the Peeking Gnome over top of the larger mushroom to complete the scene. This was a fun card to create! You can check out all these images and the other new releases from DRS Designs here.

Thanks for stopping by today.

blessings,
shelia

Read more...

Under the weather...

>> Saturday, April 4, 2020

Welcome!!


Between the large quantities of rain we've had lately, the directives to stay inside and so many ill in the world, this card just kind of worked itself out....


I started my card by stamping our Country Window in the center of a white piece of card stock using black ink.  I used a blade to remove all the window panes and then masked the image to stamp our Wood Grain Background across the whole card using grey ink. I sponged grey ink around the edges, added the top 2 lines of our Under the Weather Greeting and set it aside.  On a separate piece of card stock I stamped our Lightning image and masked it.  I used a couple of different blue inks to dab on my colors.  Once it was dry and I removed the mask, I taped it behind my window and attached everything to a folded blue card.

Stay Healthy and Stamping!
Sue

Read more...

Cured Yet?

>> Friday, March 27, 2020

by Julie Warner - The Write Stuff

Happy Friday!
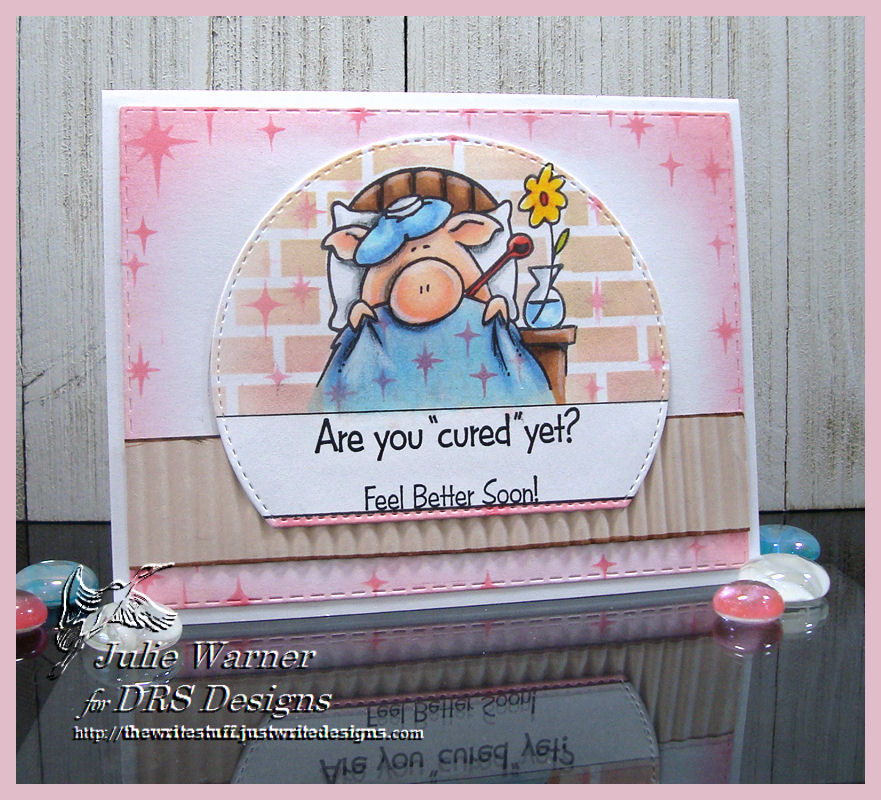
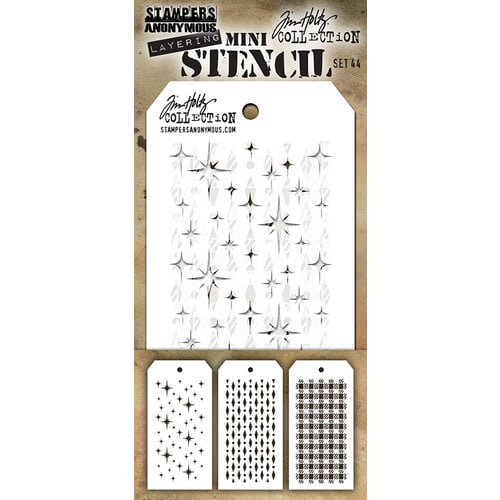
I hope your week has gone well! With all the people getting sick, I thought a get well card might be in order. And I couldn't think of a better image than poor Leonard in his bed w/ all the "under the weather" paraphernalia.  I stamped Leonard, masked him, then stenciled in the brick wall w/ one stencil & the starry images on top of that. I die cut him then used the starry stencil on the large bg after sponging the pink around the edges. A narrow tan corrugated strip  was added near the bottom to help ground it.
Here's the inside & below it are the Copics I used.
 
Thanks so much for stopping by! Have a great weekend and stay safe!


Supplies:
stamps: DRS Designs - Leonard Sickday, Cured Yet  (inside: Get Well Soon, Leonard Pig)
paper:  Staples 110# white, tan
ink:  Memento tuxedo black, Distress inks antique linen, worn lipstick
accessories: Rubbernecker Rectangle Stitch dies, Copic Markers, Brick Wall Stencil, Tim Holtz stencil, paper crimper


Read more...

Caught a Bug?

>> Monday, February 17, 2020

Happy Monday! Hope you had a great weekend. I don't know about your area, but here it's flu and cold season. I know so many people who are sick. I was a couple of weeks ago and it feels so good to be back to normal!  So with all the friends who are ill, I decided to create a get well card. Here's what I came up with.


I started with the leaf stencil from Altenew to create a quick and easy background for my little lady bugs. I stamped the lady bugs from the 4 in 1 Garden Bugs onto white CS with Memento Black ink, added some red with my Copics and fussy cut them. I didn't want to mess with trying to cut out the little antennae so I cut them off, but stamped the entire lady bug image onto the card front where I wanted them to be and then glued the die cut ones in place with their cute little antennae showing. The Caught a Bug greeting was stamped with VersaFine black ink. I added some Nyvo Crystal Glaze to the lady bugs for some shine. They look so pretty in real life.

On the inside I stamped the Get Well Soon greeting and added one more little lady bug. 


Thanks for stopping by today. Hope you are staying healthy and finding some time to get inky! If you haven't seen DRS Designs new catalog, you can check it out here. It is pretty amazing!

blessings,
shelia

Read more...

Cheerful Smiles

>> Tuesday, November 5, 2019

Hi Everyone,

This is a random card share in the midst of everyone's holiday cards, but I had a friend who had some out patient surgery last week, and I wanted to make a card to cheer him up.  

I knew I wanted to use the Cheerful Smiles Get Well Greeting, so I decided to make some smiling Bandages to go along with it.  

I masked off the middle of the band-aid, so that I could make a face with googly eyes and a hand drawn mouth.  I colored and fussy cut them, attaching them and the greeting with some dimensional tape.

The simple background was made using the Starry Background and Easy Dot Background.


Here's the simple inside, using the Feel Better Soon from the bottom portion of the greeting on the front and the Bandage stamp again.


Thanks so much for stopping by!
Karin

Read more...
Under The Weather

>> Thursday, May 16, 2019

Good morning!
Here is a bit of the dramatic for a get well card.  Your favorite horse/western 
lover will love it.
Best tip (do as I say not as I do, LOL!) Use a piece of paper under your hand while sponging on layers of color or you may end up with ink where you don't want it like I did!!
I stamped the lightening using a soft gray and used Black for the cowboys
using my Misti to get a very black black silhouette.
I finished the ground using torn masking tape to match the stamp ground
and sponged with black (I think you could also use a black marker
to do this step).
DRS stamps used: Lightening Bolt, and Cowboy Silhouette. 
After sponging on colors (Milled Lavender, Wilted Wisteria, Stormy Sky, Broken China, Black, Marmelade, Lemonade and Picked Raspberries [using a torn piece of paper towel to edge clouds]), I used a white gel pen to fill in the Lightening Bolt.

 The inside has the Under The Weather sentiment and Horse Silhouette (I used my Misti again for the horse).  I then used an embossing folder with a bit of yellow brayered on then misted.  I did not run it through the cutting machine as I did not want the impression on the horse so I used my heavy hammer on just the parts of the folder that I wanted to show the impression of sun rays.


Hope you like this card to make for your friends and family.
Thanks for visiting today!
Woohoo, I almost forgot, today is my birthday!!
Robin

Read more...

Rainbow Trees Get Well

>> Saturday, April 6, 2019

Welcome!

I decided to make a get well card for my stash and wanted it to be bright and happy - how'd I do??


I started my card by stamping our new Open Branch stamp across the bottom of my card, varying the heights.  After sponging the edges with some yellow ink I used my watercolor pencils to color each a different color.  The Get Well greeting was stamped, trimmed and layered with blue and everything was attached to a folded blue card.

Thanks for stopping by!
Sue

Read more...

Caught a Bug?

>> Friday, June 22, 2018

by Julie Warner - The Write Stuff

Happy Friday!
I hope your week has gone well! And I hope your summer isn't spoiled by one of those summer colds or flu. But just in case..here's a card to hopefully make you feel better. 

I started by die cutting the long bg piece then placing the arrows in my Misti. I first stamped them on a plastic sheet so I could see where they'd be, then placed the white piece in the Misti & lined up where to stamp them, a bunch of times. I did it this way because it made it easy to restamp some of them when the solid arrows weren't dark enough, Then I colored them all in. I really wanted a cute car image (hint, hint! BIG HINT!) but didn't have one so I made one out of circle die cuts. After playing around w/ the sizes for a while, I ended up w/ this.  I cut out the window part to add the blue behind it then die cut more circles for the wheels.
I added some narrow black strips around the layers & drew in the little puffs of smoke. 

Here's a look at the inside & below it are the Copics I used for all the arrows.
Thanks so much for stopping by! Have a great weekend!

Supplies:
stamps: DRS Designs - Caught a Bug?, 4 in 1 Arrows (inside - Caught a Bug Greeting)
paper: Staples 110# white, pine green
ink:  Memento tuxedo black
accessories: Copic markers,  ODBD double stitched rectangles dies, Lil’ Inker stitched mats long & skinny dies, Spellbinders A2 matting basics A,  sm & lg circles dies,  Copic multiliner pen, white gel pen


Read more...

Blog Archive

StatCounter

  © Blogger templates Palm by Ourblogtemplates.com 2008

Back to TOP