Showing posts with label Fence/Gate. Show all posts

Like Gnome Other!

>> Thursday, August 26, 2021

 Good morning!
Here is a Halloween card with some fun colors!
I used the open plain with various fun new Halloween colors that make great
cards for kids or maybe friends that don't like the scarier stuff.
I made the mushroom strip by stamping and masking some of the fun toadstool/mushroom DRS stamps plus the Mushroom Sign with DRS new Gnome Halloween sentiment.
My Gnome was colored in my bg colors.


My next card is an easel card.
I love making these cards because you can feature more 
especially when sentiments are a bit bigger (not really the case here 
but I decided  this would make a great easel card anyway!

I really like making little scenes and it really is easy with a bit of masking and forethought as to which to stamp first.  It helps me if I stamp the scene in no particular order onto scratch paper first then I can see more clearly which to stamp first and then mask.
I used a bit of white chalk pencil to try to get a glow around ghost and moon but that did not turn out as well as I wanted. Dang!  I used Wink of Stella on the moon and on the vellum ghost.
Thanks for visiting today!
Robin


Read more...

Scene Builder

>> Monday, September 21, 2020

 Hi Everyone. Thanks for stopping by today. If you are a regular visitor to DRS Designs, then you have seen some beautiful scenes created using the new 2 in 1 scene builders (045P and 087P). These new images make it so easy to create scenes. And you can make them as complicated or as simple as you wish.


For this card I started with water color paper and stamped both images with Archival Black and Memento Bamboo inks. I used Nuvo Aqua Flow pens and water color pencils to color in the areas and then added the panel to a black card base. I used the same black CS for the greeting. This was super easy to create.


This next card uses the same 2 in 1 scene builder images. I wanted to add the cabin to this scene, so I first stamped it with Archival black ink and colored it with Copics, then I used a mask to cover the cabin and stamped the mountain and tree 2 in 1 scene images (045P) along with the fence line from the river rocks and fenceline 2 in 1 scene builder (087P). Once again I used Archival Black and Memento Bamboo inks to stamp the images and colored them with Nuvo Aqua Flow pens and colored pencils. Once everything dried I stamped the sending you happy thoughts greeting and attached the die cut panel to a white card base.


You can check out all the new images here.

blessings,
shelia


Read more...

Enjoy Today!

>> Thursday, September 17, 2020

 Good morning!

Wouldn't this be the ultimate?  I would love to have a house

on a lake with a beautiful mountain view!

Yes, this could be my retirement house no problem!!

Today I used DRS Designs stamps: Mountain and Treeline 2 in 1, River Rocks and Fenceline 2 in 1,

Christmas Village Cabin, Cattails and Enjoy Today

I did a bit of masking to make this scene come out right, the trees and cabin part.
I made the tree reflection just squiggling a pen.

My next card is the same type theme but with horses instead of a lake.
The perfect mountain ranch!


              This card is actually done the same way but the fence is stamped right over the horse.

Thanks for visiting today!
Robin

Read more...

Picture Perfect Day

>> Thursday, September 10, 2020


Good morning!
It's a picture perfect day and permission to fish!!
Instead of a double Z fold I guess you could call this a triple Z fold! LOL!!
There is a strip on top and 1 on the bottom to form a box in the center.  I did not fill the box with extras but that could be done, maybe some cattails or...
Looking down on this card shows the construction a bit better.

The fish was stamped on the base and on a separate piece of white cardstock as well 
then cut out and popped up on the base image.  I stamped the base image using Broken China on the bottom (water rings) and Fern Green on top (trees and reflection of trees).  When I added the popped
fish I did not pop the tail but glued that part down over the splashes.  The splashes were
done using a Snow Marker sprinkled with glitter then heat puffed to give it a foamy look.
The fish was colored then Stickles was added in Crystal and Diamond.
The lake, ground and sky were all sponged with various inks on hand (Beige Brilliance and Shabby Shutters Oxide on the ground, Broken China for the lake and sky).  I used a torn paper 
towel to make the clouds in the sky (used sort of like a stencil brushing up from the torn side). 
The 2 Z fold strips going in the opposite direction fold wise, were stamped and sponged 
the same as the card base, fence was stamped using Rich Chocolate and tops were roughly 
cut out). The rocks, fish and mountains were stamped with Tuxedo Black then colored
with Copics. Warm and cool grays on the rocks and mountains, grays, greens and pink on the fish.
Thanks for visiting today!
Robin

Read more...

In the Spirit of Halloween...

>> Sunday, August 23, 2020


What a great sentiment for Halloween to send to a friend. It works so well with any Halloween image and this SILHOUETTE HAUNTED HOUSE image is just perfect to create a fun Halloween card iwth the SPIRIT OF HALLOWEEN GREETING.

I stamped the Silhouette Haunted House image and sentiment and then sponged on blues and purples to color the card base. Next I added yellows to the moon and windows.

I love quick cards and especially love quick cards that can be mass produced for sending out to friends and family to stay connected these days.

Stay safe and thank you for stopping by to take a look at my card.

Read more...

The Only Disability...

>> Sunday, June 7, 2020

I am excited to see the new set of stamps from DRS Designs featuring disabilities. This great image also has a dog and I love creating cards featuring dogs.

For this card I stamped the new image and stamped her a second time on scrap paper to mask the image. Once it was masked I stamped the wood fence. Then I colored the scene with copics.

After coloring the scene I sponged in the cloudy background and stamped the great new sentiment.

I can't wait to see how you use these new images.

Read more...

Creepy Graveyard

>> Saturday, October 20, 2018

Welcome!

What's Halloween without a creepy graveyard?  Especially with a sentry like my raven friend here!  I can assure you that I will not be anywhere close to a graveyard most nights, but especially on Halloween night :)


This was actually a pretty quick and fun card to stamp.  I started by stamping our Silhouette Graveyard using black ink.  I made a quick moon mask and a mask to cover the grass area and sponged on some blue and purple inks in the sky.  I removed both masks and added one to cover my now blue sky and sponged on some greens for the grassy area.  Once I removed that mask I used some colored pencils for the moon and stamped our Easy Grass background.  I stamped our new Iron Fence and Gate on top using black ink as well as our Raven and colored in the tree branch with black ink giving it a silhouette look, but adding a yellow beak and talons to the raven.  For the headstone, I stamped our RIP Tombstone on a scrap of card stock, colored and fussy cut it and attached it to my scene.

Thanks so much for stopping by!!
Sue

Read more...

Thank You Wheelbarrow

>> Saturday, May 5, 2018

Welcome!

Have you checked our our new images yet?  One of my favorites is our new flower wheelbarrow


I started my card by stamping our new Flower Wheelbarrow on the lower right side of my card.  After masking it I stamped our Picket Fence and then cut out a couple of the flowers from our Broken Flower Fence and a few grass sections from our Easy Grass Background.  After removing the mask I sponged the blue sky and green grass, not worrying too much about the color getting on the flowers and fence and then just used darker colors to color in the fence. flowers and wheelbarrow.  Once I had it trimmed to the correct size I stamped our new Deco Thank You using black ink.

Thanks for stopping by!

Sue

Read more...

A Beach and a Cowboy

>> Wednesday, August 9, 2017

I have some fun cards to share with you today with two of my favorite themes:  the beach and cowboys.


I colored up the Silhouette Palm Tree Line image with some markers and spritzed on some water so they would look like they were water colored. Then I sponged on the pink sky and added the Life is Measured Greeting.  I sponged on some distress oxide ink for the water and it was done.  It was actually a pretty quick card.

This card took a bit longer to make.  I swiped some inks on some aluminum foil and spritzed with water.  Then I put my paper into the ink until it all soaked up.  After drying, I stamped the Picket Fence image and colored it with colored pencils.

 Then I stamped the Saddle Up Cowboy image and fussy cut him out after coloring him with colored pencils.  I stamped the Better in Cowboy Boots greeting and turned it into a tag.  I finished the tag off with a rusty star and some old frayed carpet fibers (I loved the look and saved them).

Hope your week is going well.

Hugz,

Nancy


Read more...

Dreaming of Cooler Weather

>> Wednesday, August 5, 2015

If you are like me, you are dreaming of cooler weather.  Last night, my family was laying around talking about our favorite Fall and Winter things - hot chocolate, caramel apples, pumpkins, wearing sweaters and coats, Halloween and Christmas movies on TV, and the beauty of the leaves and trees.  I had to make a cooler weather card after all that dreaming! 


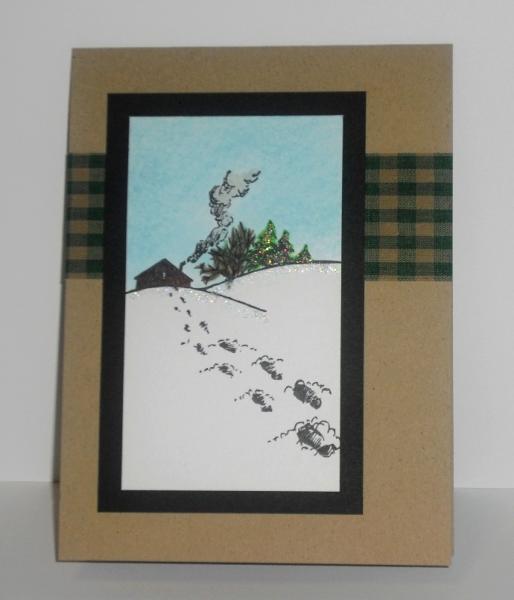
I used the Snow Tree with Fence (144M) image to create this scene.  I was inspired by THIS wonderful picture at Artful Home (the inspiration site in the Inspiration Challenge at SCS).  The image did all the work - all I had to do was a little watercolor line in the background.  A few SB dies and Martha Steward punches made the frame. 

There are still a few more hours to enter in the DRS Designs Cause a Scene Challenge!

Many hugz!


Read more...

Christmas scene

>> Saturday, August 1, 2015

Good morning!
This week's challenge was to create a scene so I'm still in the creating scenes mode this morning.
I used the Triple Tree W/Snow 004L twice as a background and the Stonewall with Gate 293P in front of the trees then the Simply Snowman 383G in front of the fence.  The sentiment is from the Christmas Multi Greeting 341H.  I used glue and loose glitter for the ground and Liquid Applique with glitter on top of the fence and pinecones.  The pinecones were made with a scallop circle die (here is a link to the tutorial with Kittie Caracciolo)  I also use a Martha Stewart Branch punch for the greenery under and on top of the pinecones.  I added thin red ribbon as toppers.  Where I live, we have pinecones that are 16"-18" long (called Sugar Pine cones) and make wonderful Christmas decorations, and yes, I have large red bows on top of a set of two for each spot.  they look great in our house where we have knotty pine tongue and grove on the walls.  I put up garland over the windows and such and put a set at each rise (as in a scallop).
My sky is sponged over torn paper to make a cloudy type sky.  To make this card I had to work backward of course, starting with the snowman then masking and stamping the fence, mask and stamp the trees.  I added the pattern to the snowman's scarf, this time checks instead of my usual stripes.  Then added all the other embellishments like glitter and snow and the Merry Christmas sentiment, finally ending with the red folded card base.
Can you see the pinecones on the window corners?
Hope you are having a wonderful weekend and I'll see you next week!!!
Robin

Read more...

Love Letter

>> Saturday, July 11, 2015

Good morning!
Keeping with the "You've Got Mail" theme today, I've done some creative masking and inking to make this card!
I've added a Die-namics stitched die cut frame, a threaded metal button, a handmade green vellum envelope (glued to just his hand to keep from showing adhesive) and a punched heart to complete the scene. 
The creative masking and inking comes from when I use scotch tape on the parts of the stamp I won't be using, ink it, pull off the tape and then stamp.
The guy is stamped separately and cut out, I needed to have him leaning on the fence with his elbow so it was easlier to cut him out and place him later.  I also used a bit of Sky Blue Brilliance, a sponge and a torn paper towel to create some light fluffy clouds (sorry, very light, you can hardly see them!).
So Golfer Duff is not a golfer today, he is the recipiant of a nice love letter!
I've had a little jar of metal buttons forever and forgot about them, so the other day when I was cleaning and reorganizing my craft room...I found them!! Yay! I used some twine to thread the button (Naked buttons not allowed on my cards, LOL!) and added it to this guy card for an embellishment on the frame.  It is a nice copper color with a decorative edge.
I think Golfer Duff is getting ready to take a drive in his convertable to go see his lady friend...he is doused with "English Leather" and ready to go!
Hope you are having a wonderful weekend!
Robin

Read more...

Happy Thoughts

>> Saturday, May 16, 2015

Good morning!
DRS stamps used: 951D Happy Thoughts, 478P Picket Fence  (new release), 406D single Birdhouse (new release), 395H Leafy Tree Branch (new release), and 413H Lovebird Branch (new release).
I did the embossing folder technique again today (actually did several while I had everything out the other day and just made lots of backgrounds to use later). I stamped all my elements including the fence on to regular white smooth cardstock, colored and cut out (the fence I just cut out the top then used the same Spellbinder Bracket border die to cut the bottom).  I glued all the pieces down except for the Lovebird Branch, I popped that one up with foam tape.  
I edged this background panel with the distress ink used (Peacock Feathers) since I decided NOT to mat it before gluing to the card base.  I also edged the white panel at the bottom to match. The scroll design of the bracket border was first backed with the blue used as a card base (it is not the card showing through).   I don't mind fussy cutting as you can probably tell.  It is therapeutic and fun to me, just like coloring is.
I made a small yellow bow for the birdhouse to finish this card off.
Thanks for stopping by.  I hope you get time to create some cards of your own today!
Robin

Read more...

Challenge #174- Birds & Bees!

>> Thursday, May 14, 2015

Welcome to DRS Challenge Thursday! 

First, the random drawing winner from last week's challenge is....
Billie A 

Congratulations! You are the winner from our Hot Trends- Beautiful Backgrounds Challenge!
Please send an email to info@drsdesigns.com to claim your prize.

This week they fly, they sing, they buzz ..
Birds & Bees!
(use birds or bees on your project...stamped, punched, die cut, paper, any kind of bird or bee!)

To enter, show us your card  by linking it below. The deadline for this challenge is Wednesday, May 20, at 6 pm ET. Challenge entries don't have to use DRS Designs stamps, but if you use them on your challenge card, you'll get an extra entry into the prize drawing. From all of the entries, one lucky winner will be chosen to receive their choice of 2 stamps from the online catalog at www.drsdesigns.com!

Here are the Birds & Bees Challenge cards from our talented DRS Design Team and we'd love for you to leave us a comment!


Shelia


Sue
~~~~~~~~~~~~~~~~~~~~~~~~~~~~~~~~~~~~~~~~~~~~~~~~~~

Read more...

From Our Birdhouse

>> Friday, May 8, 2015

by Julie Warner - The Write Stuff

Happy Friday!
I hope your week has gone well! And a fine spring week it has been here! Birds, bees, butterflies...all over! And nice sunny days for a change! Sort of like this cute little scene.... I'm having a hard time concentrating on my post because dear ol' hubby has really pulled a good one. Sigh...I have no clue why he decided to order himself a pair of jeans online. And a different brand that he's never even tried on before. That's always a great idea! Some guys should never be allowed to buy their own clothes unsupervised. He's one of those. Seriously..he needs Garanimal tags just to put together pants & shirts & not look like a deranged golfer. So the jeans arrive today. They are denim colored cardboard. But he's determined that they will be fine after washing. And after using a metric ton of water to wash them a dozen times, he tries them on. Ok. Now they are just crispy. He's still determined that they will fine, but he wasn't happy when I told him they looked like the male version of "mom jeans". I just hope he learns his lesson after he has to wear them a time or two. I'm thinking sitting down with these on will be a fun adventure for him. At least it will be entertaining for me!

Anyway, for my card today, I started my stamping this fun new picket fence, masking part of it, then stamping the new birdhouse 3 times (which, by the way, I begged for a birdhouse & here it is!). Here's a little tip to make this easier...I only cut quickly around the top of the fence mask then colored in where the birdhouse posts would be when I removed the mask. There's really no need to cut out between all the pickets on the fence :) I added the lovebirds branch above the houses and a few branches from the leafy tree branch, some die cut grass, a few punched clouds & a punched sun. The die cut house was left white; I only added a little blue to the windows and the greeting was stamped on a piece of green vellum and wrapped around the house. The finished card is 5.50 x 4.25 and these are the Copics I used.
Thanks so much for stopping by! Have a great weekend and may NONE of your jeans be crispy cardboard! And don't forget to check out the DRS Thursday Challenge! This week, Beautiful Backgrounds.
Supplies:
ink: Memento tuxedo black
paper: Neenah white, X-Press It white, green vellum
accessories: Copic markers, cloud punches, sun punch, house die (Memory Box), grass die (Cheery Lynn), mini scallop scissors (top & bottom of vellum panel)


Read more...

Challenge #151 - HOT TRENDS- Glitter!

>> Thursday, December 4, 2014

Welcome to DRS Challenge Thursday! 
First, our winner from last week is....
Kate T  

Congratulations! You are the winner from our I Pine for You! Challenge! 
Please send an email to info@drsdesigns.com to claim your prize.

This week we're using the HOT TREND of 
Glitter!
(so sparkly & fun for the holidays! use glitter, glitter paper, glitter glue, etc)

To enter, show us your card  by linking it below and we'd love for you to leave us a comment.  The deadline for this challenge is Wednesday, December 10, at 6 pm ET. Challenge entries don't have to use DRS Designs stamps, but if you use them on your challenge card, you'll get an extra entry into the prize drawing.


For the prize, one winner will be randomly selected to win the following 3 stamps:.
And here are some wonderful sparkly cards from our talented Design Team and we'd love for you leave us a comment!
Karin
Janett
Shelia
Sue
(hard to see, but the star is covered in white glitter :)

Jennifer E.

~~~~~~~~~~~~~~~~~~~~~~~~~~~~~~~~~~~~~~~~~~~~~~~~


Read more...

Challenge #148 - Hang it Up!

>> Thursday, November 13, 2014

Welcome to the DRS Thursday Challenge!
First, the Winner from the Random Drawing....
Mel C 

We had 2 people who got second entires for using DRS images & it pays off! Thanks so much for using DRS images! Congrats, you are the winner from our Hot Trends -Just Half! Challenge!  
 Please contact us at info@drsdesigns.com to claim your prize. 

For this week's challenge, we are ready to ...
Hang it Up!
 (use any image, die cut or punched shape that you can Hang Up...think lights, ornaments, stars, etc!)

To enter, show us your card  by linking it below and we'd love for you to leave us a comment.  The deadline for this challenge is Wednesday, November 19, at 6 pm ET. Challenge entries don't have to use DRS Designs stamps, but if you use them on your challenge card, you'll get an extra entry into the prize drawing.

For the prize, one winner will be randomly selected to win the following 3 stamps:.
Christmas From Our House 120C
Christmas Village Cabin 212G
Pine Tree Snowdrifts 320H

And here are some wonderful inspired cards from our talented Design Team and we'd love for you leave us a comment!

Karin
Robin
Shelia
Jennifer E.
Sue
Julie
Janett

~~~~~~~~~~~~~~~~~~~~~~~~~~~~~~~~~~~~~~~~~~~~~~~~~


Read more...

Count Porkula

>> Saturday, August 30, 2014

Thank you for coming to visit!! Hope you are having a very creative weekend!!!
This Halloween new release has been so fun to play with already!!! I'm having a blast!
DRS stamps used: 125G The Raven (new release), 134D Count Porkula (new release), 898C sm Bat and Moon, 548G Batty Halloween, 293P Stone Fence and Gate
I stamped Count Porkula first (isn't he cute!!) then masked him and stamped the stone fence.  I then stamped the Raven (he looks so menacing, doesn't he?) Masked and stamped the moon with bat.  Next I used a stamp aligner to make sure my sentiment fit just right in between branches and bat, the Happy Halloween also has bats on it.  I masked the moon, branch, Raven, the count and fence to sponge my sky. 
The rest of the image and foreground is colored with Copic Markers.
Poor Count Porkula, I think he is walking up to the door of a haunted house!! He just wants a bit of  chocolate but I think he might be in store for a trick instead! Hmmm. I hope he doesn't get too scared!
Well, thanks for coming by and I hope I have inspired you to go create something.
Scroll down and see some more amazing cards using these and other Halloween stamps from DRS.

Read more...

Enjoy

>> Saturday, June 21, 2014

Hello everyone! Robin here...As summer arrives we have more days to enjoy the outdoors relaxing, playing with the kids, reading a book or whatever you like to do outside...today Leonard is out there blowing bubbles again!!   He's hoping you'll send this card to a friend who might need a "pick me up".  I would love to get a card from a friend for no real reason, wouldn't you?
I used DRS stamps: 081G-Leonard behind the bubble, 1091K-Broken flower fence, 130A-Bubbles, and 1145C-Enjoy Today.
I colored with Copics and used Diamond Glaze on the bubbles.
I used a swirl embossing folder on the white panel and pop dots under the yellow oval.  You can't see them very well but there are little white acrylic paint clouds in the background as well.
Have a great weekend and thanks for coming to see us!
Robin

Read more...

StatCounter

  © Blogger templates Palm by Ourblogtemplates.com 2008

Back to TOP