Showing posts with label snowman. Show all posts

Special Place in my Heart

>> Monday, January 29, 2024


Hello crafty friends. Are you in winter months? I am in winter months now and it seems I am doing more winter / snow cards due to the weather. 

For today's card, I wanted to use the new SPECIAL PLACE IN MY HEART GREETING - 307E.

Thank you for taking the time to stop by and check out my card. Have you stopped by the DRS Designs website? There are some new sentiment stamps that are great for a couple of upcoming holidays. I hope you get a chance to check them out.

Read more...

January Cards

>> Tuesday, January 16, 2024

Hi Everyone,

My first card is a copy of last week's card.  My brother-in-law has a birthday this month, and he's a huge bird fan.  I figured a penguin is a cold weather bird and I'm loving the speech bubbles as of late, so a birthday card was born.

I used the inside of the Birthday Flower Circle for the greeting along with Percy Penguin again, and I hope he likes it even though he's a guy and the card has glitter and gems ;)


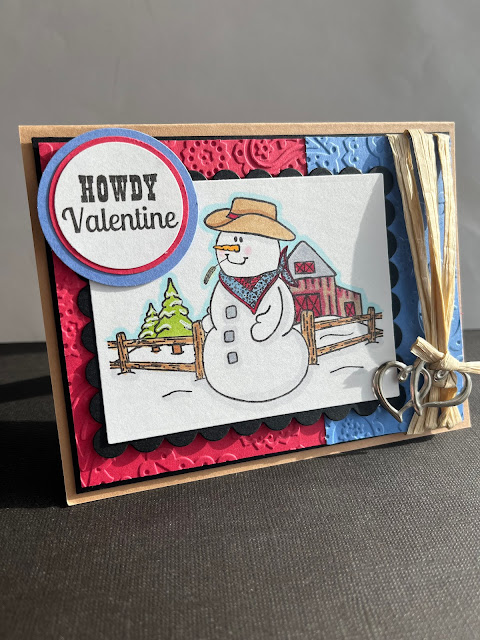
Some new stamps have been released at DRS Designs and I couldn't resist pairing up the new Howdy Valentine greeting with the adorable Cowboy Snowman.  Valentine's day may be all sunshine and flowers in some places, but in my part of the world it's definitely cold and snowy!
 

I added some wraphia, simply because it seemed rustic, and added some heart embellishments to keep with the valentine theme. 

Thanks for stopping by the blog!
Karin

Read more...

Thank You

>> Tuesday, January 2, 2024


Hi Everyone,

I'm still working on my holiday thank you notes, and since the Blizzard of Thanks Greeting was still on my worktable from this card, I used it for this one as well. 

I used the Interlocking Snow Background stamp on my blue base and stamped, colored and fussy cut Stretch the Round Button Snowman 


Instead of just a using a regular die to cut the sentiment, I chose a speech bubble for my snowman image because it seemed to make the card a bit more fun.  A few random snowflakes were added to play off the word blizzard, and then I called it done.  

Hope your new year is off to a great start!

Karin


Read more...

In The Meadow

>> Thursday, December 15, 2022

 Good morning crafty friends!


Today I used some new snowmen dies I got from Sizzix and some really cute stamps from DRS.
I used the Christmas Lamp Post first then masked it and stamped the Triple Trees with Snow twice.
I colored everything, sponged the sky, splattered white paint then glittered the ground.


I stamped In The Meadow on a separate piece of white then matted with red and popped up 
at the top of the card.
I made my little snowmen and popped them up warming their hands at the lamp post, LOL!

Thanks for visiting today! 
Robin

Read more...

Best Year Ever!

>> Monday, January 24, 2022


I love looking for a way to stretch my stamps. One way to stretch sentiment stamps is to use just a portion of the sentiment. This BEST YEAR CHEERS GREETING - 1109F is a great sentiment that you can use "BEST YEAR EVER" portion of the stamp on the outside of a card and then any sentiment on the inside.

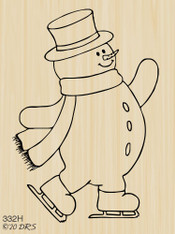
I stamped this adorable SKATING SNOWMAN - 332H then colored him with copics. I then cut out a circle from the white layer and placed him under the embossed snowflakes.

The card was finished off with some punched snowflakes and sequins.

Thank you for stopping by to check out my card this week. I hope you have the BEST YEAR EVER!

Read more...

Ice Day Birthday!

>> Thursday, January 20, 2022


Good morning!


I found this sentiment in my DRS stamps and thought how perfect to add snow (embossing folder), ice (ice skates) and gloves (mittens).  I used the Raised Mittens Skip Winter then fussy cut 2 of the mittens, colored then added some Liquid Applique to the wrist bands and heat to puff, I used Skating Snowman then die cut with a cross-stitch circle die, I then glued the mittens to his "hands".
The sentiment where I got my idea is Ice Day Birthday I stamped it in red on a 5 1/2 X 1 3/4" strip of white (approximate, I fit according to sentiment).  I then cut a red panel to mat the sentiment.
I used a snow background embossing folder on a white 4 1/8 X 5 3/8" panel, I then cut the sentiment strip to fit 5 3/8" and glued it to the snow background on a red 4 1/4 X 5 1/2" card panel.
The circle snowman is popped up.
Totally simple card for your winter birthday!
My husband's birthday is January 2nd so this was perfect for him.

Thanks for visiting today!
Robin

Read more...

Pink Snowman

>> Monday, December 6, 2021


For some reason I am stuck on pink. Not my normal color but I am happy to play with pink.

This cute SKATING SNOWMAN - 332H was fun to color up in pink. I added a red scarf, trimmed hat, buttons and skates. I added the 1 LINE MERRY CHRISTMAS - 364B sentiment but honestly I think this could be a Valentine snowman. 

Once colored with copics I finished with some punched glittery silver snowflakes.

Thank you for stopping by to check out my card this week.

Read more...

In The Meadow

>> Thursday, November 25, 2021

Happy Thanksgiving friends!


I guess I should have a Thanksgiving card, sorry...been too into Christmas lately!  But I do wish you all in the USA a wonderful day today with family and friends to celebrate and give thanks.  To all of the rest of my friends, where ever in the world you are, have a blessed day!


Today I've used DRS Designs stamps: Plaid Fir Tree , Merriest Wishes, Tis The Season, Skating Snowman, and Christmas Lamp Post.   

I cut a circle from the front of the card as a window to the inside then I made a frame with the same die plus 1 size larger together.  I cut it out of a previously made sprayed background panel.  I usually use Dylusion spray inks and/or Distress Oxide Spray Inks for making background pieces.  I glued the frame around the circle opening.  I then used Citrus Green Oxide to stamp the plaid tree, cleaned the stamp then stamped it again with turquoise ink, cleaned and stamped it again in blue.  I used masks so that I could stamp the 3 trees together and then cut them out as 1 piece.  After cutting, I popped them up on the left side of the circle opening.

I stamped Tis the Season at the bottom then set the card aside to work on the inside.

For the inside I used the circle that I cut out of the front of card, stamped the lamp post and snowman on it.  I colored all with Copic Markers.  I then cut a card panel a little smaller than the inside (4 1/8 X 5 3/8") I used a stamp aligner to make sure I stamped the lamp post in the right spot, removed my circle then stamped the lamp post on the card panel.  I colored the parts needing coloring and then glued the circle on top where it would match up with the other lamp post.
Inside
I then stamped Merriest Wishes at the bottom.


My next card uses the same colors and the same trees as a background sort of.
I cut out a nativity scene from a larger scene (ODBD die). I recut the star in silver then 
mounted it on a die cut flat bottom circle from MFT's.  (I used the same piece of background paper
I previously made).

The card front is black so my other card front pieces were cut from a single piece of white,
4 1/4 X 5 1/2" I cut it with these angles then trimmed so that some black would show.
My 2 side pieces were stamped and masked with the same 3 colors as my top card.
The sentiment is new Jesus Is The Reason from DRS (it has a pretty star above the words but 
since I have the star on the manger I masked the star off the sentiment).


Hope this gives some inspiration!
Thanks for visiting!!
Robin


Read more...

Freezin!!

>> Monday, February 8, 2021

 Happy Monday everyone. Hope you had a great weekend and found some time to get creative. It is bitterly cold here in NW Ohio, so I was quite content to stay indoors and stamp away the weekend! It's so cold our poor dog doesn't want to go for walks. She just dashes into the backyard, does her business and dashes back in doors! I really don't mind since I have little to no desire to go outdoors either!! With that idea in mind, here's my first card for today. It truly is Freezin' Season here!


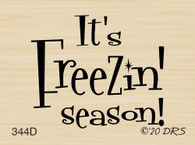
I started with the dark blue CS, splattered some white gesso mixed with water to create the snow, then I used a MFT window die to cut out the window and then the Freezin season was stamped with VersaMark and embossed with white EP. I used the window in the blue panel to mark and die cut the same window in the white card base. Then I stamped and colored the Skating Snowman inside the card. I honestly believe if this snowman were here right now, he'd be skating off to someplace a tad bit warmer! Wind chill has our temps in the minus digits. That's pretty cold, even for a snowman.


My next cards are for Valentine's Day.  DRS has some great new Valentine images and greetings.


This card uses the new Bee my Valentine greeting and the new Flower Hearts along with the sweet little bitsy bee. The flower hearts were stamped onto pink CS with VersaMark ink, heat embossed with white  EP, die cut into a heart shape and then cut into strips. The strips are attached to a heart die cut from acetate and popped up with foam adhesive. In real life it looks like the heart is floating on the card. I got this idea from Natasha Foote. You can see her video here.


This card uses the same greeting, but this time I stenciled the honeycomb using  some DO inks. The greeting was stamped in the corner. The bitsy bee and the Happy bee were stamped, colored and fussy cut. They're attached with foam dots. Some clear gems were added for embellishments. The panel was attached to a black card base.

Thanks for stopping by today. Hope you're staying warm!

blessings,
shelia


Read more...

Winter Skating

>> Friday, January 29, 2021

  by Julie Warner - The Write Stuff

Happy Friday!
I hope your week has gone well! Brrr...it's cold here! We had a cold front overnight & the bottom dropped out. The temp never made it out of the 30's all day & w/ the stiff wind, it made it feel even colder. So I think this ice skating snowman is right in line w/ the cold weather. 

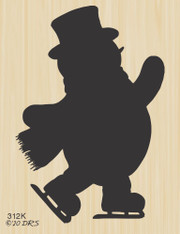
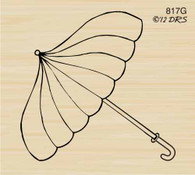
In a weird twist of fate, this card turned out almost exactly like the picture I had in my head.  What's up w/ that? It almost never happens that way. Am I right? Anyway, I stamped the winter words w/ a lt blue ink, then stamped the snowflakes in a shade darker blue. Still light, but you can see the difference. Then I put it into my Misti & stamped the silhouette snowman several times w/ the denim ink. The umbrella was also stamped w/ the denim & I used B39 & N7 Copics to turn it into a silhouette. The greeting was die cut out of very dk navy using a couple of different die sets. 
And here's the inside. I decided to make the front a little smaller so I could add a narrow navy layer so I used the part I cut off as a frame for the inside.
Thanks so much for stopping by! Have a great weekend!


Supplies:
paper: Staples 110# white, dk navy
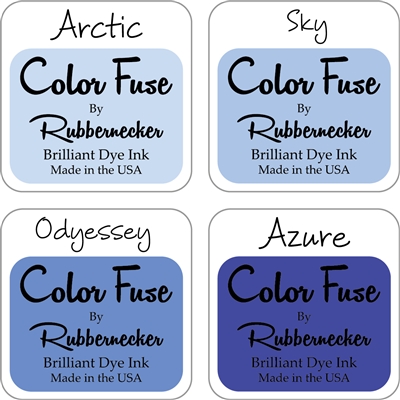
ink:  Adirondack denim, Rubbernecker Stamps Color Fuse ink set #7


Read more...

Freezin' Season!

>> Monday, January 25, 2021

Happy Monday everyone. Hope you are staying warm where ever you are. We are having our coldest temperatures so far and may even get our first proper snow. We've had a mild winter so far and only have had minimal snow. My husband may have to get the snow blower out tomorrow morning! We'll see. So in honor of this bout of cold weather I have a couple of snowman cards to share with you.


This first card features the new silhouette skating snowman and the fun Freezin" season greeting. I started by stamping the snowman, as well as the greeting onto some watercolor CS with VersaMark ink and then heat embossing them with Hero Arts detailed white EP.. A Fawn Lawn border die was used to cut a hilly border to use as a mask. I sponged the sky in with a few TH Distress Oxides inks in blues. I used the lightest blue ink I had and sponged a little color onto the snow at the bottom. Some gesso mixed with water was used to splatter some snow onto the sky. After I completed this I kept looking at the card and thinking something was wrong. That's when I realized he was skating on snow and not ice! So I die cut an oval mask and sponged on some more of the lightest blue ink, making it darker for the ice. Some Nuvo Aqua Flow clear shimmer was added to the frozen pond.


This card uses the same greeting but this time it's paired with the Skating Snowman image. The snowman was stamped onto white CS with Memento Black ink, colored with Copics and die cut with a oval die. The greeting was stamped with Versafine Blue ink, heat embossed with clear EP and die cut. The blue panel was splatter with the same gesso mix I used on the first card. Didn't want it to go to waste. After I got this card put together I noticed a blue ink smudge on the greeting, so I added a die cut snowflake with a navy pearl to hide it.


Thanks for stopping by today. You can see all the new images, including the ones I used today, here.


blessings,

shelia

Read more...

Snow Better Friend

>> Thursday, January 14, 2021

 Good morning!

It is winter...isn't it?  Well, we could use more snow for sure but the temps are pretty cold, at night anyway!  LOL!

Well, this is wishful thinking from me for a lot of snow

and I hope it comes soon.  My son just left for a snowboarding vacation he has been planning with buddies for 6 month!!

Today I have 2 snowman cards using the 2 new snowmen.

This first card uses Skating Snowman and Snow Better Friend

The snowflake border die is from Memory Box, I put a rhinestone in the center of the snowflake.   
The scallop oval is from Rubbernecker.


My next card uses the same snowflake die but with different stamps.
First the Silhouette Skating Snowman, It's Freezin' Season which are both new
The ink color is a Jade/Teal color.
I put a rhinestone in the center of the double snowflake border die cut.

I used a Misti to get good coverage on this silhouette snowman and even put a coat of Brilliance
Platinum Planet on it but you can't see it in this picture.  It gives it a bit of a shimmer.
Thanks for visiting today!
Robin

Read more...

Freezing' Snowman ⛄️

>> Friday, January 8, 2021

 by Julie Warner - The Write Stuff

Happy Friday!
I hope your week has gone well! We're supposed to have snow overnight so it feels as cold as this snowman must be. I stamped & colored him on a partial white piece. It's partial because I had already cut out a group of oval frames & this was left. I like using pieces that are odd shaped because it gives me different & unusual layouts. The largest of the oval frames was attached to the opening then I die cut the panel using a rectangle die. The greeting oval is the centermost piece of the frames. And it was the perfect size!

The snowflakes were stamped around the snowman w/ an arctic blue ink. The panel to the right is an alcohol ink bg I made a while back. I dabbed a little of the silver AI ink onto a piece of felt & used it as a stamp pad for the silver snowflakes. If you try this, you might want to do what I did & soak a folded paper towel w/ some isopropyl alcohol to clean the ink from the stamp afterward. 
Here's the inside & below it are the Copics I used.
Thanks so much for stopping by! Have a great weekend!


Supplies:
paper: Staples 110# white, glossy white
ink:  Memento tuxedo black, Rubbernecker Stamps Color Fuse ink set #7


Read more...
StatCounter

  © Blogger templates Palm by Ourblogtemplates.com 2008

Back to TOP