Showing posts with label Christmas Tree. Show all posts

Leaping Deer

>> Monday, December 11, 2023


Hello crafty friends. I finally had a chance to use this great new Leaping Deer - 276H image. Oh, how I love this great deer image. I actually have two cards to share this week with this wonderful image.


For my first card today: 


For my second card:
  • I stamped the Leaping Deer - 276H  and the THINKING OF YOU AT CHRISTMAS GREETING - 183D and heat embossed them with gold glitter embossing powder.
  • Next, I cut several strips of mirror gold to create more interest to the card.
  • I then punched several snowflakes and layered them giving them dimension and finished them with stickles.
On this card really shines.

Thank you so much for stopping by to check out my cards this week.

Read more...

Quick Watercolor Christmas/Winter Cards

>> Wednesday, December 6, 2023

Hello Crafty Friends.


I have been playing around with some simple water colors and these three very fun new stamps from DRS Designs:  Small Script Merry Christmas, Hello Winter,  and Simple Pine Trees.  The Design Team has been rocking cards using them and for some reason they keep calling to me. 


On this one, I just stamped the images and did some quick water color washes, some shadows, and a bit of green and decorations in the trees.   I finished it off with a bit of SnowTex. 

On this one, I stamped the two images and did some more minimal watercolor.  I had some watercolor leftover so I stenciled in some larger snowflakes.  I finished it off with a splatter of paint and Snowtex.
Two super easy and fast cards. Something we all probably need as Christmas is speeding toward us.

Hugz,

Nancy


Read more...

Merry Christmas

>> Monday, December 4, 2023


This new Simple Pine Trees 285E is just perfect for adding some quick trees to your cards. I have two cards to share today.

For my first card:

  • I started the card with sponging teal on a white card stock.
  • Next, I stamped the Simple Pine Trees 285E several times across the panel with versamark ink then white heat embossed the trees.
  • I then used some scissors and fussy cut some snow hills and popped the top one up on dimensionals.
  • The top hill is stamped with the new Small Script Merry Christmas 272E in teal to match the sponged teal.
  • I finished the hills with stickles and added some white gel pen to the sky and additional stickles to the white gel pen.
For my second card:


  • I stamped silver designer paper with versamark ink using the INTERLOCKING SNOW BACKGROUND - 015H and then heat embossed silver embossing powder.
  • I then cut apart the snow panels and layered on a die cut white panel popping the panel up on dimensionals.
  • Next, I stamped the Simple Pine Trees 285E with versamark ink and heat embossed the trees in green. I then fussy cut the trees and popped them up on dimensionals.
  • The Small Script Merry Christmas 272E is heat embossed with red emboss powder.
  • The card is finished with several clear sequins.

Do you have a favorite of these two card? I have to say, I love them both. The aqua is a great color but I really love the silver on silver embossing on the second card.

Thank you so much for stopping by to check out my two cards this week.

Read more...

Merry Christmas

>> Monday, November 27, 2023


I love the new Simple Pine Trees 285E. They are great for backgrounds or simple card fronts. For my card today, I used it for a really simple card front.

  • First, I masked off the small tree and only used the large tree. Once the tree was stamped I stamped the new Small Script Merry Christmas 272E and stamped it so it was touching the tree.
  • I then colored the tree with copics and added some red Nuvo Drops to the tree and also the I on Christmas.
  • I then cut the layer down and added the bright green card stock to pick up some of the color on the tree. 

I might need to make more of this card and color the tree up in other colors.


Thank you so much for stopping by to check out my card this week.

Read more...

Evergreen

>> Thursday, December 8, 2022

 Good morning friends!

I wish you could see the sparkle in the tree but trust me, it's there.

I started with my Plaid Fir Tree in the Misti (because I'm going to over stamp it later). I inked up the stamp with 2 colors of green Distress, Pine Needles and Rustic Wilderness, stamped and then reinked with embossing ink.  Then I used some glitter on the inked tree and heat set.  I added the sentiment: Merriest Wishes to the Misti, inked with black then stamped.

The green glitter paper is actually foam backed glitter paper I found at a local craft store.

I used the Tim Holtz Sizzix plaid die in 2 colors behind the glitter paper backed with white then added it to a green foil paper for a final layer.


I hope you like this idea and will try it yourself, it works and everything is sparkling in real life.
Thanks for visiting today! 
Robin

Read more...

In The Meadow

>> Thursday, November 25, 2021

Happy Thanksgiving friends!


I guess I should have a Thanksgiving card, sorry...been too into Christmas lately!  But I do wish you all in the USA a wonderful day today with family and friends to celebrate and give thanks.  To all of the rest of my friends, where ever in the world you are, have a blessed day!


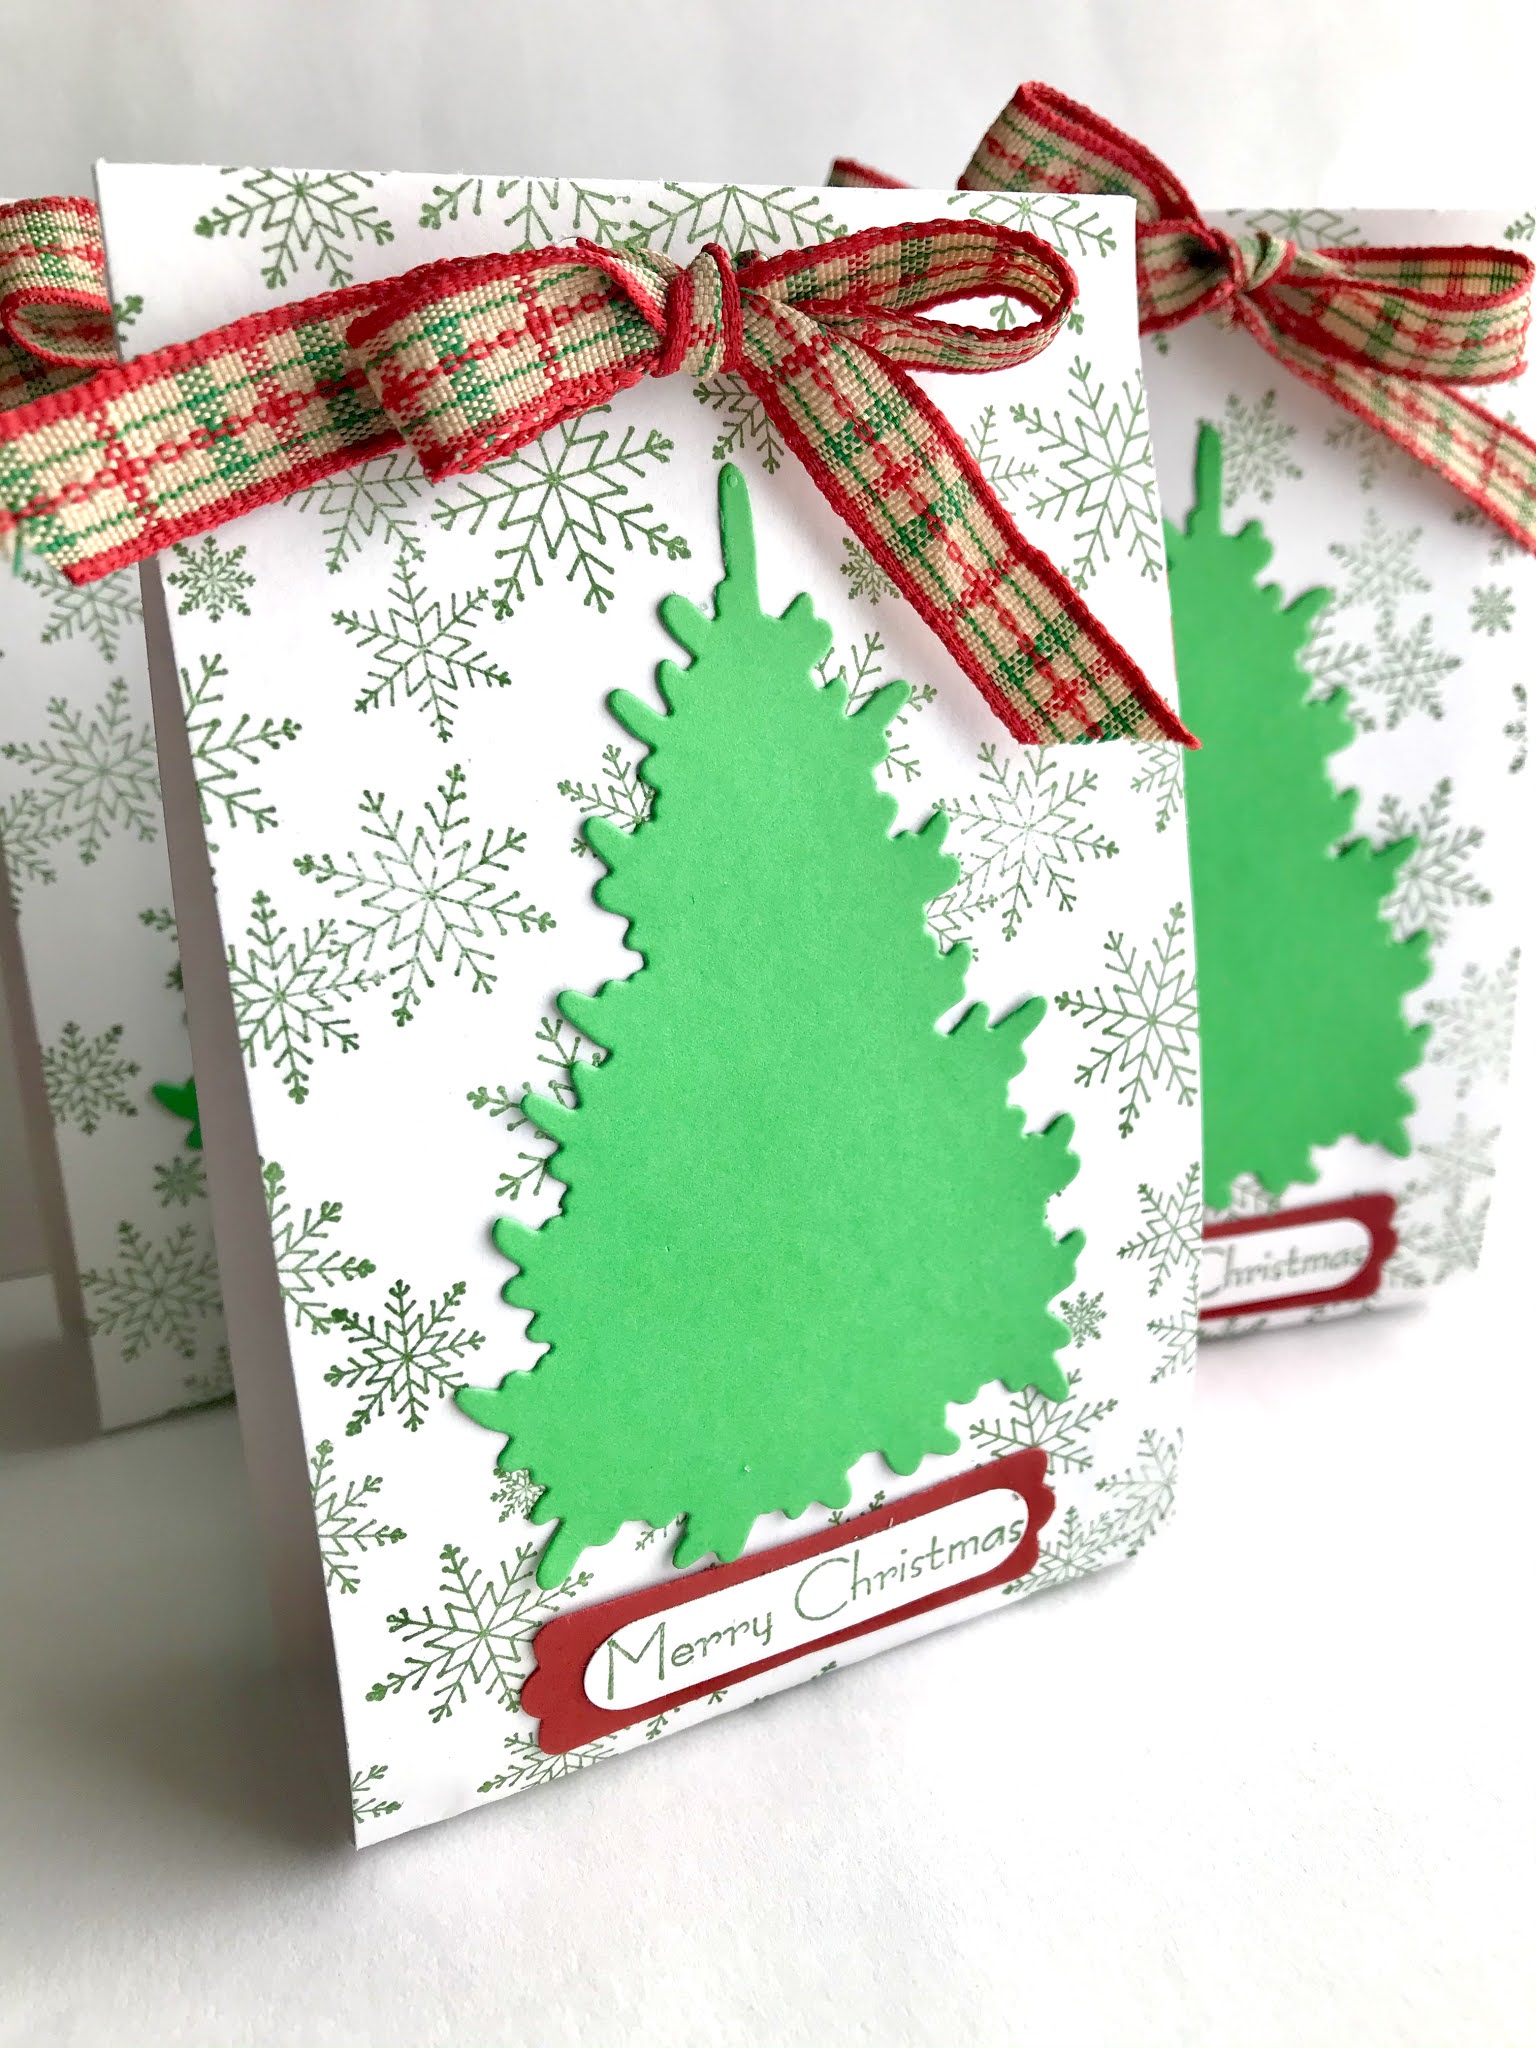
Today I've used DRS Designs stamps: Plaid Fir Tree , Merriest Wishes, Tis The Season, Skating Snowman, and Christmas Lamp Post.   

I cut a circle from the front of the card as a window to the inside then I made a frame with the same die plus 1 size larger together.  I cut it out of a previously made sprayed background panel.  I usually use Dylusion spray inks and/or Distress Oxide Spray Inks for making background pieces.  I glued the frame around the circle opening.  I then used Citrus Green Oxide to stamp the plaid tree, cleaned the stamp then stamped it again with turquoise ink, cleaned and stamped it again in blue.  I used masks so that I could stamp the 3 trees together and then cut them out as 1 piece.  After cutting, I popped them up on the left side of the circle opening.

I stamped Tis the Season at the bottom then set the card aside to work on the inside.

For the inside I used the circle that I cut out of the front of card, stamped the lamp post and snowman on it.  I colored all with Copic Markers.  I then cut a card panel a little smaller than the inside (4 1/8 X 5 3/8") I used a stamp aligner to make sure I stamped the lamp post in the right spot, removed my circle then stamped the lamp post on the card panel.  I colored the parts needing coloring and then glued the circle on top where it would match up with the other lamp post.
Inside
I then stamped Merriest Wishes at the bottom.


My next card uses the same colors and the same trees as a background sort of.
I cut out a nativity scene from a larger scene (ODBD die). I recut the star in silver then 
mounted it on a die cut flat bottom circle from MFT's.  (I used the same piece of background paper
I previously made).

The card front is black so my other card front pieces were cut from a single piece of white,
4 1/4 X 5 1/2" I cut it with these angles then trimmed so that some black would show.
My 2 side pieces were stamped and masked with the same 3 colors as my top card.
The sentiment is new Jesus Is The Reason from DRS (it has a pretty star above the words but 
since I have the star on the manger I masked the star off the sentiment).


Hope this gives some inspiration!
Thanks for visiting!!
Robin


Read more...

CAS Country Christmas Cards

>> Wednesday, November 24, 2021

Hello CraftyFriends.


I am still doing lots of CAS Christmas cards so I can get them in the mail next weekend.  The new DRS sentiments and images work perfect to get some quick cards done.  I have two to share and neither too much time.


This one was made with the new Jesus is the Reason Greeting and an Impression Obsession die. All I added was a bit of Stickles to the center of the star. 

I used the Silient Night Sheet Music image for the background and fussy cut the new Plaid Fir Tree to add to it for depth and color.  I also cut a few words out of the new Ugly Sweater Christmas Greeting to add to as they were small and fit great (I added the hope and faith words inside). 
Hope you have a great week!  Happy Thanksgiving tomorrow if you celebrate it.  

Hugz,

Nancy

Read more...

Plaid Christmas

>> Tuesday, November 16, 2021

Hi Everyone,

I decided to feature the recently released Plaid Fir Tree on my card today, and I began by stamping and fussy cutting 3 trees.  Once they were cut, I turned them over and stamped them on the opposite side, and then glued them together by adding glue down the center of the trees.  

I attached my three dimensional tree to a die cut and plaid embossed panel, which was attached to a background made using the Woven Plaid Background stamp. 

A die cut border embellished with enamel dots was added at the bottom and I finished the card with the new Tis the Season Greeting.


Here is a close up of the tree...


Thanks for visiting and be sure to check out all of the newest holiday stamps over at the DRS Designs store!

Karin

Read more...

Silver Bells

>> Thursday, November 11, 2021

 Good morning!
Today I've used DRS Designs Bells Holly and Bow, and


I also used an embossing folder on both the silver and white panels.
The oval dies are from Rubbernecker.
I used some rhinestones by Spellbinders.
When I was growing up the song Silver Bells was always my favorite
Christmas song.  You can imagine that now every time I hear it I think 
of those sweet Christmases in my childhood.
These bells made me think of that song as soon as I saw them!

Merry Christmas Gnome Boy
Z Fold card

I used the new Plaid Fir Tree
and on the inside I used the Plaid Fir Tree, Merry Christmas Arc, Tree Home Gnome ,


I used Spellbinders dies for the frames.

Thanks for visiting today!

Robin


Read more...

Lovely Gifts

>> Thursday, December 24, 2020


Good morning!
Merry almost Christmas!
I have a couple of Christmas cards today, (hey why not get started on next years cards while I'm in the Christmas mood, right?).
This first one features the new Potted Christmas tree and

I used a new die I bought at our local stamp store from Hero Arts.  I cut it in white for the lights and cut it in green too...you get it, right?
Just a little shading on the bulbs and glitter and woohoo, Christmas lights!  I also used a snowflake embossing folder on this card for texture.


My next card features the new Potted Christmas Tree and Lovely Gifts Christmas Greeting.
I used a snowflake embossing folder and some oval dies from Rubbernecker on this card.
I also used several enamel dots to accent.
These were super simple cards to make in a hurry.
Thanks for visiting today and Merry Christmas!
Robin

Read more...

Merry Christmas Frosty

>> Tuesday, December 22, 2020

Hi Everyone,


Here's a look at the one paper crafted holiday item I made this year.  I was working on things over the summer for my niece's wedding and I made this rosette out of white paper.  It didn't work out for my favors, so I added some winter elements and made this ornament for the tree.


The rosette base was made from 2 strips of paper measuring 2" x 12", and scored every 1/4".  It was then border punched along one side, folded accordion style and hot glued together.   I stamped, colored and fussy cut the Medium Mr. Snowman image, attaching him to a few die cut and embossed circles of matching paper.  The word Frosty came from the Winter Wonder Words Greeting stamp.


And on the back I used the Snowman Especially for You stamp.


For my Christmas dinner, it will once again just be the 4 of us, so I copied myself and made the same favors I did in this Thanksgiving post, just using peppermint flavored chocolates and these stamps:


However you're celebrating this year, I'm wishing you a Happy Christmas!

Cheers!
Karin


Read more...

Sweater Weather

>> Sunday, December 6, 2020


It is fast approaching sweater weather where I live and that makes me think of creating sweater cards. This POTTED CHRISTMAS TREE - 182G is perfect for the front of a sweater.


I stamped the POTTED CHRISTMAS TREE - 182G image and colored with copics. Once colored I fussy cut it and added it to a red card stock and cut a notch out of the top and layered on a white card base.


Using an argyle emboss folder I embossed the base layer with some punched snowflakes added around the tree.


For the collar on top and the base I used a ribbed embossing tool and glued those down trimming them off to fit the card.


I finished it off with pearls for a necklace.


I have a second card again this week.

This NEW HOME GREETING - 967G is so perfect to send to anyone getting a new home. When we bought our home I remember the dogwood trees were in full bloom and I just had to use the DOGWOOD BRANCH - 1092H with this sentiment.

I stamped the dogwood branch a few times around the edge of the card panel. Then colored with copics. I added the sentiment and die cut the panel with a wonky border die.

I finished with some soft pink gems and popped it on dimensionals.

I have a surprise 3rd card for you this week.
This card reminds me of my lasts home. When buying a home the first thing that comes to mind is all the projects that need done. We had to strip all the floors in our home and restain them.

For this card I used the WOOD GRAIN BACKGROUND - 626P stamped on Kraft card stock. Next I embossed it with a wood grain emboss folder.

I stamped the JUST MOVED HOUSE KEY - 193F and colored it with copics. While rooting through my supplies I found this washi tape that was perfect for trimming the card. It made me think measure twice cut once. I finished the card with a couple of dimensional flower stickers from my stash.

Thank you for stopping by to check out my cards this week. I hope you have a wonderful week.

Read more...

"Shell"ebrate the Season

>> Thursday, November 12, 2020

Good morning!
Using some sand, sea and coral colors today for a 
tropical holiday.  I'm sure some of you live around the beach
where cold weather and snow is unheard of right?
So this is for you.
A sand castle full of shells!
I used DRS Designs stamps: "Shell"ebrate the Season

The zig zag die I used at the bottom (which also made the banner) is an
older set from Memory Box.  I also used some enamel stars I believe came from
Stampin' up!


My next card uses the new Beauty of the Season


The stamping is all embossed with white powder on light blue cardstock.
I used a sheer ribbon for a bow with multiple loops.

Thanks for visiting today for some more fun Christmas inspiration!

Robin


Read more...

Snowy Season's Greetings

>> Wednesday, November 11, 2020

We don't get much snow in Central Alabama, but about this time every year, I start wanting to see it.  I guess that is because I grew up in New Mexico and this is about the time we started getting snow.  With temps in the 70s and 80s still, we probably won't be seeing snow any time soon so I filled today's card with lots of it. 

I used the last of the paper towel background my Grandson Lewis made me and added the new Potted Christmas Tree and the new Tiny Season's Greetings. Once I had the images on, I masked the greeting, and splattered the whole thing with SnowTex.  Then I pile up some of the snow on top of the greeting. 

Christmas is just around the corner, and time to make a ton of cards if you haven't already.  I am behind yet again!

Hugz,

Nancy


Read more...

Beauty of the Season

>> Thursday, November 5, 2020

Good morning!
I have a couple of red cards today.
My first one features the Stretch The Round Button Snowman


The oval die is from Rubbernecker.  I actually used an embossing folder on part of the background
too.  I placed the embossing folder over the red and white then used a hammer to emboss just
where I wanted it (well almost, close anyway).

My second card uses the Potted Christmas TreeBeauty of the Season,

This was an "In the Box" cutting technique.  I stamped the tree at the left side of the cardstock drew a circle with the die then cutting from the center of the circle I cut to the point where the circle I drew meets the stamped line.  Then I placed the die on leaving the tree outside the die then cut the circle.  
I cut another circle with the special edges and slipped it under the tree.  I cut a red frame using a scallop die from Spellbinders and the round die I used before.
Thanks for visiting today!
Robin
 

Read more...

Coastal Christmas "Shell"abration

>> Wednesday, November 4, 2020

One day, I dream of living at the beach or at least on water.  I do have a few friends and family who are lucky enough to live at the beach or very close to it and my cards today would work perfectly for them.


My first card is full of fussy cutting fun (I enjoy it).  I stamped, water-colored, cut, and sponged:


* 8 of the coral in the 3-1 Ocean Floor Designs


*8 of the 4-1 Seashells


*2 of the Christmas Light String


*1 of the new "Shell"ebrate the Season Greeting


Then I just started layering the coral, shells and lights together.  I kept all the colors soft other than the lights. 

Then I made another card using the Potted Berry Tree, the "Shell"ebrate the Season Greeting and some of the shells fussy cut from the Seashell Christmas Tree

I water-colored the tree and the shells.  

It is time to start those Christmas cards if you haven't already...Christmas is just around the corner.  I have a couple of weekends planned soon to knock my cards out, but I know I will still be making them up to the last minute like I always do!


Hope your week is going well.  


Hugz,


Nancy

Read more...

Seasons Greetings

>> Tuesday, November 3, 2020

Hi Everyone,

Now that it's November, I did my first bit of holiday preparation yesterday.  I unpacked my Christmas dishes in anticipation for December dinners.  It's generally the first thing I do, since they're behind cupboard doors, so no one but me knows.  One year I did put up my tree before Thanksgiving though, but I was pretty tired of looking at it by the time Christmas rolled around, so I'm not doing that again. I will continue to decorate on Black Friday, it keeps me out of the stores and it's been my tradition since I was in college.

On that note, here is my card using the new Potted Christmas Tree stamp.  After coloring and die cutting it, I went and embellished the ornaments with some glitter glue for a bit of sparkle.  The background and tiny tag were stamped using the Interlocking Snow Background, and then I stamped the tag using the Tiny Season's Greetings.

I die cut a big snowflake and used a solid ribbon for the tag and a printed ribbon along the bottom of the card.  One pink gemstone finished it off.


The month of October had me going to two drive by parties, one birthday and one baby shower.  So very 2020, am I right?!

Anyway, I made this cheerful piggy card for the birthday celebration.  Leonard Pig Behind the Bubble is the star of the card.  I colored him up and used my circle dies, along with the Delightful Surprises Birthday Greeting and I added some glossy accents to the big bubble.


And in keeping with the circles theme, I used the Interlocking Circles stamp to create the background.  

Here's wishing you a delightful day!

Karin

Read more...

Gnome for the Holidays!

>> Monday, November 2, 2020

 Happy Monday Everyone. Hope you had a great weekend and found some time to get creative. We had some snow flurries yesterday with strong bitterly old winds, so it was a good day to stay in and stamp! Here's the card I created.


I started with a piece of watercolor CS, stamped the woodgrain background onto it and then sponged on some DO inks in browns. While that dried I stamped, colored and fussy cut the peeking gnome and toad stool images. The string of Christmas lights was stamped with Versafine Black ink and heat embossed with clear EP. I used a small paintbrush and water to remove the DO ink from the light bulbs and colored them with various Copic Markers. Next I die cut the window from the front panel, marked off the inside of the window and stamped the new Gnome for the Holidays greeting and potted Christmas tree image, which I colored with Copics. Once everything was colored, I assembled the card. The woodgrain panel is popped up with foam adhesive, as is the peeking gnome. The mushrooms and grassy border are glued on. Last I added some clear Nuvo drops to the Christmas lights and tree bulbs and then some white Nuvo drops to the white spots on the mushrooms.

I really like how this turned out. That peeking gnome is my favorite gnome and I knew I wanted to use him on my card.

Thanks for stopping by today. You can check out the newest images as well as all the awesome images and greetings from DRS Designs here.


blessings,

shelia

Read more...

Christmas Blessings!

>> Thursday, October 29, 2020

Good morning friends!

Today I've used DRS Designs stamps: Christmas Blessings, Interlocking Stars
card using an "old" sketch from SplitCoastStampers.
I also used an embossing folder on the Kraft tag and Spellbinders scallop circle and circles dies.
I used white embossing powder on the stars and dots and Stickles on the ornaments.


My second card
Uses some decorative edge dies from Rubbernecker, ribbon and banner dies from HC.
The DRS Designs stamps used for this card are Large Original Plaid  (for the stripes)

This was also a sketch but from ODBD long time ago.

Any time I'm pressed for time but I still want a really pretty card I look through 
all my favorite sketches and decide which ones go with the images/sizes
I want to work with.  Not only is it a time saver but I also come out with cards I like.
So, next time you are in a hurry, get out your sketches and take 5 minutes 
to find a great one.  
WHAT? you don't print off your favorites? You can also find 
a bunch at SplitCoastStampers here or Google card sketches.
Hope this inspires you to start with your Christmas cards if you haven't already.
Thanks for visiting!
Robin


Read more...

Gnome for the Holidays

>> Thursday, October 22, 2020


Good morning!
I drew the split door in the tree slice and masked it to stamp the Tree Slice Wood Grain.  First though, I stamped the sign with mushrooms and the Gnome Home.  I masked the wood slice and Gnome Home then stamped the mountains and trees.
I reverse masked the doorway and stamped the Peeking Gnome.  I did a bit more masking and stamped the mushroom lines.  The tree was stamped separately , colored and cut out then popped up.
I used a white painty pen to add snow to the mountain tops then added Stickles to make them sparkle.  I added Stickles to the ornaments too.

I used some Memory Box and Rubbernecker Dies on this one with gold paper.


The Lantern was stamped then I die cut it.  I die cut the gold frame using a combo of 2 dies then I popped it up.  I die cut the gold mat for the sentiment.  The pinecone was stamped separately then colored and cut out then glued it to the sentiment.

Thanks for visiting today!

Robin


Read more...

StatCounter

  © Blogger templates Palm by Ourblogtemplates.com 2008

Back to TOP