I have had such a great time this summer as a Guest Designer for DRS Designs! Everyone is so sweet and helpful and I have lots of new ideas and stamps to use! SO, for my last "hurrah" so to speak, I have a little project.
This past weekend on SCS it was
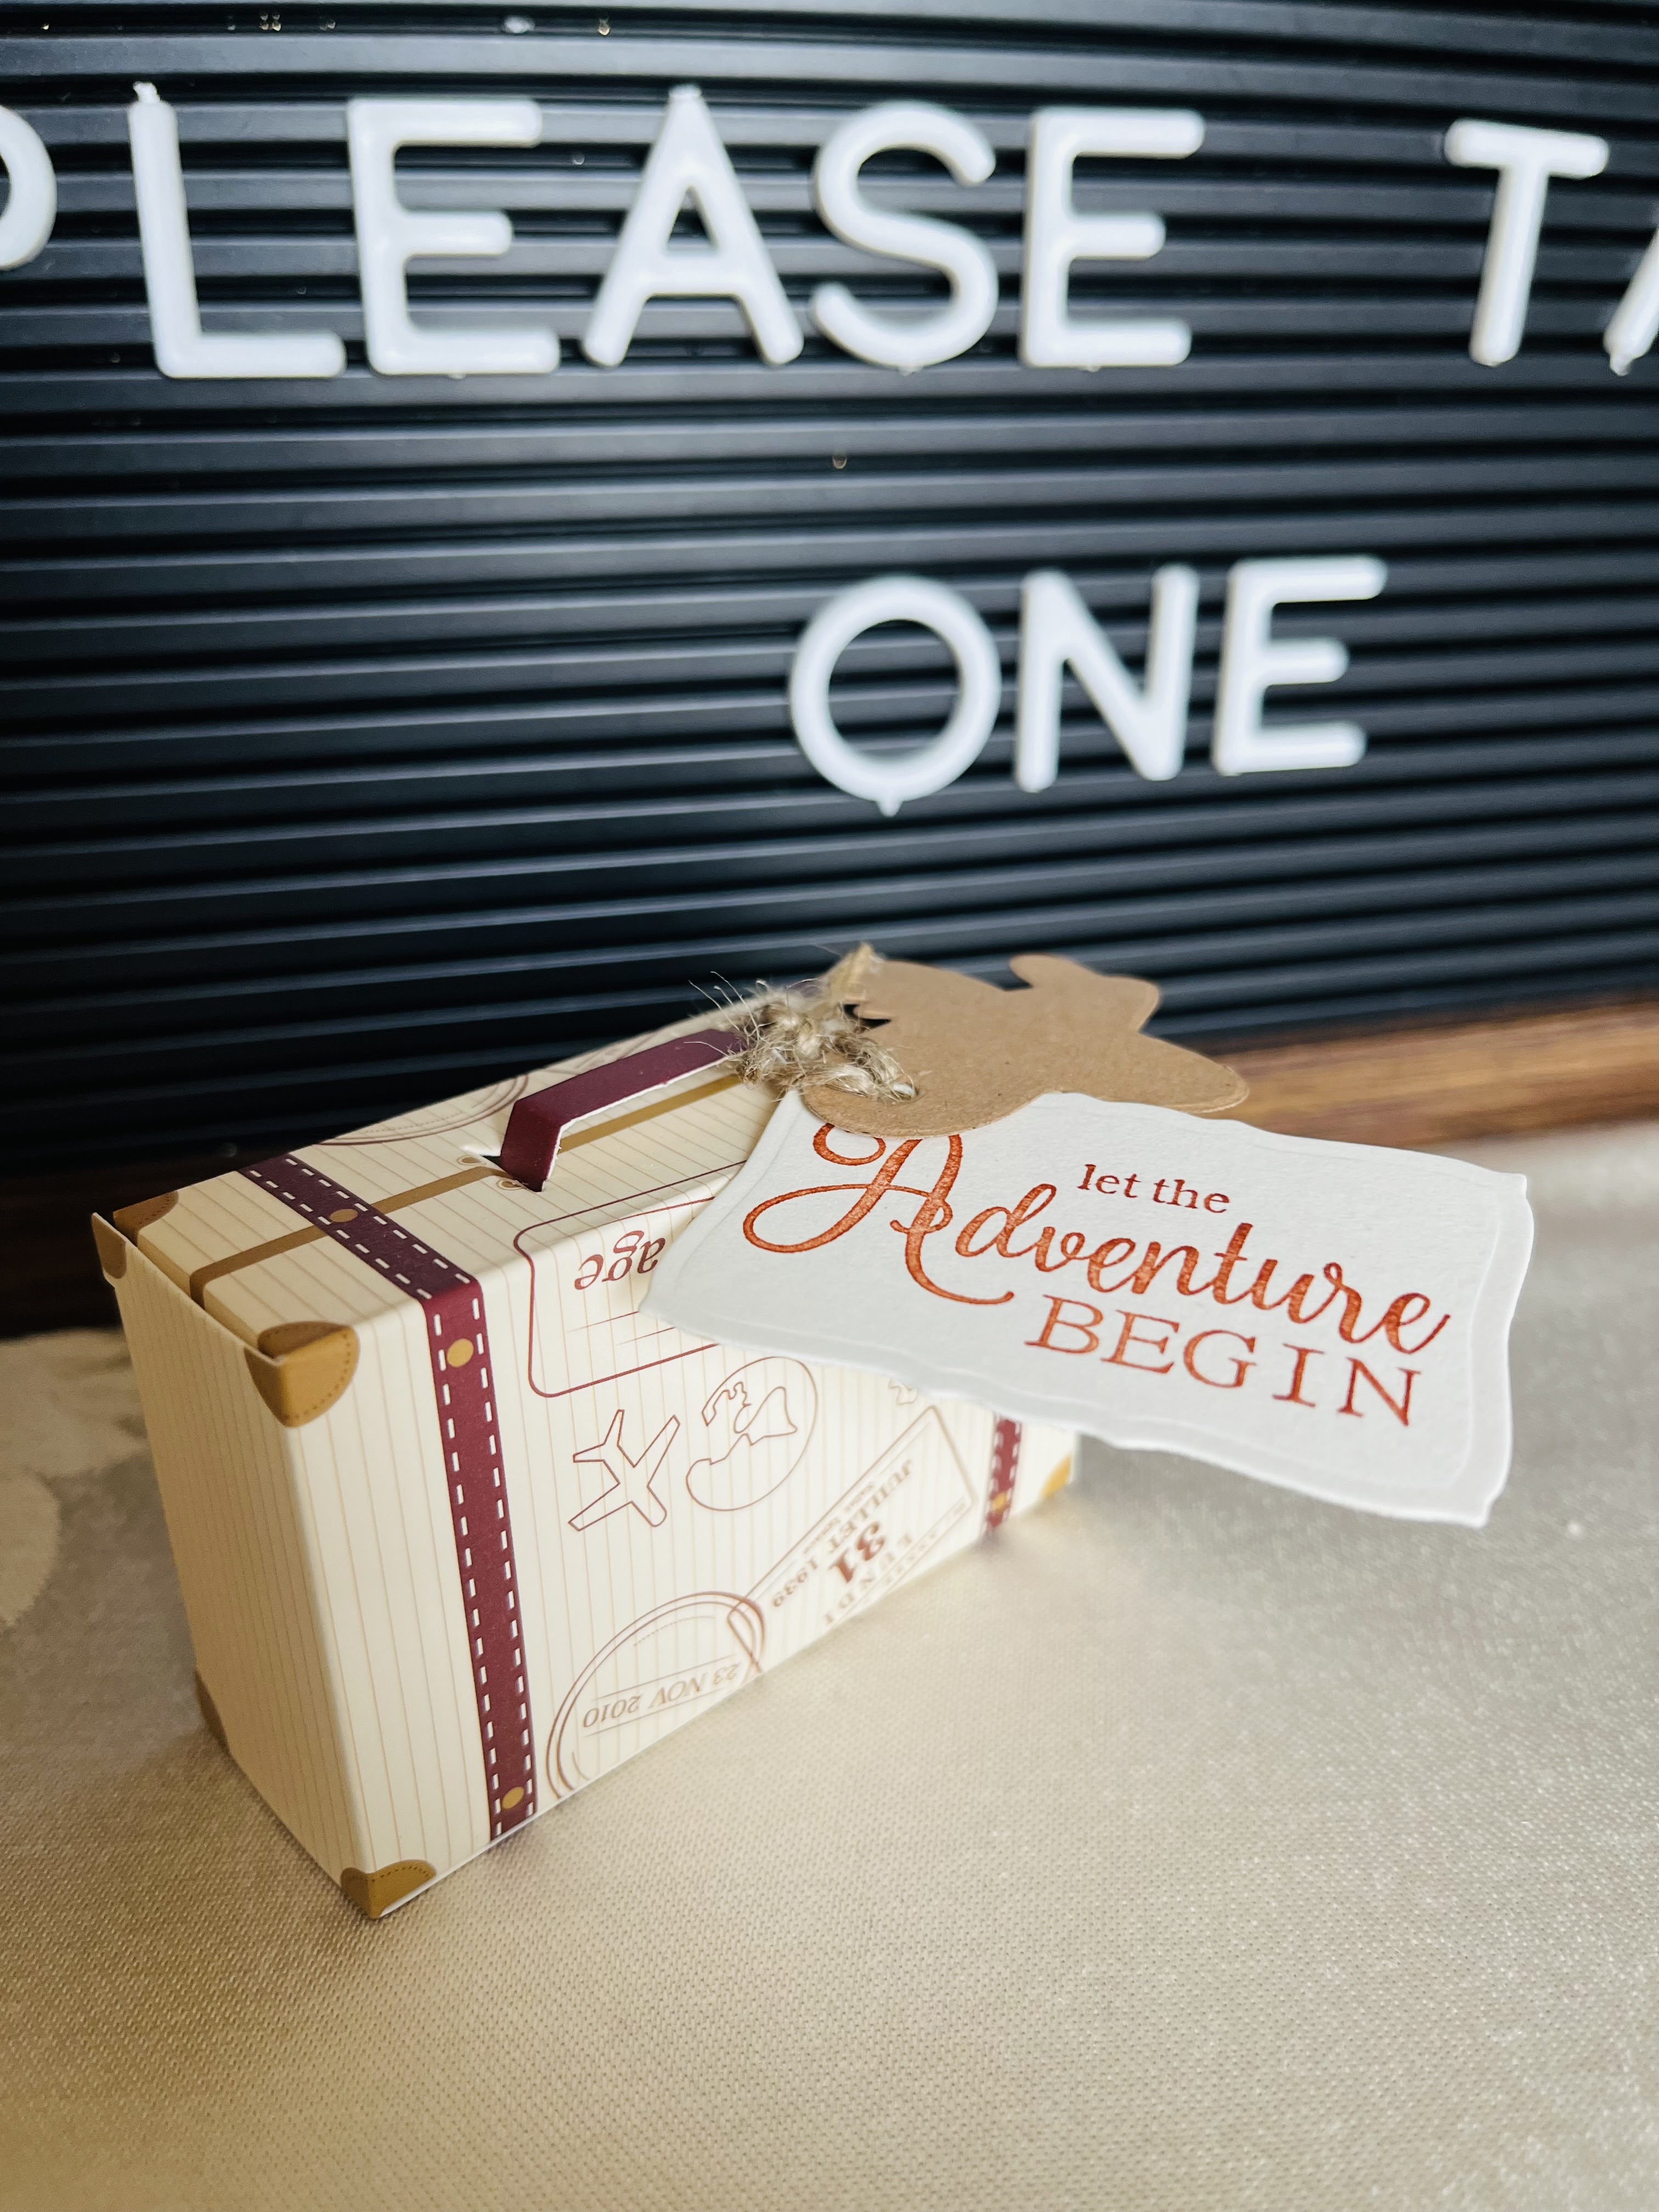
Virtual Stamping Night. We have a bunch of challenges that center around a theme which this time was "Paper Chef." One of the challenges was to make a mini pizza box. SO many ideas came to me as far as what to put inside the pizza box! Here are the instructions on SCS for the box itself:
For this one, I made a simple set of six 3X3 cards. My Aunt lives on the beach and loves all things nautical. She also hates to wrap presents and hates to buy cards...she usually puts gifts in a pretty bag and folds a piece of paper in half to write as a card! ACK! SO, I figured I would leave these little notecards blank so she could use them for any occasion, and for either male of female.
The box is about 4X4 squared. The panel on the front is distressed and covered with a piece of mesh that I wrinkled up to give the appearance of a fishing net. Some hemp, a prima flower that I distressed and some buttons gave it a beachy look.

recipe: stamps: DRS Designs Conch Shell F1107
paper: Papertrey Ink Ocean Tides, Rustic Cream, White
ink: Ocean Tides, Vintage White, Chai distressing ink, Memento Timber Brown, Copic markers
Accessories: mesh, buttons, hemp, ribbon, prima flower, Glimmer Mist Sugar Cookie
Close up of front panel:

I carried on the beach theme on the 3X3 cards by using the conch shell alone. It makes a simple and elegant little card. There are 3 white and 3 in the Ocean Tides color.

Inside the box I tied the cards up with some ocean tides ribbon and some hemp and laid them on top of some crinkled up filler paper.
I think it makes a cute and easy little gift! Another idea would be to make it in a holiday theme and include a bunch of one layer holiday gift tags! I gotta get started on THAT idea!
Thank you again Cathy and everyone at DRS, I had a wonderful time being part of your team and hope to work with you all again someday!
Hugs,
Denise M.


.jpg)


