Showing posts with label Santa. Show all posts

Merry Christmas to All

>> Tuesday, December 20, 2022

Hi Everyone,

Here are a couple of last-minute Christmas cards that I whipped up.  I used the same embossing folder for both, so the backgrounds were a snap. 

I colored the World Globe, and knew I wanted to pair it up with the Merry Christmas to All sentiment, so I thought a Santa hat would be on brand and really bring on the holiday cheer.  I stamped and fussy cut two hats using one for the globe and another for an embellishment.  A few scattered gems finished it. 

The hats came from these stamps:


For this card I used a piece of the holly paper I made for this card here, and added the Santa Face and the Merriest Wishes Greeting, along with a few gems in the snowflake centers. 


Wishing you and yours the Merriest of Christmases!  

Thanks for stopping by!
Karin


Read more...

Merry Christmas to All

>> Tuesday, December 13, 2022

 Hi Everyone,


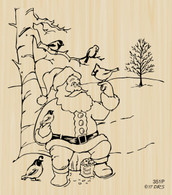
Using the new Merry Christmas to All sentiment on my card, I decided to pair it up with the Santa with Birds Christmas Scene because he's depicted with "all" the little birdies.


I stamped and colored up the scene but ended up with a big smudge along the top.  Don't you hate when that happens?  Lucky for me my dies saved the day by letting me crop out the goof up. The scene is simply smaller and, in the end, fit the card well.   I also added some glitter glue to the fur on his clothes for a bit of holiday sparkle.  


I layered it onto a background that was stamped using the Medium Filigree Snowflake and lined with a strip of embossed snowflake cardstock.  Finally, for embellishment I added the Small Cardinal that was stamped, colored and fussy cut. 


Happy Holidays!
Karin


Read more...

New Home Wishes and a Visit with Santa

>> Wednesday, November 25, 2020

Hello crafty friends!   I have been doing a lot of water-coloring lately, and I have some fun projects to show you using DRS Design stamps.  

This first card uses the sweet New Home Greeting that just hit the store (inside I used the new Just Moved House Key).  I love the fun little Mushroom Houses which I water-colored and tucked into this fun Tim Holtz Stitched Slots die.  

I kept my pallet pretty neutral because I love neutrals, but I did avoid using Vintage Photo ink on the edges - shocking!  LOL!  

I have been trying to learn to make scenery with watercolors and this is my favorite so far. The background was pretty easy and the Santa adds the perfect touch of whimsey. 
The Santa comes from one of my favorite DRS Designs images: Santa with Birds Christmas Scene.  I stamped him on water-color paper, colored him up, and fussy cut him so he could sit in the forest and feed a few sweet birds.  

Hope you liked today's post, and thanks so much for dropping by.

Hugz,

Nancy


Read more...

Santa Chimney

>> Friday, November 6, 2020

  by Julie Warner - The Write Stuff

Happy Friday!
I hope your week has gone well! Wow! November already. This year is almost over. Doesn't seem possible, does it? 

My card today is the result of an idea that's been roaming around in my head for a while & it finally all came together. I don't know if y'all remember but when this Santa image came out, I made a card & had to color the scene twice because some of it was ruined.( Here's that post. ) Anyway, I think Sue mentioned she thought it would show up in another card. Turns out she was right! I was able to salvage the lower half of Santa & his bag of toys, which I fussy cut. The fireplace was die cut & I used a brick stencil on it. The rest of the brick wall, was stamped, sponged & a few Copics were used to help color in the bricks. 
I elevated the fireplace in order to place Santa inside it then attached the brick wall behind it. The lower half of the brick (inside the fireplace) was sponged w/ darker inks to make it fade into the background. I also fussy cut Santa's hat & added it just above the greeting.

Here are the Copics I used. (As for the ones on Santa, you'll probably have to look at the original post.) Below it is the inside. 
Thanks so much for stopping by! Have a great weekend!


Supplies:
paper: Staples 110# white
ink:  Memento tuxedo black, Distress inks fired brick, barn door, black soot, antique linen
accessories: Rubbernecker Rectangle Stitch,  Fire PlaceChristmas Mini dies, brick wall stencil, Copic markers

Read more...

Santa Line-up

>> Saturday, November 30, 2019

Welcome!

One of the fun things about moving my stamping stuff to a new location was cleaning it all out and finding things I hadn't seen in years.  I found quite a large stash of odds and ends that didn't work for whatever reason and now I'm doing my best to clean them all out and put them to good use.


My Santa Line-up came from the pile.  It's not 5 separate Santa's, it one long line of masked Santa Face images that I had previously fussy cut along the bottom.  Last night I finished fussy cutting along the top and colored the hats in red.  I layered it on green and then red before attaching it to a white layer and then on a folded green card.  I stamped our Especially to You greeting as shown using green ink.  My last step last night was to apply some liquid applique on the hat band and pom pom and let it dry over night so I could puff it up today.  Sadly, it's not as white as I would have liked so I'm off now to shop for a new tube :)

Thanks so much for stopping by!
Sue

Read more...

Snowy Santa and Friend

>> Wednesday, November 27, 2019

I have a super fun card to share today.

I made it for a Splitcoaststamper.com challenge last week.  The challenge was to add as many items off a list that you could (Santa, green, holly, trees, red, multiple colors, silver, gold, presents, texture, etc.).  I got all but 2 - I forgot the holly and the gold. 

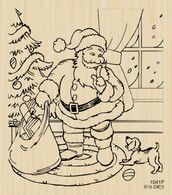
I started the card with a sponged card based (Pacific Point).  Then I die cut the trees (SU!) and sponged them.  I added Stickles for the ornaments.  Then I colored and fussy cut the Santa and dog from the Santa and Puppy Christmas Scene.  I then water distressed the background, layed up everything, and then splattered on some Snowtex.  I tucked in the Small Merry Christmas greeting to finish it off. 

I smiled the whole time I made this card.  I just knew that puppy was going to make the card come out so well.  I was right!


I am still running behind on my Christmas cards, but I am ahead of last year I am doing better.  I hope you are too.

Hugz,

Nancy

Read more...

Holiday Santa

>> Sunday, February 11, 2018

by Julie Warner - The Write Stuff

 Happy Sunday!
Me again, on a Sunday! And another Christmas card. A little deja vu going on here. As I mentioned, I didn't have a chance to work w/ these Christmas images before the holidays & I really wanted to color this one. And there's the plus that I was asked to be on the Splitcoast Fan Club Monthly Christmas Challenge team & this was my card for Feb's challenge. 
After I colored Santa, I used the smallest of the Grand Labels 1 die to cut a frame out of the blue layer. I thought it needed something, so I die cut a decorative labels 1 out of black & used the largest of the Labels 1 to cut out the middle of it & make a double frame for Santa.

Here's a look at the inside & below it are the Copics I used.
Thanks so much for stopping by! Have a great rest of your weekend!

Supplies:
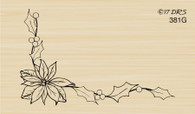
stamps: DRS Designs - Santa w/ Birds  (inside- Deco Peace & Joy Poinsettia Vine Corner )
paper: X-Press It white, lt blue, black
ink: Memento tuxedo black (Kaliedacolor fruitcake used on inside)
accessories: Copic markers, Misti, spellbinders grand labels 1, labels 1, decorative labels dies, sizzix Holiday words #2 die


Read more...

Holiday Buddies

>> Friday, December 8, 2017

Hi Everyone,

Isn't this Wintertime Buddies stamp just super cheerful?  It's always been one of my favorites for making a friendly looking Christmas card :)

I colored it up and fussy cut it out, adding some glitter glue to the fur on Santa's clothes.  As I was waiting for that to dry, I die cut and dry embossed the large circle that was to hold the Santa and Snowman image. 

The background was stamped using the Snow Background stamp and I added a green panel that was dry embossed with holly.


The sentiment is the last line from the Heartache at Christmas stamp and the poinsettia embellishment was fussy cut from the recently released Poinsettia Vine Corner stamp.

It's beginning to look a lot like Christmas....Hope your holiday prep is going strong and thank you for taking time to peek in on us today :)

Have a great one!
Karin


Read more...

Christmas Froggies, Stamp Surgery and Plagues

>> Wednesday, November 29, 2017

Ever wake up and have a card idea in your head?  Well, I woke up in the middle of the night and had the idea to take the Santa hat off the new Santa Puppy image and put it on the Frog on a Log image. I love stamp surgery!!!

I figured he needed to be in the snow to work for Christmas so I used a pine branch embossing folder and sponged it with some fun colors, then I did a few snow banks that I covered with Snowtex.  To finish it off, I added the All is Calm Christmas Greeting and the Triple Holly image plus some more Snowtex.  The images are colored with Prisma Pencils.

After I was done, I thought the froggie and hat could work with no snow if he was in South Alabama, California, or Florida - lol.  So I tried him CAS using the Brush Pussy Willows image behind.  
All these frogs made me think of the frogs in Exodus - the frog plagues.  I did a Bible Journal page on this scripture - I can't imagine how horrible it was to have frogs everywhere - plus I know they were not cute like this one!  I kept all the colors in the brown family on the image and used a white gel pen to add some additional dots (freckles?).  
Hope you are having a wonderful week.

Hugz,

Nancy

Read more...

Merry Christmas to All...

>> Monday, November 20, 2017

Hi Everyone. My card today features the new Santa with Birds image. I had fun coloring this image and adding some shimmer here and there.


The Santa and birds image was stamped with Memento Black ink and colored with Copics. Some Nuvo Blizzard drops were added to his hat and the fur trim on his coat.  After the drops dried, I added some clear Wink of Stella to the snowy areas. The panel was die cut with a SB die, attached to the red panel and then to the white card base. Some white snowflakes were die cut and added to two of the corners. Red nail heads were added to the centers.

You can barely see, but on the inside the Interlocking Snowflakes Background image was stamped with Real Red ink along the bottom of the card.

So how are you doing with your stash of Christmas cards?  Hope you are further along than me!!

Thanks for stopping by.

blessings,
shelia

Read more...

Santa with Birds

>> Sunday, November 19, 2017

Good Morning all,

This new stamp would be perfect for that special card.


It really does not take that long color this image and it is just adorable. It's called Santa with Birds Christmas.

After coloring I added some frames and you have a Christmas card.

Have a wonderful day,


Read more...

Santa Is Coming!

>> Saturday, November 18, 2017

Good morning!!
I have two Santa cards for you this morning.
One is the new release Santa with Birds 351P
I've also used the new Deco Peace and Joy 355G or part of it anyway.
the frame is a die from Lawn Fawn and inner die from Memory Box.
The Birds are I.O. on the corners.  I popped up the frame, used Liquid Applique on the fur and Mix Micro Beads for the seed.  I like that look so since I have a pack of mixed colors I like to use it.  I used glitter on the snow.


 This next card is from last year's release,  Santa with Puppy 1041P I also used
Santa Puppy 408F on the frame and the Christmas lights 1054H on the frame with Merry Christmas 364B.  The frame die is from Memory Box and the inner die is also Memory Box.  I popped up the frame and fussy cut the lights and puppy for the frame.  My fur is Liquid Applique heated.  I used a metallic silver pencil and glitter pen on the tree tinsel, Glitter Nuvo on the outside snow and also white paint.


Thanks for visiting today!
Robin

Read more...

StatCounter

  © Blogger templates Palm by Ourblogtemplates.com 2008

Back to TOP