Showing posts with label bugs. Show all posts

Happy Birthday!

>> Thursday, February 18, 2021

 Good morning!

I am so happy to show the new Arched Window in this card!

Isn't it so cute?  Just think of all the things you can do with it.

The other new stamp shown today is the Blessings on St. Patrick's.

Besides those 2 new stamps, I've used several previously 

released stamps to form this scene:


The ovals dies are from Rubbernecker.
The way I did this card (because it takes a little planning) is this:
I stamped the main images in to separate pieces of acetate as well as on my stamp aligner acrylic
square.  I arranged the acetate on my piece of white cardstock to get an
idea of the scene I wanted to create.  This also helped me visualize which
images to stamp first.  I stamped the Gnome and the shamrocks first as they 
are in the foreground.  I then masked the images just stamped and used 
my stamp aligner to to stamp the window, masked and stamped the wood background 
(Vicki's Versatile Background) on top and bottom of the window.  
I stamped the mushrooms which did not need masking.  
Removing all the mask, I used a Copic liner to draw in the tree trunk lines and grass lines. 
(If you are using Copic markers to color you need to use only ink pens 
that will not smudge like the Copic black liner pen).
I hope this helps with making scenes out of multiple stamps such as above.
Stamp the sentiment and die cut.  I also used a bit of Crystal Stickles on the 
Butterfly wings.

My next card was done in the same way as the first
using different stamps of course.


This time I stamped the sign and sleeping Gnome first, masked and stamped the 
Mushroom line, masked then stamped the window and masked.
Next I used the aligner to stamp the Tree Slice masked and stamped the "trees" 
multiple times and different heights.  The butterflies were
stamped next and finally the Happy Birthday!
Thank you for visiting today!
Robin


Read more...

Lucky!

>> Thursday, February 4, 2021

Good morning!
2 more last Valentines.  This first 1 uses the mirror image again.
DRS stamps: Flower Hearts, Lucky in Love and
Well who wouldn't feel lucky to find their soul mate?


My second card is done with a watercolor background, Moose die and frame dies.
I used DRS: I'm Wild About You to compliment the scene.

The purple frame has a black inner frame and then popped up.
I sprinkled glitter on both cards.
Thanks for visiting today!
Robin


Read more...

Caught a Bug?

>> Monday, February 17, 2020

Happy Monday! Hope you had a great weekend. I don't know about your area, but here it's flu and cold season. I know so many people who are sick. I was a couple of weeks ago and it feels so good to be back to normal!  So with all the friends who are ill, I decided to create a get well card. Here's what I came up with.


I started with the leaf stencil from Altenew to create a quick and easy background for my little lady bugs. I stamped the lady bugs from the 4 in 1 Garden Bugs onto white CS with Memento Black ink, added some red with my Copics and fussy cut them. I didn't want to mess with trying to cut out the little antennae so I cut them off, but stamped the entire lady bug image onto the card front where I wanted them to be and then glued the die cut ones in place with their cute little antennae showing. The Caught a Bug greeting was stamped with VersaFine black ink. I added some Nyvo Crystal Glaze to the lady bugs for some shine. They look so pretty in real life.

On the inside I stamped the Get Well Soon greeting and added one more little lady bug


Thanks for stopping by today. Hope you are staying healthy and finding some time to get inky! If you haven't seen DRS Designs new catalog, you can check it out here. It is pretty amazing!

blessings,
shelia

Read more...

Valentine Cards

>> Tuesday, January 21, 2020

Hi Everyone,

I have a ladybug embossing folder (Darice) in my stash that I've never used.  Until today! I was really happy that it made such a great background for this darling little Love Bug stamp.  Her adorable little face just makes me smile :)

For the strip of patterned paper along the side, I made it using the following stamps:

Lines O'Plenty Background (red ink)
Easy Dot Background (black ink)
Splatter Background (green ink)


And I added the Love Bug Hug Greeting to complete my valentine.

Since that card went so quick, I decided to make one more.  This time I utilized my candy hearts embossing folder (Darice) and made a strip of paper using the Silhouette Love Heart, to mimic the look of the conversation heart background.


I used the same border punch as on the first card and completed it using the My Heart To Yours 
stamp and adding a tiny die cut heart to the greeting. 

Wishing you a day of love and STAMPING!

Thanks for visiting!
Karin


Read more...

Watermelon

>> Tuesday, August 6, 2019

Hi Everyone,

I'm still celebrating summer treats with my post this week.  Last week it was lemonade, and this week it's watermelon :) It's clean and simple, suitable for a friend or a thank you card.

I created the watermelon slice using my regular graduated oval dies, and a scalloped die for the bite.

Instead of making regular seeds, I used a heart punch to help convey my love ;) 


I stamped the greeting and a few ants for embellishment along the bottom of the card to finish it off.  

Here are links to the stamps I used:
Splatter Background (It's hard to see, but I stamped the green portion of the melon)

Thanks for visiting, hope you're day is sweet!

Karin

Read more...

Sparkle

>> Thursday, April 4, 2019

Good morning!
This is Sherlock Bird (Silly Bird) in gray tweed.
Made the vest and stamped it with the Woven Plaid and then die cut the hat,
pipe and eye glass (Karen Burniston dies).  Sherlock is cut out with an oval.
The sentiment is Thinking of You Tweetie.
I used a sketch from SCS all in grays.

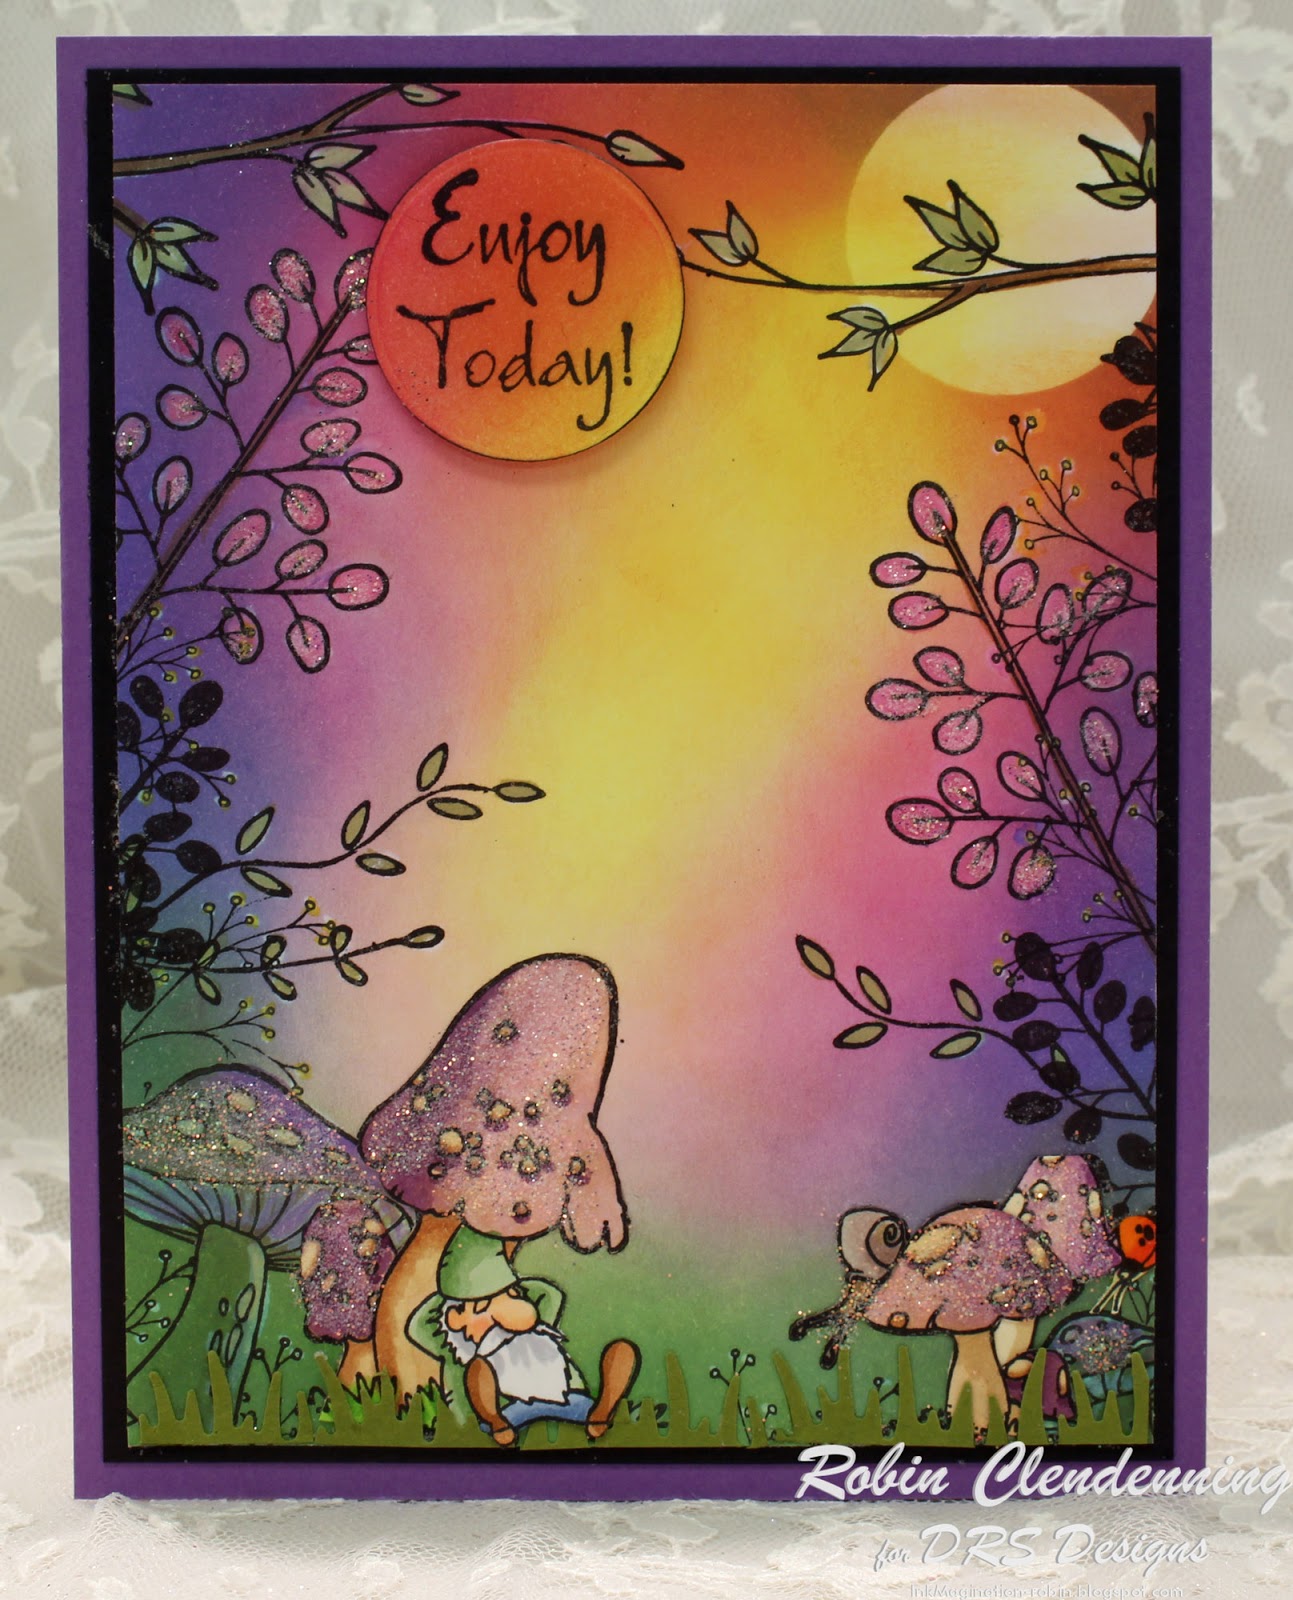
This Gnome card is of a moon light nap in a fairy garden
I sponged the background then stamped the scene with Silhouette Leaf Branch, Open


The background is done with Oxide Inks 

Thanks for visiting today! 
Robin

Read more...

Extra Tweet

>> Thursday, March 7, 2019

Good morning!

This card features our new Silly Bird.  I made him even sillier with google eyes and a derby of green and gold glitter paper.  I also used the new 
Extra Tweet sentiment and some other older favorites, Leafy Tree Branch 
The diamond shape dies are from HC.  The blue/green background 
was a piece of blue cardstock sprayed with some green Dylusions Ink.
The inside panel background was the Alcohol Ink in water marbling technique.


This card features the new Feathers and another favorite, 
Birds of a Feather.  The background was done using the 
Alcohol Inks and water marbling technique, I then stamped the sentiment with Black VersaFine (it stamps VERY black). and stamped the feathers over the words with Tumbled Glass Distress Ink (not Oxide as it is Opaque).  I stamped the rest of the background with black feathers.  I stamped the feathers again 
with black Tuxedo Memento, colored them with Copics then 
fussy cut them for my embellishment adding a ribbon and enamel dot.
I used a SCS sketch for this card as well.


This is a shadow box card using the Embossing Folder 
Letter-Press Technique. I cut one 5 1/2" white square, Brayered one side of the tree embossing folder with Heatwave Kaleidacolor Ink Pad and then ran the cardstock and folder through the die cutting machine.  I then made this shadow box (HC) and cut the center out of my embossed cardstock and covered the outside and the inside. I had to make the box first to make sure I glued the center directly into the "window" opening.
I stamped and fussy cut the Tree House Gnome, Snail Toadstool
Ladybug Toadstool, and Toadstools.  To go with these stamps, I die cut some Sizzix toadstools and plant life also some birch trees.  
I tore some paper for grass.
Die cut the Wonderful Day Gnome and glued it to the inside center after sponging with Brilliance Sky Blue.


Thanks for visiting today!
Robin

Read more...

Happy Day Ladybug

>> Saturday, February 23, 2019

Welcome!

I'm happy to say we've have a brief warm spell this week - and sunshine too!  What more could I ask for?  It was so nice it really got me in a spring mood and my card today reflects it :)


I started my card by stamping a folded kraft card with our Easy Dot Background and red ink and set it aside.  My tiny little mushroom scene was so fun to make!  I can't remember ever having made a tiny little scene like this and it was so easy!  I cut my paper first into a 1 3/8" square then stamped our new Ladybug Toadstool using black ink and colored it using my alcohol markers.  I stamped our Happy Days greeting on white and after trimming and layering with red paper I assembled everything together.

Thanks so much for stopping by!
Sue

Read more...

Love Bug Hugs

>> Monday, February 18, 2019

Happy Monday.  Hope you had a great weekend! I have a couple of cards to share with you today that feature the new Ladybug Toadstool and the Love Bug Hug greeting


This first card uses the open calendar image which I stamped onto white CS, hand wrote the dates and computer generated the Month and year. The tiny ladybug was stamped on the 14th day, colored with copics and then I cut the calendar out and attached it to the red banner that was stamped with the easy dot background in Versafine Black Onyx ink. The greeting was stamped with Memento Lady bug red ink, die cut and attached with foam adhesive for some dimension. The new lady bug Toadstool was stamped, colored, fussy cut and glued into place. I smudged some black ink at the top of the card, so the black gingham ribbon was added to cover that up!


The red panel was stamped with the checkerboard background image using Ladybug red Memento ink, as was the greeting. The ladybug toadstool was stamped, colored with Copics, die cut and layered onto some red CS. The white layer was die cut with an edge die and embossed with a strip of small hearts. I added the red plaid washi tape to the white panel before putting it all together. The bow was created using a Martha Stewart punch that I've had for years. I punched out several bows, glued them together for dimension and added a red rhinestone to the center. 

Thanks for stopping by!

shelia

Read more...

Sleep Tight

>> Thursday, February 14, 2019

Good morning!
Oh yes, we have been having snow/hail and rain for about a week and
 expect more for the next week but I am happy as a clam!
Yes, we ALWAYS need as much water as possible in any form
 for our poor forest, lakes and reservoirs. So I say bring it on!!
I have to admit though, our lowest temps have only been in the 
teens not sub 0 degrees like some places! 
We have a nice cuddly woodstove that keeps us warm too!

I have a couple of Gnome cards for you today!  These guys are so cute!
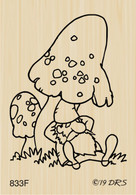
This Gnome is sleeping under a starry starry night!  The background under the stars is done with Color Burst (Ken Oliver). I used DRS stamps: Tree Slice Woodgrain , Ladybug Toadstool and Sleeping Gnome .

The stars and plants- Sizzix dies, tree background- Karen Burniston die.

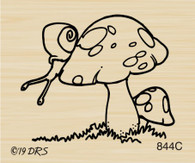
My other card Uses DRS stamps: Tree Home Gnome Snail Toadstool ,
Wonderful Day Gnome and Toadstools 


Dies by Spellbinder (upper part of tree trunk), MFTs (sun) and Memory Box (greenery).
All these toadstools, Gnomes and bitty bugs are so darling, they remind me of a fairy garden which I just love!
I wonder what scene you might make up with some of these guys.  Hope to see some on Facebook soon!
Thanks for visiting!
Robin

Read more...

Little Bitty Ladybug

>> Tuesday, February 12, 2019

Hi Everyone,

The snow and ice are back in full force outside my window, so I thought a cheery ladybug card would be just the thing for today's post. 

I colored up the darling little Ladybug Toadstool, and punched it out using my 1 1/4" & 1 3/8" circle punches.  Those sizes will tell you it's small, so I chose to make it more of an embellishment by pairing it up with the Ladybug Birthday Greeting, which I stamped, die cut and matted.


I made my background by choosing colors from my toadstool, and stamped the Easy Dot background in red and the Splatter background in green. Using a scallop border punch, some cardstock scraps and a bit of ric rack, I attached my border to the top of the card. 

After adhering my sentiment and image, I debated whether to add a flower embellishment, but ended up leaving well enough alone, deciding less is more :)

Thanks for stopping by and I'm wishing you a delightful day!

Karin


Read more...

gnomes and toadstools

>> Monday, February 11, 2019


Happy Monday! Hope you had a great weekend. This has been a super busy week for me. I'm thankful for the free time between appointments, meetings, work and life to be able to stamp and get creative. It is so soothing for me. I have two cards to share with you today that feature the new Gnome greeting with some cute toad stools and gnomes!

The first card uses the tree home gnome and the new toadstools with a ladybug and a snail as well as the older toadstools. I stamped the gnome and new toadstools onto white CS, masked off the toadstools and stamped the large toadstool three times. Everything was colored with Copics and added to the kraft card base along with the greeting and some chevrons. The sketch is from Splitcoast Stampers. I added some Nuvo clear drops to the ladybug and snail to help them stand out a bit.


This card features the sleeping gnome. I added a bunch of toadstools to create a little forest around him. This required some masking, but was super easy to do. Everything is colored with copics and again I added some clear Nuvo drops to the ladybug. The kraft strips were stamped with the woodgrain background image using Vintage Photo DO ink. The ladybug button was from my stash. No idea where it came from, but thought it would look cute added to the card.

These new gnomes are so cute and fun to stamp and color. You can check them out here.

Thanks for stopping by today.

blessings,
shelia

Read more...

Sending You Love

>> Thursday, February 7, 2019

Good morning!
Today my first card could be considered a Valentine or maybe just a card to a loved one.
My grandson would probably like this for any occasion!

I used a heart embossing folder for the background panel.

My second card is based on a sketch from SCS and I've used the new cute Sleeping Gnome
a wood grain embossing folder and One-Line Happy Thoughts.
The arrow die I used the top part of is from HC.


I love the new gnome stamps, don't you?  They are so cute!!

Thanks for visiting today!
Robin


Read more...

Gnome Matter

>> Friday, February 1, 2019

by Julie Warner - The Write Stuff

Happy Friday!
I hope your week has gone well! We had snow again on Tues. It really confused my parrots. They sat on their window perches in the kitchen with their little beaks pressed against the window just going "ohhhhhhhhh"..well in parrot, but that's what it meant. And I'm writing this early just in case. We tend to lose power in ice & snow because of all the trees here in the forest that surrounds us. And since the snow (& rain before that) is freezing, we will probably have ice. Did I mention the temp is supposed to be 11 tonight? Yikes! I'm thinking I should pass out little blankies for all the birds outside. So depending on whether I have power & the new images are up on the DRS site, I'll come back & link them before this posts.

This card really wasn't hard & it's all on one layer. There are only 4 images  (besides the greeting) the gnome w/ toadstools, the snail w/ toadstool, the rocks & the tall trees. The only one I masked was the gnome in order to stamp the trees behind him. Everything else is just coloring & I did all the background coloring first before I colored the images.   And I have another card that almost looks like it could continue right on next to this one. But you'll have to wait until next time to see it, lol. 

Here's a look at the inside & below it are the Copics I used (the bottom right one is an E31).
Thanks so much for stopping by! Have a great weekend!


Supplies:
paper: X-Press It white, Staples 110# white
ink:  Memento tuxedo black
accessories: Copic markers, Rubbernecker stitched rectangles dies


Read more...

Summer Story

>> Tuesday, June 12, 2018

Hi Everyone,

One of the things I look forward to most when the seasons change, is eating the foods that come with it.  Stone fruits like peaches, cherries and plums, along with good sweet melons.  Watermelon is probably tops!  Nothing tastes better in the summer heat, than a cold, juicy slice :)  My ant on today's card, couldn't agree more.

I stamped a panel using the Checkerboard Background stamp, to mimic a picnic tablecloth and added a punched border.  


For my little scene, I stamped the Bee Trail and one single ant from the 4 In 1 Garden Bugs.  I stamped and fussy cut the Watermelon Border, and after coloring it, I piled them up and attached them with dimensional foam tape.  I tied a ribbon around my checkerboard panel and attached the punched Summer Story Greeting, and a little heart thought bubble to complete it.  

I hope your summer is simply grand...Thanks for stopping by to visit!
Karin

Read more...

Bugs and Flakes

>> Thursday, February 8, 2018

Good morning!!

I used alcohol inks on these acetate snowflakes so they are still see 
through and the color won't rub off when handled.


I used a rainbow type pad for my greeting to go with the colors 
in the snowflakes.
I also added lavender rhinestones to the centers 
of each snowflake


Here is another last minute Valentine
These all may seem a bit small (and no, the card is not extra large)...I stamped the heart and bug on shrink plastic 3 times each and cut them out, punched and 1/8" hole at the top of each and then put them in my toaster oven (I only use for crafts) and watched them shrink...that is so funny to see!  
I then added the wine wire and curled the ends around a narrow handle brush.  I added a spot of glue under each bug to keep them in place. 
The card is from a sketch at SCS's.  I added a bow
because it just needed something extra (to me) but you could
leave it off and color the bugs red to make it a cute boy card too!


Have fun getting crafty!
Thanks for visiting today!!
Robin


Read more...

Love Bug Hug

>> Saturday, February 3, 2018

Welcome!

My card today all came about because I went shopping on Wednesday and got a jump on Valentine gifts for my boys.  While scrutinizing the Valentine section at Target I ran across a bag of Reese's chocolates called Love Bugs.  How could I resist when we just released our Love Bug Hug Greeting???


My card is relatively simple - if you like fussy cutting :)
I stamped our Medium Daisy Bloom 3 times on scraps of white card stock and colored them with colored pencils and fussy cut them.  The leaves behind them were stolen from our Leaf Butterfly Spray and all was attached to pink card stock and layered with green. I stamped our Bee Trail and the Love Bug Hug greeting using black ink and attached all to a folded red card.  Last, but not least was attaching the Love Bug Chocolate.


You can see his cute little face better here :)

Thanks for stopping by!
Sue


Read more...

Coffee All Around

>> Thursday, January 18, 2018

Good morning!


This is a circular side step card, you can find the tutorial HERE.  
My background was done with Sepia tones of Dylusion spray inks and then I splattered some walnut color Oxide Distress ink on the background.  I splatter the corrugated card stock as well.  I used a die for the sentiment
 and stitched circle under the cup.

The cup was fussy cut and so was the little heart.
Copics: R50, E51, E21 for the cup.


This next card is called a Peek-A-Boo card
I cut the hearts out of the white first with a Spellbinder scalloped heart
I then centered it over the red folded card and placed the straight edge heart
die on the red and under each scalloped cut out and cut the red.
I placed the card in my Misti and then placed my love bug over the hearts (one at a time).  I place my stamp then opened the card and stamped on the white inside panel (for each heart opening). Tip, clean the stamp each time so that it doesn't leave ink residue when placing.

Now stamp an inside sentiment that fits without being seen 
through the heart openings.
Flag/pennant die is from ODBD.

Bugs are colored with Copics: R21, R24, R29, R59, C02, C03, C05, C07

Thanks for visiting today!!
Robin

Read more...

Love Bug

>> Monday, January 15, 2018


Don't you just love this little love bug image? I sure do! For this Valentine, I started with heavy weight white CS and stamped the greeting with Versafine Black Onyx ink in one corner and the Love bug with Memento black ink in the other corner. The love bug was colored with Copics and I used a red gel pen to color in his nose and the hearts on his antenna. You can't really see it in the photo.

Next I stamped the tiny lady bug from our 4 in 1 Garden Bugs stamp with Versafine Black Onyx ink onto a piece of red CS and die cut the word "love" from the red CS. I then used the same die to cut the work love from the white CS being sure to keep all the little pieces of paper from the insides of the letters. I used TH Matte Medium to glue the word love into place as well as the white parts.

Everything is attached to the black panel and then to the white card base.

Thanks for stopping by today. To see this cute image and more check out our on line store here.

Blessings,
shelia

Read more...

Love Bug

>> Saturday, January 13, 2018

Welcome!

If you have a love bug in your life, DRS Designs now has the perfect stamps to make them a Valentine's Day card!


I started my card by stamping the Love Bug on a scrap of card stock.  I colored, trimmed, shaded and layered it on black.  Next I used the Splatter Background on red paper and added 2 embossed strips of black paper for the top and bottom.  I stamped the bottom of a white piece of card stock with our new Love Bug Hug greeting and layered everything on a folded red card.

Thanks for stopping by
Sue

Read more...

StatCounter

  © Blogger templates Palm by Ourblogtemplates.com 2008

Back to TOP