Showing posts with label shaker. Show all posts

Hello Winter! Shaker

>> Thursday, December 21, 2023

 Hello friends! 

I love the little snow globe look so today I've used Snow Globe then cut out the globe part so that I could create a shaker. 

I used a die set from Sizzix showing a little village scene then added shaker elements.

Of course I used acetate in the opening.  The whole globe needed a frame to bring it all together with a brown that sort of matches the globe base and some of the houses. 

I also used the sentiment Hello Winter.


Thanks for visiting today!
Robin

Read more...

Perfect Day

>> Thursday, August 4, 2022


Good morning crafty friends!


My husband loves this card, he asked me to make him one (probably to give to a little boy knowing him), because he said it has Nemo on it!! He is a sweetie!


So, the stamps I used for this shaker card are DRS: School of Fish, 3 in 1 Ocean Floor, Porthole,


Do you think I accomplished the tarnished brass look?  That was what I was hoping for anyway!!
I used some screw brads dabbed with some alcohol ink to keep them from looking like new screws, I also used a net die from Amy Design-Maritime.
For the shaker I used acetate, die cut foam frame for under the acetate and lots of tiny various goodies inside to shake around.
The edges of the die cut net were sponged with Vintage Photo Distress Ink.
The oval and round dies are both from Lifestyle.

Thank you for visiting today!!

Robin

Read more...

Valentine's Day

>> Thursday, December 30, 2021

Good morning!
My first card is a shaker card with lots of fun hearts
inside, both stamped and shaking about.

I used parts of 2 different sentiments for this card.
DRS stamps: Cheap Chocolate Eve and 
I also used the new  Candy Heart Background inside the shaker.
The heart cut out is from ODBD.  The shaker pieces are a combo of several different things.
I used some acetate for the shaker window.

My next card is a window card of sorts.
This is the card closed, you can see through to
the inside.
I used DRS stamps: Happy Bee, Flowers Hearts,


Inside

I just love this card, it makes my heart happy to look at it!

Now it's your turn, go get crafty!
Robin


Read more...

I'm Wild About You

>> Monday, October 4, 2021


This HAPPY SHARK - 153G is absolutely perfect for an underwater card and when I can do a Clean and Simple underwater card all the better.


For the base I used a water stencil and 2 different colored blue distress oxide colors. I then die cut the heart and the framing and added the I'M WILD ABOUT YOU GREETING - 331D.


I finished off the card with some sparkly sequins from my collection and popped the panel up on dimensionals.


I have a second card to share this week. It is another Clean and Simple card.


This one is a shaker card where I let the sentiment and shaker be the whole card. I used the new Season of Thanks Oval - 828K stamped with Stazon ink on acetate for my focal.


I then used glitter for the shaker. It is very shiny behind the focal but tough to get a good picture of how shiny it is. Once the focal was created I popped it up on dimensionals and added the glitter.


Thank you for stopping by to check out my cards this week.

Read more...

Happy Thoughts!

>> Thursday, March 4, 2021

Good morning!

My first card this morning has the Arched Window looking 
out at an ocean scene in a shaker!
For the scene out the window I used:


The sentiment, Happy Thoughts is added at the bottom on a pennant/banner.  
I scored the bottom to look like bead board, every 1/4" and left the top plain then colored it 
with B000 Copic.  The bottom was lightly sponged with Morning Mist.     
I also added 1/4" chair railing in white and used a C2 Copic to make a shadow under the railing.    
My frame is from Lawn Fawn.  
I cut out the window panes and added acetate behind them.  
Next I made my little scene and colored with a variety of blues, grays, beige  and red.  
I made a sun stencil punching a circle from a post-it then used  
brushes to apply color to the sky.  
I made an inner popped up frame using a Fun Foam sheet then before adding  
the scene to the back of the front window scene.  
I added some shaker pieces mostly sequins and Prills.


My next card features the Arched Window on a yellow siding and brick house (I remember one from my youth that I thought was so pretty).


I stamped the window then masked and stamped the bricks and Wood Grain Background.  I stamped the wheelbarrow and butterflies separately and fussy cut them then glued them on.
I added some transparent red acrylic dots to my sentiment banner 
and fishtailed the end.

Thanks for visiting today!
Robin


Read more...

Shell Wreath

>> Friday, November 13, 2020

  by Julie Warner - The Write Stuff

Happy Friday!
I hope your week has gone well! (Goodness..I just saw it's Friday the 13th. Well sure...the way this year has gone, I guess that's par for the course.) Sad to say, all of our lovely fall color blew away when Zeta came through. Almost of all the trees are bare..just a few colorful bushes left. And this week we've had more rain being pushed up by, I can't remember..another of those Greek Alphabet storms. Will it ever stop? 

My card today features a Christmas wreath w/ a shell theme. And just for fun, I added a mostly flat shaker in the center of the wreath.  I die cut the twig wreath out of kraft, then stamped the shells, coral & fish onto coral & peach card stock using the twig & campfire oxide inks. (Some of the coral c/s had been spritzed w/ bleach, so it looks mottled.) I used a couple of Prismacolor pencils to add just a hint of shading then fussy cut them all. 
The white panel had a large circle cut out behind the wreath & I added a stitched circle frame, my shaker & then a peach colored c/s behind it. The whole panel is backed w/ a darker coral color. 

Here's the inside.
Thanks so much for stopping by! Have a great weekend!


Supplies:
paper: Staples 110# white
ink:  Memento tuxedo black, Distress oxide inks crackling campfire, gathered twigs
accessories: Rubbernecker Rectangle StitchCircle Stitch Frames  dies, Twig Wreath  die, Prismacolor Pencils


Read more...

Sending You Sunshine...

>> Thursday, May 14, 2020

Good morning!
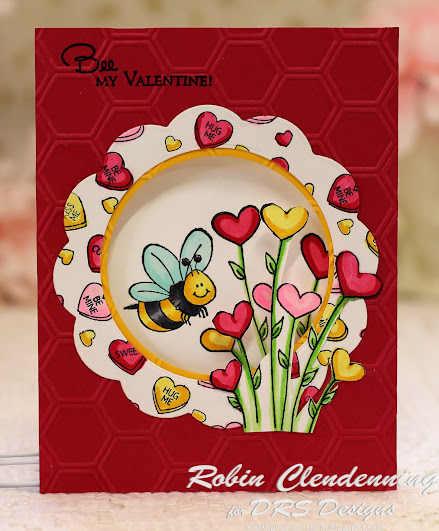
First card on the menu, a shaker card.
I used the Porthole to make this shaker card and I like it.
The beads and shaker bits look like colorful sand/rock
bits you might find in a fish tank but it makes it fun.
Maybe it is just a bunch of sea creepers wondering
over the coral reef, eh?
The background was made using the Wood Grain Background
on tan paper and doing some partial coloring to "bring
out" the grain.
The porthole was stamped on copper paper then added 
some aging with Copics.
I re-stamped the image and cut out just the hinges and 
glued them on then inserted copper brads.
I glued the acetate to the back then made a circle of popup behind just the porthole frame and set aside to make the scene inside.
The underwater scene was made with the School of Fish 
After making the scene, I carefully filled it with shaker bits, completely avoiding the edges.
I put glue on my pop up ring (on the porthole frame) 
then turned it over onto the scene with bits.
I put an acrylic block on top until it dried to make 
sure it dried flat with no gaps.
I glued the woodgrain panel to a tan then brown panel.  
Used a copper panel in an
embossing folder then mounted it on dark brown 
then onto the wood grain.
I embossed the sentiment, Sending You Sunshine
onto dark brown using copper embossing powder.
When card base was finished I glued 
the porthole shaker to the card.


Mickey and Goofy are stickers I got a long time ago when I was scrapbooking and thought that we would eventually 
get back to Disneyland...that
didn't happen!! Now I no longer scrapbook!
My DRS Design stamps used: 3 in 1 Ocean Floor,
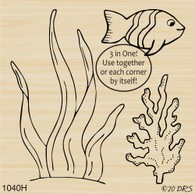
I used the 3 in 1 Ocean Floor several times, masking.  
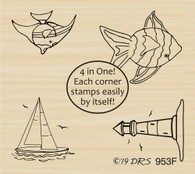
The School of Fish was also used more than once, masking.
The Seashells were fussy cut and Bubbles added 
once the scene was complete for placing purposes.
The sea bottom is torn tan paper.
I only used part of the sentiment and the water at the top was
lightly stenciled with a sunray stencil (Tim Holtz).
Thank you for visiting today!
New stamps will be available in the on-line store May 11.
Robin


Read more...

Only ❤️ Eyes

>> Friday, February 7, 2020

by Julie Warner - The Write Stuff

 Happy Friday!
I hope your week has gone well! Only 1 more week until Valentine's Day! I wanted to make one for hubs that wasn't too squishy..you know how guys are w/ frills & frou-frou stuff. It's also kind of ironic since I have had so much trouble  (& continue to have) w/ my eyes this past half year. I'm sure he'll get the irony. 

I used some eyeglass dies to cut out the 3 pair of glasses on the front, then cut the glasses again out of pink & red.  A plastic sleeve was attached behind the cutouts & I added heart confetti I made using several little heart punches inside the sleeve in the open areas. I used a Fuse tool to seal the sleeve all around the eyeglasses on the back side. Pretty quick & easy! It's also what I refer to as a flat shaker. The cardstock I used was little heavier but it's not elevated above what can be mailed w/ single stamp. 
Here's the inside. For the borders down the sides, I inked one row of the hearts w/ a red maker & stamped it.
Thanks so much for stopping by! Have a great weekend!


Supplies:
stamps: DRS Designs - Only Have Eyes  (inside: Loved You Yesterday1 Line Valentine’s DayHeart Drops)
paper:  Staples 110# white, red,  pink, Recollections Heavy white, 
ink:  Memento tuxedo black
accessories: Rubbernecker Rectangle Stitch dies, TE Spectacles dies, heart punches, Fuse tool


Read more...

A Whole Lotta Shakin!

>> Monday, January 13, 2020

Happy Monday Everyone. Hope you had a wonderful weekend and found time to get creative. My husband and I were out of town for the holidays, so I have thoroughly missed my crafting time. It felt so good to get back to it!

Today I have a couple of shaker cards that I created for my grands for Valentine's Day. While at my daughter's for Christmas we went to a local craft store and I found some die cut cards and the plastic inserts (on sale!!) that I thought would be fun for the kids. The cards are from Jillibean.


I placed a piece of scrap paper inside the card to cover the window opening and then stamped the hearts with TH Distress Candied Apple ink and heat embossed the hearts with clear EP. The hearts are part of the larger Hearts and Scrolls image. The Sentiment (also part of a larger greeting) was stamped with VersaMark ink and embossed with white EP and die cut with a MFT die. The word love was die cut from red using a small die of the month set from Spellbinders that I've had in my stash for a couple of years now. The shaker part is filled with candy hearts and sprinkles from Wilton. I saw a Tim Holtz video where he used Wilton candy for a gumball shaker and that gave me the idea for using the candy. This way the kids can ripe it open and eat the candy if they want to.  I added the baker's twine and bow with some Matte Medium.

For my older grandson I used the Woven plaid background image instead of hearts. I thought he might like this better.


The background was stamped with Altenew Ruby Red ink. Everything else is the same. I did use my Misti to get the lines straight. I only used one part of the woven plaid image. I do like that you can cut the images apart and use bits and pieces. I like that it gives you more options.

Thanks for stopping by.

blessings,
shelia


Read more...

StatCounter

  © Blogger templates Palm by Ourblogtemplates.com 2008

Back to TOP