Happy Day after Valentine's Day! Which means it's time to move on to the next holiday. So I have a couple of St. Patrick Day cards to share with you featuring some of the newest images from DRS Designs.
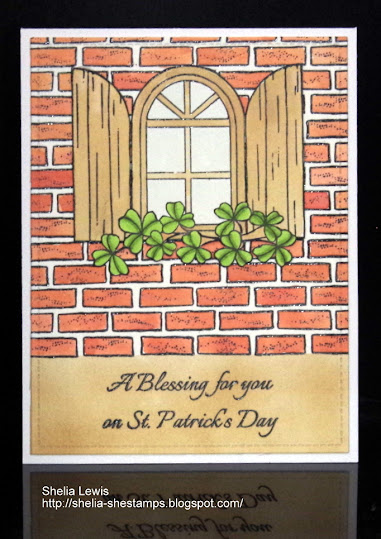
This first card features the new
arched window image. As soon as I saw it I knew I wanted to make a cottage looking scene. So I grabbed some water color CS, stamped the
brick wall image with Versafine black ink, heat embossed with clear EP and then used some DO inks to color in the bricks. I started with DO Fired Brick, but it looked too red so I mixed in some Vintage Photo. While the ink dried I stamped the
arched window image with the same black ink, heat embossed with clear EP, heat embossed and colored it with some Vintage Photo and Tumbled Glass DO inks. Once that dried I fussy cut the image and glued in onto my wall. The new
Blessing on St. Patrick's Day greeting was also stamped with Versfine black ink and heat embossed with clear EP. I used Frayed Burlap to sponge on the ground area. I decided it needed a little green so I stamped the
Shamrock Swag image, colored it with Copics, fussy cut and glued it at the bottom of the window.
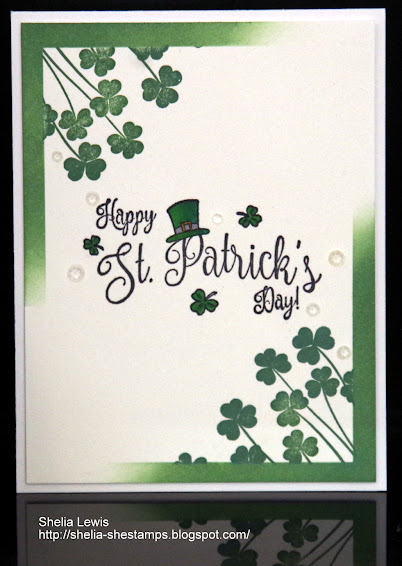
This card was super easy to create and uses a technique I learned from another
Natasha Foote video. First I made a rectangle mask for the center of the card and sponged some DO rustic wilderness ink in the opposite corners, fading out towards the ends. Next I masked off the edges with the sponged ink and stamped the
silhouette shamrocks in the two corners, The new
Top Hat St. Patrick's Day greeting was stamped with Memento black ink in the center and colored with Copics. A few clear crystal gems were added to finish it off. I really like how this card turned out and will definitely be trying this technique again.
Thanks for stopping by today. You can check out all the newly released images
here.
blessings,
shelia
Read more...


